Love the One You’re With
When you want to cook Thai food outside of Thailand and rare ingredients are missing or their availability is limited, we learn how to make substitutions for critical ingredients. Thus it often transpires that some ingredients in traditional dishes change over time. Green papaya salad – Som Tum – is not acceptable without green papaya, so how do you create this traditional dish when the freshest texture and flavor are important and all you can find is an aging and bitter green papaya? My friend in Switzerland and some Hmong farmers in the Pacific Northwest use sweet, fresh local carrots from their gardens in place of the hard-to-find green papaya. The homesickness for this traditional dish can be cured by the sound of the mortar and pestle and the pungent authenticity of the rest of the ingredients. I never forgot the taste of the Som Tum I ate in Switzerland after being away from Thailand for two months for the first time. Love the one you’re with!

Khmer Chicken Curry with Sorrel
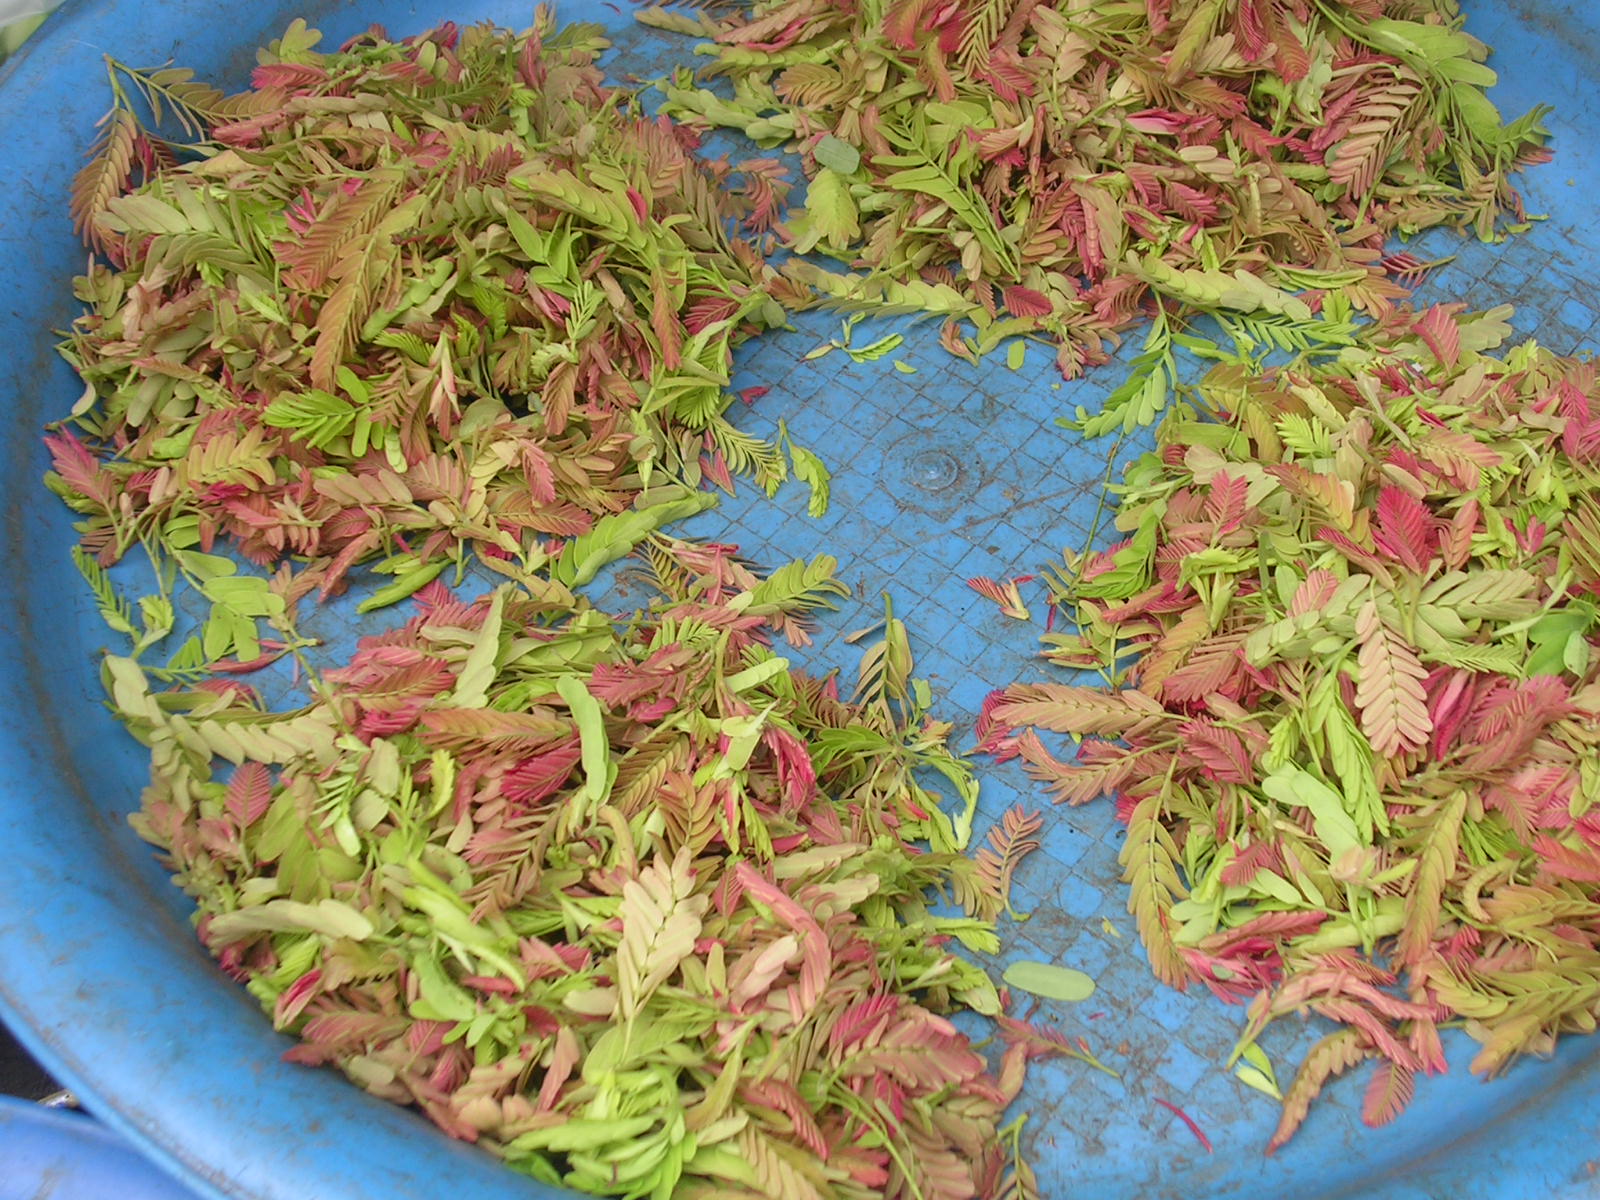
Young tamarind leaves

Sorrel – ซอรเรล – Rumex acetosa
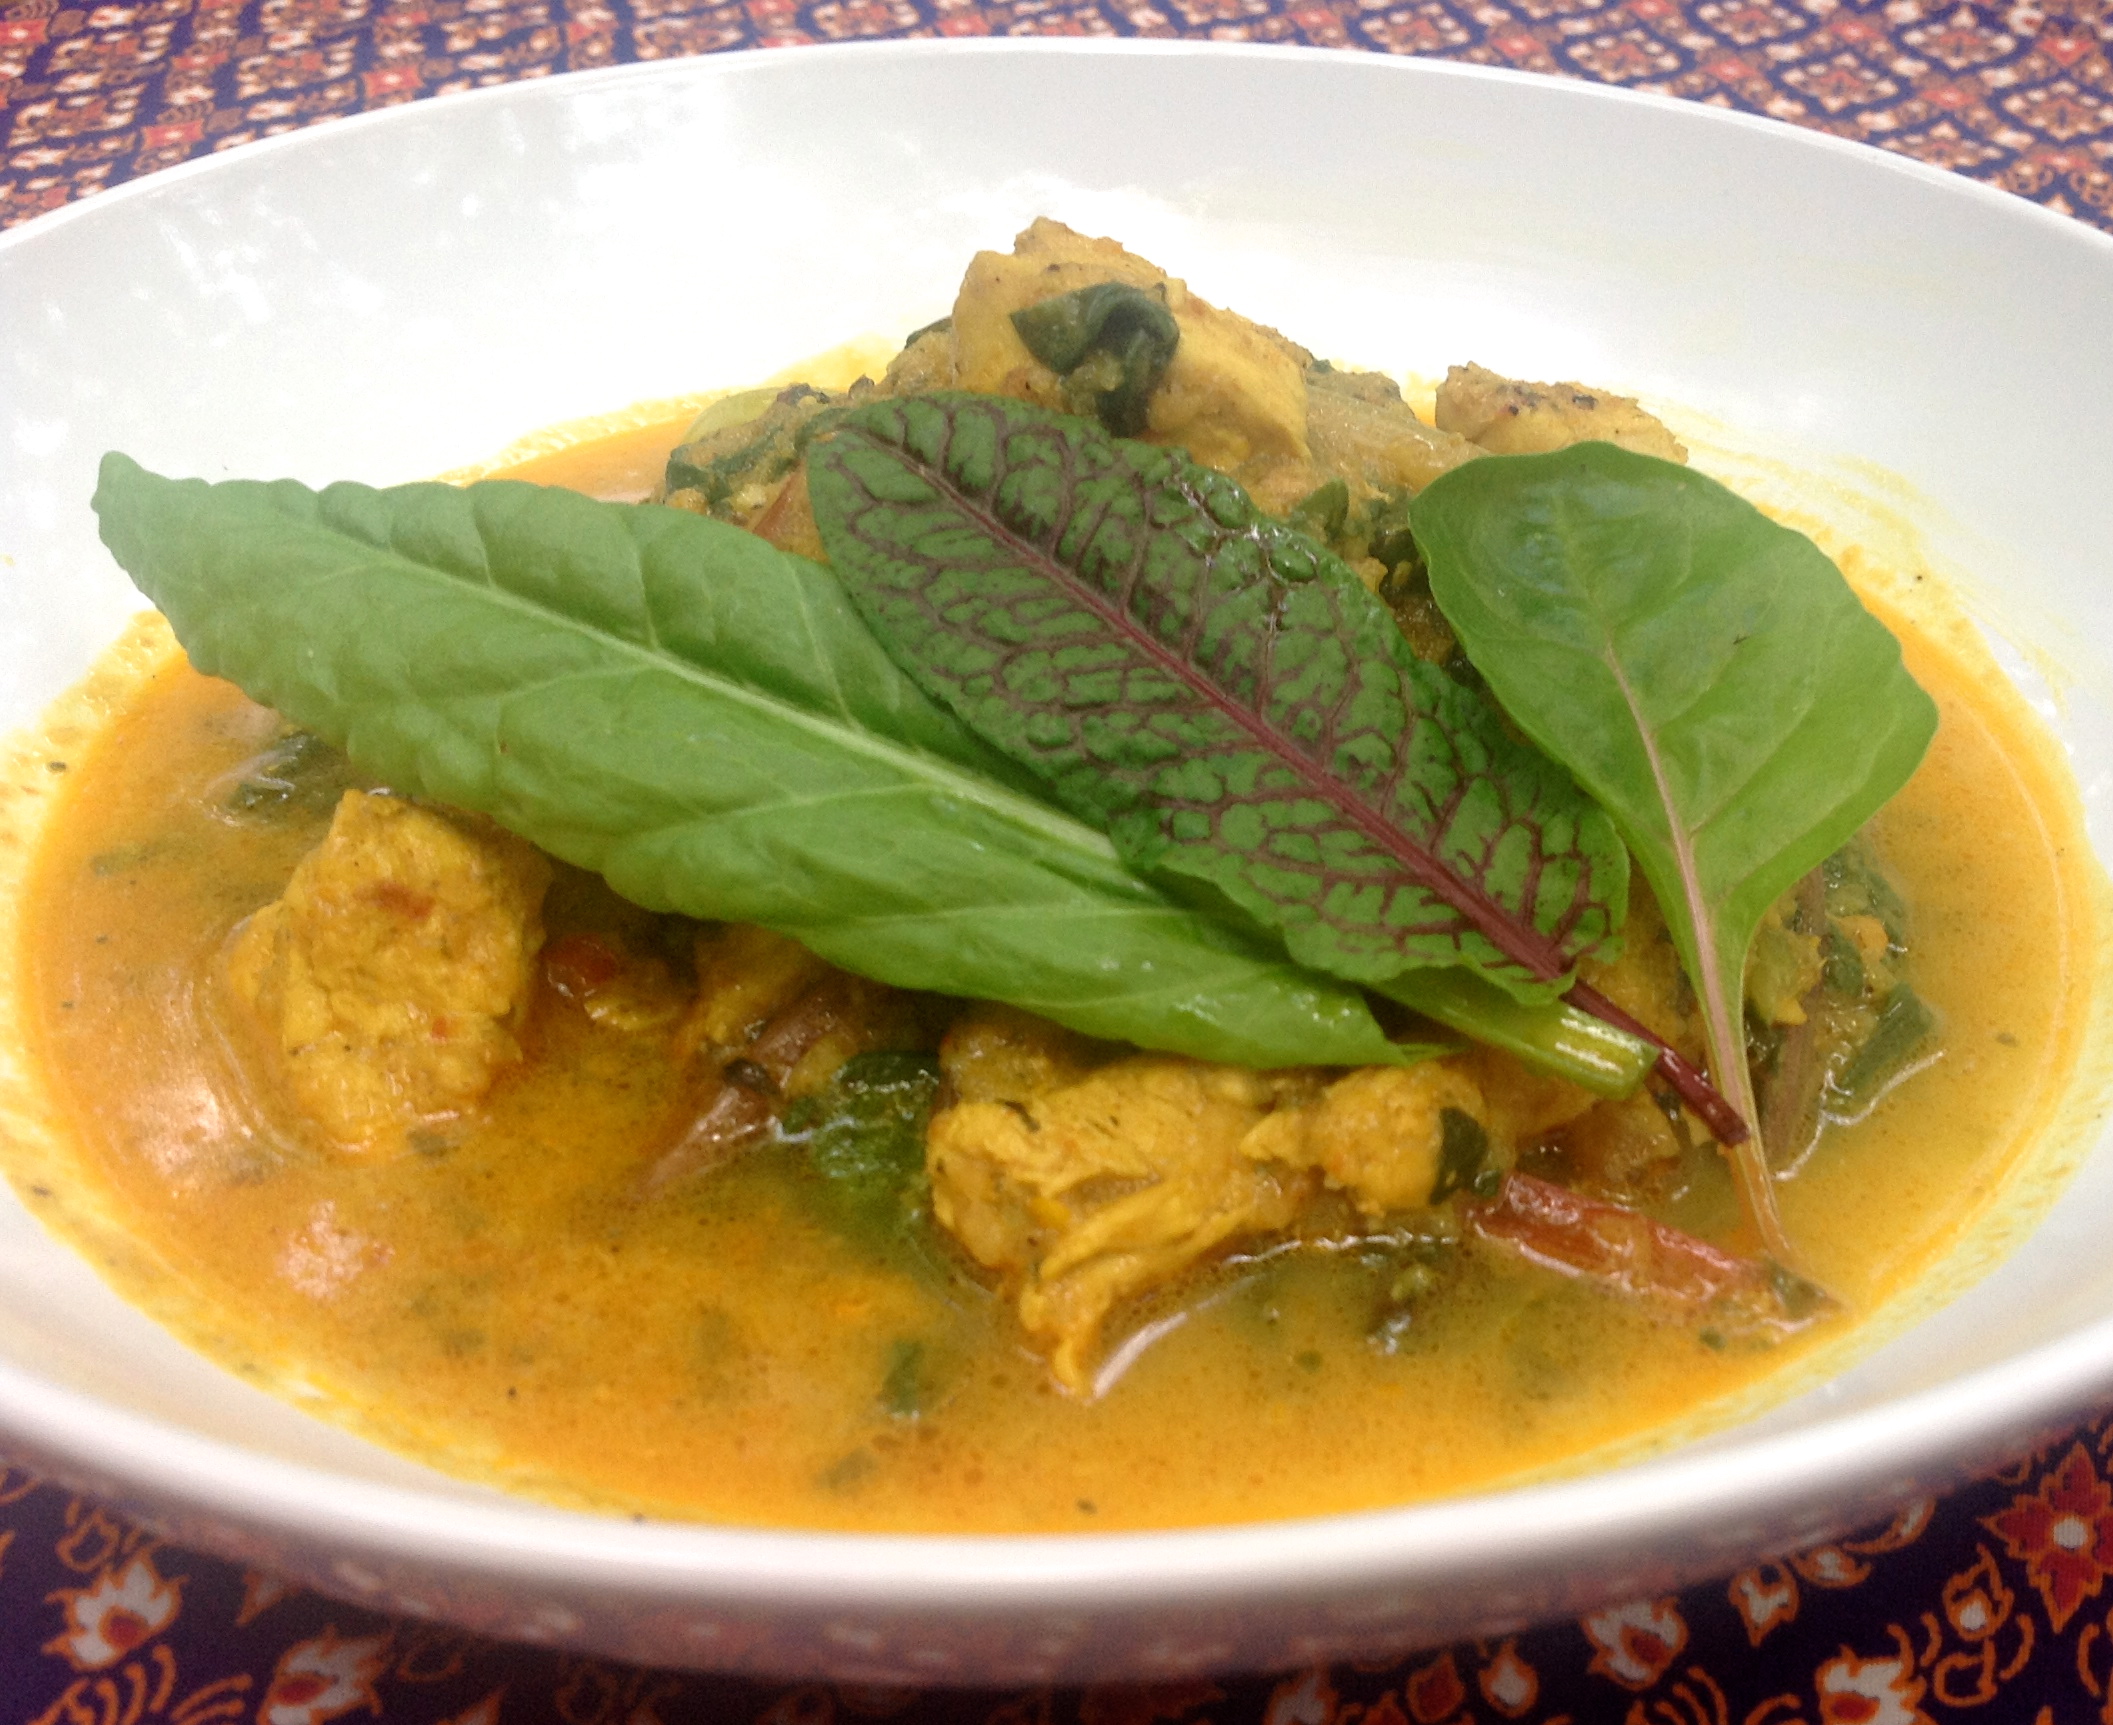
Khmer Chicken Curry with Sorrel
From left to right, I combine regular sorrel, sorrel ‘raspberry dressing,’ and baby Swiss chard from my garden in this curry.
You can find sorrel and Swiss chard all year long in the Pacific Northwest.
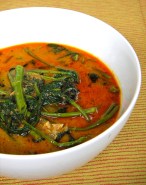
Khmer Chicken Curry with Sorrel leaves
แกงไก่เขมรใบซอรเรล
Gaeng Gai Khmer Bai Sorrel
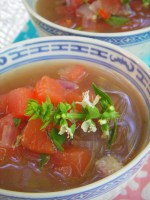
The delightful taste of Khmer chicken curry with sorrel leaves can make it hard to make the recipe stretch to six servings. This curry is more of a comfort food, reminiscent of vegetable stew, with a hint of citrus curry—rice porridge with a wonderful aroma. It is packed with health benefits from fresh turmeric, galangal, and tamarind or sorrel leaves. The curry is flavorful, but not hot, and the coconut milk is only required to taste. The toasted rice makes the soup rich in texture but light in taste. I enjoy this as a one-dish curry meal with a bit of steamed rice on the side. This recipe tastes best made with fresh Khmer Curry Paste or Phuket Curry Paste.
Serves: 4–6
3 tablespoons canola oil 1 chicken breast or 4 chicken thighs, sliced 5 tablespoons Khmer curry paste 0r 3 tablespoons Phuket Red Curry Paste or 3 tablespoon Thai red curry paste 2 tablespoons fish sauce 1/4 cup to 1/2 cup coconut milk 3 to 5 tablespoons toasted rice powder 2 cups sorrel leaves 2 cups Swiss chard leaves ½ tablespoon lime or tamarind concentrate 1 tablespoon palm sugar, optionalHeat a pot with a heavy bottom on medium-high heat, then stir in canola oil, chicken, and Khmer curry paste; cook until fragrant and you see the oil separate out from the remainder of the ingredients. Pour in 1 cup water and let cook on medium heat with the lid on until the chicken is tender, about 10 minutes.
Stir in coconut milk and toasted rice powder and cook for 5 more minutes. Stir in sorrel, Swiss chard leaves, and lime juice and cook for 30 seconds. Serve right away with warm steamed jasmine rice.

I grow sorrel, sorrel “raspberry dressing” and Swiss chard in the same pot
Related articles
- Tamarind Health Benefit – Fruits – leaves – Seeds – Flower (healthandbeautypages.com)
- How to make Tamarind Concentrate (praneesthaikitchen.com)
- Sour Soup with Chicken and Tamarind Leaves (feastasia.casaveneracion.com)
- 50 things to do with fresh sorrel (chocolateandzucchini.com)
- Kroeung Khmer Curry Paste Recipe (praneesthaikitchen.com)
- Misunderstood Weeds Part 4: Sorrel (ramblingofabikegardener.wordpress.com)
- Sorrel soup with spot prawns (theglobeandmail.com)