Feeds:
Posts
Comments

Posts Tagged ‘Culinary Adventure in Pacific Northwest’

Farm Dinner At Dog Mountain Farm

Dog Mountain Farm, located in Snoqualmie Vally near Carnation, Washington, offers summer farm dinner events that are a culinary delight. The dinners are prepared by a guest chef and served with wines from a local winery. I attended one of these dinners in  June 2010 and was blessed to experience a half day at the farm of sun-filled summer, a beautiful view of the Cascade mountains, and dining on white tablecloths surrounded by apple orchards. The farm offers various farm and culinary activities year round for all age groups.

View of the Cascade Mountain

September 2012 has provided the rare beauty of a long stretch of sunny days. Saturday, September 15th, the date that I cooked at the Dog Mountain Farm, was one of the most beautiful days among them.

The farm dinner guests arrived at 3pm. Farm owners Cindy and David welcomed everyone with champagne and an hors d’oeuvre, then took them on a farm tour.

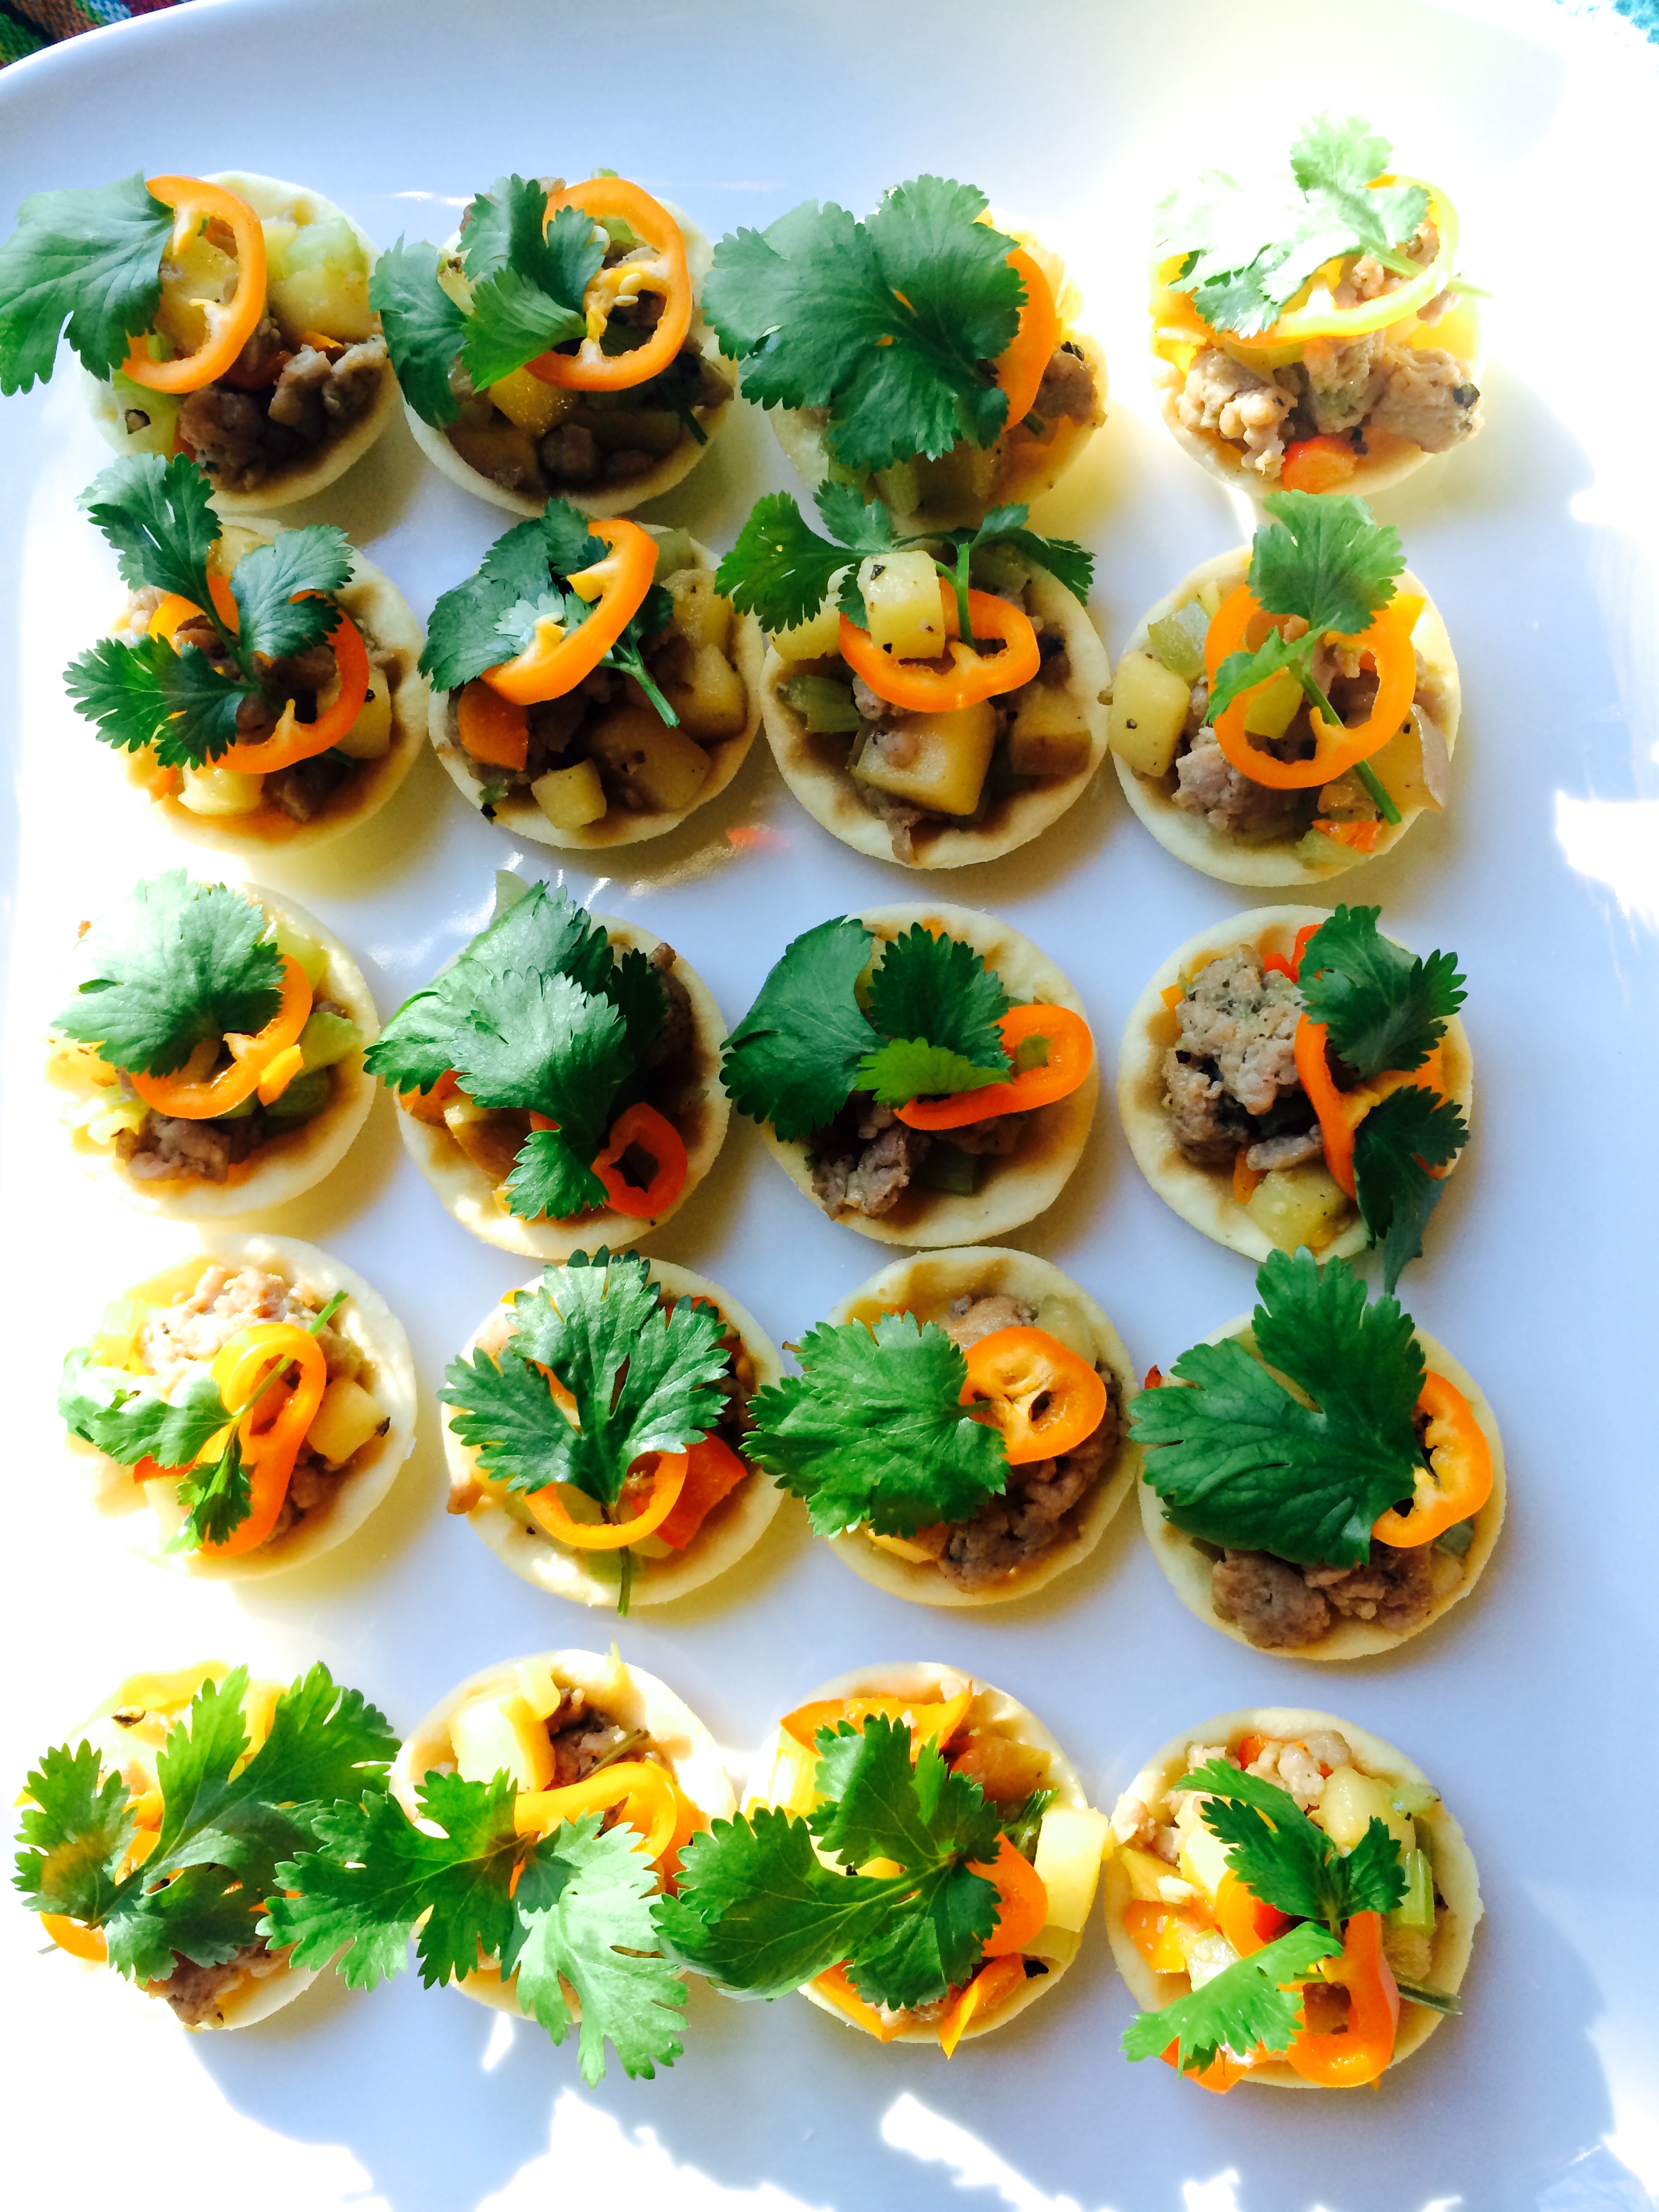
Galloping Horse or Mar Hor with savory pork on plum brûlée

I was happy to have the hors d’oeuvre done just in time. The abundance of plums provided a good substitute for pineapple in the Thai hors d’oeuvre called Mar Hor or Galloping Horse, a savory pork mixture atop plum brûlée. I was pleased when I ate one to hear the excitement of taste from far away – like someone galloping a horse.

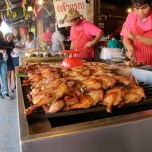
The Dog Mountain Farm raises French Grimaud Pekin and Muscovy ducks, Embden geese, French guinea fowl, and heritage turkeys.

While the guests toured the farm, I continued cooking—there were four more courses coming.

My Thai Farm dinner included wine pairings from the Wilridge Winery. The wines were served by the winery’s owner and winemaker, Paul Beveridge. Paul selected the wines exclusively for the menu above. They were Viognier Rosebud Vineyard ($11.89), Estate Nebbiolo Wilridge Vineyard ($210), Estate Sangiovese Wilridge Vineyard ($21), and Estate Mélange Noir Wilridge Vineyard ($21). The amazing wines, along with the details and personal stories that Paul shared, enriched the dinner experience.

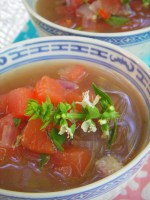
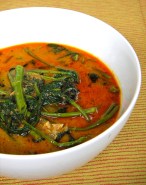
Kabocha Pumpkin Soup with corn, kale, summer squash and lemon basil

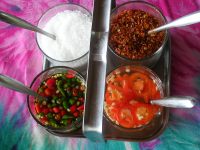
The dinner was served around 4:30pm and I was able to pause at that point for just a minute to take in the sun rays that filled the farm kitchen. Then I ladled the Gaeng Leang – Thai country-style soup – into individual bowls. (Please click here for Gaeng Leang Recipe). Gaeng Leang is often served at Thai dinners to display local abundance. This one had a generous amount of lemon basil from the farm green house and was as authentic as my grandmother’s cooking 40 years ago!

Asian pear is crunchy, juicy, sweet and fragrant.

The third course was an Asian pear salad with mixed herbs and salad greens and a sweet chili vinaigrette. I didn’t have a chance to take a picture of the salad or write down the recipe, so I will have to recreate the recipe one day to share with you. This dish was totally impromptu. I adjusted my chili lime vinaigrette recipe by adding a few more ingredients to compliment the farm’s Asian pears and to echo the flavors of the overall dinner menu.

Braised Duck Curry

The fourth course was a traditional Thai duck curry, Gaeng Phed Ped Yang, made with Dog Mountain Farm’s French Grimaud Pekin. For more information and a recipe for curry dishes please check my future posts.

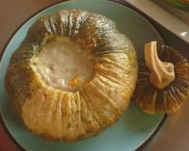
Thai Duck Egg Custard

Please click the picture above to see Pranee’s custard recipe

Coconut Duck Egg Custard Ice Cream

Please click photo above to see Pranee’s Coconut Duck Egg Custard recipe

Originally I had planned to make just one dessert: coconut duck egg custard ice cream with fried farm apples. But once I began cooking with the very fresh duck eggs, I could not help but make my mom’s Thai duck egg custard over black sticky rice, a traditional Thai dessert.

Once the five-course dinner was served I had a chance to relax, join in the conversation with the dinner guests, and take in the beauty of the double sunset—a beautiful sunset to the West and the reflected light on the Cascade Mountains to the East.

Where to find the Dog Mountain Farm Stand

For those of you who live in the Seattle area, Dog Mountain Farm has a stand at the Broadway Farmers Market on Sundays. Please check their website and then send them an e-mail to have them harvest fresh produce that you can pick up at the market on Sunday between 11am – 3pm.

Pranee Khruasanit Halvorsen

Related articles

Read Full Post »

The Holy Herbs

It has been a busy summer for me so far. This has kept me away from writing, but it doesn’t mean I didn’t cook up a delicious dish for my Thai Kitchen blog. I have a lot of photos and notes and testings that have been done but that are waiting for me to write them up. While waiting for those posts from my food experiences in July, I have a delicious, unpretentious and impromptu dish to share with you. From my garden and Thai kitchen to yours!

Oregano Buds

Why oregano? Ten years ago, oregano was widespread via self-sown seeds in my Seattle garden near Thai spirit house. That year, my niece was visiting from Thailand and I used oregano in place of Thai holy basil when I prepared Phad Kraprow Gai (stir-fried minced chicken with Thai holy basil). I didn’t tell her that I’d used oregano and she didn’t notice the difference. Later on, when I told her it was not Thai holy basil, but Greek holy oregano we laughed! Fresh oregano has a peppery and pungent taste that I love and which is similar to Thai holy basil. Try using oregano in place of Thai holy basil when oregano leaves and blossoms are abundant in your garden.

Oregano Blossoms

Yesterday was my day off from traveling on the road and I was hanging around home and working in my garden. My girlfriend and I were immersing ourselves in the sun, surrounded by flowers, herbs and weeds. All of a sudden I realized that most of my oregano plants were blossoming. As it got close to lunch time, I began to think about what I could cook with those blossoms. I decided to make Oregano Blossoms Fried Rice for lunch. I cut the stems down to six inches long so there were some leaves attached to yield more leaves until the end of the summer.

Oregano Blossoms Fried Rice

Does frozen cooked rice work for this dish? This is the first time that I have experimented with previously frozen rice from my fridge. I thawed the rice before using it to loosen up the cooked rice grains and it worked perfectly well for fried rice. Off course my passion is to share what is happening in my Thai Kitchen with you, so here is my recipe for oregano blossoms.

Oregano Blossoms Fried Rice with Tomato and Garlic

Khao Phad Dok Oregano Makrua Thet Kratiem

ข้าวผัดดอกออริกาโนกับมะเขือเทศและกระเทียม

Oregano is not a Thai herb, but it has long been a substitute ingredient for me in the absence of my beloved Thai holy basil. Both belong to the mint, or Lamiaceae, family. The flavor undertones of both herbs are alike, and as a gardener I love herbs that can grow wide and are easy to take care of. Now that I have discovered how great oregano blossoms taste in this recipe, I will enjoy the same dish often this summer! Cheers to the holy herbs!

Serves: 2 to 4

3 tablespoons canola oil
6 cloves garlic, peeled, crushed and chopped
1/2 onion, sliced
1 cayenne pepper, sliced (remove seeds if preferred)
1/2 cup oregano leaves and blossoms, stems removed
1 large tomato, cut into wedges
2 eggs
3 cups cooked rice, cooled or frozen
2 pinches of salt, optional
1 tablespoon soy sauce
1 tablespoon fish sauce
4 lime wedges
8 sting beans or cucumber or any fresh vegetable condiment, optional
 
Heat canola oil in a skillet or wok on high heat. Add garlic and stir until golden, then add onion, cayenne and oregano leaves and blossoms and blossoms. Stir until fragrant, about 30 seconds. Clear the center of the wok and scramble in eggs for two seconds before adding rice. Stir in soy sauce and  fish sauce. Serve with lime wedge, vegetable condiment and spicy fish sauce. (See recipe below).
 
© 2012 Pranee Khruasanit Halvorsen
I Love Thai cooking
Pranee teaches Thai Cooking classes in the Seattle area.
Her website is: I Love Thai cooking.com  
 
Follow Me on Pinterest
 

Read Full Post »

Without a Rice Cooker

You can cook rice for 30 people, anytime, without a rice cooker! Since last November, my son and I have been preparing one meal a month for 60 homeless youth at Seattle’s [James W. Ray] Orion Center. The organization helps homeless youth get off the street and provides them with meals, education and shelter. The meal-calendar is posted and updated to allow members of the public to sign up to prepare a meal for these hungry youth. It has been a rewarding experience to take part in helping to build community. Thank you to a friend who also signed up to help prepare a meal with me. Together—without a rice cooker—we cooked lavender-turmeric scented jasmine rice for 30–6o hungry young people.

Rice can be cooked in a rice cooker, on the stove top, or in the oven. My recipe below is for rice cooked in the oven. I wanted to share the recipe so you would know that you do not need to buy a rice cooker in order to cook large quantities of rice. Instead you can purchase a large hotel pan and cook up to 30 servings of rice in about an hour.

Before putting rice and water in the hotel pan, it is best if all ingredients are hot before they are sealed up and placed in a preheated oven. (Here’s a link for an explanation as to how this method works: “Once water is heated past the 212°F mark, it stops being water and turns into steam. Steaming has an advantage over methods such as boiling or even simmering …..”. Moist Heat Cooking Method by About.com.)

About the recipe

Culinary Lavender

Today, the recipe I want to share with you is Kao Oop Kamin and Dok Lavender, lavender-turmeric scented jasmine rice. It works well served with Thai main dishes such as Thai curry dishes. I came up with the concept of adding lavender to turmeric scented jasmine rice about two years ago after I visited the Lavender Wind Farm on Whidbey Island and purchased a bag full of culinary lavender. After that visit I began adding lavender to everything. My friend, Kathy Gehrt, a local expert on cooking with lavender, says ” you can infuse anything with lavender” just be careful not to over use the lavender. You can learn more about cooking with lavender from Kathy’s book as well as her blog “Discovering Lavender.

One day I simply played with turmeric powder and lavender in a rice cooker. I found it had an alluring and somehow surprising fragrance. After making this dish I forgot about this new flavor and scent combination until sometime later when I heated up the leftovers and experienced the same unexpected delight. The next time I cooked this recipe was at the first dinner I prepared at the Orion Center. My friend was puzzled by the rice’s flavor and fragrance—”What is it in this steamed rice?

Thai jasmine rice, culinary lavender and turmeric

The sweet perfume of lavender complements the pungent turmeric, which is also known as Indian saffron. This amazing blend gives off an alluring aroma and gives the rice a subtle flavor that allows you to serve it with any cuisine. You can find culinary lavender in jars or in the bulk herbs section in a natural food store.

Playing with lavender and turmeric in a rice cooker

Lavender-Turmeric Scented Jasmine Rice

Kao Op Khamin Dok Lavender

ข้าวอบขมิ้นลาเวนเดอร์

Lavender-Turmeric Scented Jasmine Rice

Yield: 30 cups cooked rice

When I cook this at a large event, I measure up the jasmine rice, turmeric, lavender and salt beforehand and store them in a large ziplock bag. Each bag will provide a main course or side dish for 30 servings. You can bake enough in your oven to serve 30 people. In a commercial kitchen, where the ovens are larger, you could double the recipe and bake each in a separate hotel pan—one on the top shelf and another one on the bottom shelf. For smaller portions at home, set the oven temperature at 350°F and bake for 30 minutes, then let rest for 10 minutes. The rice to water ratio is 1 to 1 ½.

1/4 cup canola oil
10 cups jasmine rice
1 tablespoon turmeric powder
3 tablespoons culinary lavender 
2 teaspoons salt
16 cups boiling water
2 sheets 2 ½-foot-long aluminum foil 

Preheat oven to 425°F. Place large pan on high heat on the top of your stove and add canola oil. When the oil is hot, add rice, turmeric, lavender and salt and stir for 1 minute. Pour the rice mixture into a hotel pan and then pour in boiling water. Stir well and cover tightly with foil. Put pan in the preheated oven and let it cook undisturbed (no peeking) for at least 40 minutes. Remove the pan from the oven and let it sit for 10 to 20 minutes before removing the foil. Stir and serve.

Summer 2010 at Lavender Wind Farm, Whidbey Island

 
I Love Thai cooking
Pranee teaches Thai Cooking classes in the Seattle area.
Her website is: I Love Thai cooking.com 
 
 Related articles

Read Full Post »

Not Just for Fine Dining, Golden Trout

Last Saturday I went to the Pike Place Market to get the fresh fish of the day for my family dinner. Golden trout caught my eye. When I visited the market last summer, only City Fish carried it. This time around it seemed that every fish stall had a pile of golden trout, so I thought this would be a perfect time to share my recipe with you for Steamed Golden Trout in Lime-Chili-Garlic-Dill Sauce. The pictures were taken a while ago, but the recipe is timeless. It is based on Phuket Pla Nueng Manao—steamed fish in lime juice—but the way I prepared it reflects my new home in the Pacific Northwest.

Golden trout is a sub-species of rainbow trout, both of which are related to salmon. The pale pink color of the flesh and its texture are a really amazing mixture of both trout and salmon. There are many ways to prepare golden trout, but today my favorite is to steam them. I love cooking fish whole, so using the oven is a quick way to go.

The golden trout I bought was from a farm in Idaho. Golden trout’s natural habitat is the “clear, cold headwaters of creeks and lakes at elevations above 6,890 feet,” but most golden trout come from fish farms. This is because you may fish for them for your personal consumption but not to sell them commercially. Most golden trout in the markets are from the Idaho Trout Company. From my research I learned that fly fishing for rainbow trout and golden trout is a very popular activity.

Fresh Rainbow Trout from Pike Place Market

When it comes to steaming fish, I am my grandma’s grandaughter. I ate many meals of steamed fish with my grandmother, like Clay Pot Lemongrass-Steamed Fish (Pla Nueng Morh Din). I hope you will have a chance to cook a few of her recipes. Several of them are featured in the Asian Grandmothers Cookbook by Pat Tanumihardja. At home here in Seattle, I have adapted my grandmother’s recipe into an easy and fun way to prepare fish for my friends and family. My recipe below reflects my quick and easy method for doing this at home. I will let you decide which way you prefer.

Garlic, Lime, Dill and Purple Chili

PLA NUENG MANAO

ปลานึ่งมะนาว

Steamed Golden Trout with Lime-Chili-Garlic-Dill Sauce

Servings: 4

Preparation Time: 15 minutes

Cooking Time: 15 minutes

If you love fish, this recipe works for all occasions! It is light, fresh and delightful — yet easy to prepare. While steaming the fish, prepare the sauce. When the fish is cooked, just pour the sauce over it and serve with hot, fragrant jasmine rice.

1 whole golden trout, or any fileted fish (cooking time may vary)
4 lemongrass stalks, trimmed and smashed
large sheet of parchment paper and foil
10 cloves garlic, peeled
5 Thai red chilis, purple chilis, jalapeno or Serrano peppers
1 cilantro root
1 teaspoon salt
2 tablespoons sugar
2 tablespoons fish sauce
3 tablespoons lime juice
1/4 cup chopped dill or cilantro
4 lime slices for garnish

Using a mortar and pestle, pound garlic, peppers, cilantro root and salt until smooth. With pestle, blend in sugar, fish sauce and lime juice until sugar dissolves. Stir in dill. Set aside.

Preheat oven to 375°F.  Place 1/4 cup water in a 9” x 13” baking pan, then spread the lemongrass out. Place the trout on the bed of lemongrass and sprinkle salt on top of the fish. Cover the dish with parchment paper and then the foil, wrapping it around the edges to form a seal. Bake until the fish is cooked, about 10 to 15 minutes. (The good thing about steaming is you never overcook the fish). To check if the fish is done, insert a knife into the thickest part of the fish and lift the flesh away from the backbone. If it is easy to separate the flesh from the backbone, then it is done. If not, steam a little bit longer.

Place trout on a serving dish along with all of the steaming water. Pour the lime sauce over the top, then garnish with sliced limes and serve with jasmine rice.


Cook’s Note:

~Thai chilies are recommended for this recipe because they have a lingering flavor; you may remove seeds if needed. To control the spiciness of your finished dish, use 2 chilies for mild, 3 or 4 for medium, and 5 or 6 for a full spicy flavor.

~Always add the fish sauce before the lime juice to keep the sauce vibrant and fresh tasting.

~Best of all is to prepare the sauce while the fish is cooking. If you have a steamer, you can steam the fish in a serving size bowl and pour the sauce on top just before serving.

~The sauce can be used as a dipping sauce for any seafood, including mussels, clams and crab meat.

I Love Thai cooking
Pranee teaches Thai Cooking classes in the Seattle area.
Her website is: I Love Thai cooking.com 

Read Full Post »

A Divine Fruit, Persimmon ลูกพลับ 

Here in Seattle, I have been savoring persimmons during all of November and now into December. Persimmons reached their peak this last week. The abundance of this fruit at peak season provides a low price and high quality sweet fruits and this is when I am inspired to cook with persimmons. This year in my kitchen I found two delicious new ways to cook with them: persimmon-orange butter and persimmon upside-down cake. Today I will share with you my discoveries of this divine fruit which only appears once a year.

Fuyu Persimmon fruit – ลูกพลับ

The yellow-orange color of persimmon and its aromatic sweetness make this fruit special. In the U.S., the season for persimmons is in November and December, and they give us  a special way to celebrate the holiday seasons. Persimmons arrived in the U.S. and Europe over 200 years ago. There are two varieties in Seattle market: Hachiya and Fuyu. The former is recommended to eat when it is fully ripe. The latter, Fuyu, is my favorite and it is the variety most commonly available, so my focus today will be on the Fuyu persimmon.

Fuyu persimmons (Diospyros Kaki L) are native to Northern China. It is an ancient fruit—a fossilized persimmon was found in the tomb of the emperor of the Han Dynasty. Fuyu persimmons first traveled from China to Thailand in 1937, but they did not become widespread until the Royal Project Foundation under Kasetsart University  conducted a study in 1969 that grew various varieties of persimmons in Thailand and led to the successful establishment of persimmon farming in Chiang Mai, Chiang Rai and Phetchabun. These are three persimmon varieties in Thailand: Xichu, Fuyu and Hyakume. (Source: 111 Thai Fruits by Nidda and Thaweethong Hongvivat published by Sangdad). The season for harvesting them is from July till September each year.  The nutritional benefits from persimmons are priceless. It is high in potassium, vitamin C, and much more.

Unripe Fuyu persimmon early in the season

When the hint of green disappears from the skin and is replaced by a yellow-orange color, one can snack on unripe Fuyu persimmon, though the ripe ones are the best. Persimmons can accompany an assorted cheese platter, much like pears or grapes, or combining green salad with bacon. For dessert, last year I found my pleasure by adding persimmons in coconut milk to my pearl tapioca pudding just before serving. This year, in the process of creating a dessert for 70 people, I found myself preparing persimmon-orange butter to serve over sweet sticky rice. Then came persimmon upside-down cake; this was magically created right after baking cranberry upside-down cake for my family. For an impromptu inspiration, all we need is to have plenty of persimmons around while they are in season.

Fuyu Persimmon

Persimmon-Orange Butter

Yield: 2 cups

You can use persimmon-orange butter on just about everything, or you can eat it plain like apple sauce. This is my favorite way:  served with sticky rice, on top of peanut butter and fruit butter for the sandwich.

6 fully ripened Fuyu persimmons, peeled and chopped
Zest of one orange
6 oranges, peeled and chopped
1/4 teaspoon salt
1/2 cup sugar
1 cinnamon stick
3 tablespoons triple sec
3 tablespoons butter

Place persimmons, orange zest, orange, salt, sugar, cinnamon stick, triple sec and butter in a large saucepan. Let it cook on medium heat until softened and all juices from the fruit have evaporated, about 30 minutes. Stir often during the cooking. Remove cinnamon stick. Pour the mixture into a blender or food processor and blend until smooth. Store in the refrigerator for up to two weeks.

The Making of Persimmon Upside-Down Cake

Sliced persimmon, brown sugar, star anise and triple sac

When I was looking for a spice to compliment the flavor of persimmon, I picked up my cinnamon powder from Vietnam and star anise powder from Thailand. After smelling the star anise, I decided it was a sure thing. At that moment my eye glanced over at the star-shaped center of the persimmon and I decided to place a star anise in between the slices of persimmon. The star anise mirrors the pattern of the star-shaped center of the persimmon. Perfect.

Right Side Up

I was also happy that I had some persimmon-orange butter that I had created on another day. This allowed me to add some persimmon flavor in the body of the cake.

Persimmon Upside-Down Cake

I used organic brown sugar, but any brown sugar would do the work.

A Perfect Persimmon-Star Anise Upside-Down Cake

The pretty star-shaped centers creates a perfect look for this upside-down cake.

Persimmon Upside-Down Cake

Burnt brown sugar with creamy  soft persimmons melt in your mouth, almost like a crème caramel.

Persimmon Upside-Down Cake

เค้กลูกพลับ

I baked Yankee Cranberry Upside-Down Cake many times last week, which is what led me to this project.  I played around with persimmons and spices I had in the kitchen, and by the time the cranberry upside-down cake was finished, my persimmon-star anise upside-down cake was ready to go in. It became totally a different cake with its own flavor profiles, but it was the Yankee Cranberry Upside-Down Cake that inspired me with confidence.

Baking time: 35 to 40 minutes

Serves: 8 to 12

6 tablespoons butter, melted
¼ cup brown sugar
1 ¼ teaspoons star anise powder, divided
1 tablespoon triple sec, divided
3 persimmons, peeled and sliced lengthwise into 6 pieces, each about 1/3 inch thick
5 star anises, whole
3/4 cup sugar
2 eggs, at room temperature
1 ¼ cups flour
2 teaspoons baking powder
1/2 teaspoon salt
3/4 cup buttermilk
3 tablespoons persimmon-orange butter, persimmon pulps or orange marmalade
 

Preheat oven to 350°F.

Cover a 9-inch spring form pan with 2 tablespoons melted butter, then sprinkle with brown sugar, triple sec and ½ teaspoon star anise powder to cover entire surface. Arrange persimmon slices and star anise as shown in the photo above.

Combine flour, baking powder, remaining star anise powder and salt.

Beat the remaining 4 tablespoons butter and the sugar very hard by hand until they are well mixed. Then beat in eggs, one at a time, very hard by hand until the mixture is custardy. Whisk in ½ cup of the flour mixture, mix well, then whisk in ¼ cup buttermilk; continue this method of adding the flour and buttermilk until you finish with ¼ cup flour.  Pour the batter into the center of the springform pan, smoothing it with a spatula to make it evenly cover the persimmon.

Bake on a rack in the center of the oven until a wooden toothpick inserted into the center comes out clean, about 35 to 40 minutes. Let it cool for 5 to 10 minutes. While the cake is still warm, invert the cake onto a serving platter.

credit: http://familyfun.go.com/recipes/yankee-cranberry-upside-down-cake-687053/

Photos: © 2011 Pranee Khruasanit Halvorsen

Pranee teaches Thai Cooking classes in the Seattle area.
Her website is: I Love Thai cooking.com 
 

Read Full Post »

Are Winter Squash Leaves Edible?

I enjoyed the Seattle sun last Wednesday at the Columbia City Farmers Market along with the delicious food from the stalls. I purchased a few fresh vegetables from various farmers and, like always, a bunch of winter squash leaves from a Hmong farmer’s stall. This time the squash leaves prompted me to cook and share with you a recipe from my Thai kitchen: how to cook winter squash leaves –Yod Namtao – ยอดน้ำเต้า.

Winter squash leaves are edible. In fact, all parts of squash family plants are edible, from leaves to stems, flowers, fruit, skin and seeds. The young leaves and stems are shown in the photos above and below. These edible greens become available when a farmer cuts back the leaves on a plant in order to encourage it to produce fewer but larger fruits. Winter squash leaves are popular in rustic-style cooking in Southeast Asia and they are great sources of fiber and other nutritional benefits.

Winter Squash Leaves and Blossoms - my visit to Hoi An Market 2009

Though they may feel a little rough to the touch, the young leaves from winter squash have amazing flavors when cooked. They have a  spinach-like texture, but are richer and denser with a bite to it in flavor. Like any leafy green vegetable, you can stir-fry, steam or stew them. In my kitchen, I either blanch them in salted coconut milk or saute them with butter, then add water and chicken stock and cook them down until the leaves are softened but not mushy, about 5 minutes. Last year I made a winter melon leaves stew with dried fish and shallots using a Hmong farmer’s verbal recipe. It was similar to my Watermelon Rind Soup and made a delicious vegetable stew.           

Winter squash leaves are only available in the summer and only at the Hmong farmers’ stalls. Because of this limitation, I never fail to purchase a bunch of winter squash leaves each visit to the market. Supporting the Hmong farmers also helps me to ensure that there will be a continuing supply due to the demand. When you get a chance, please pick up some winter squash leaves at a Seattle Farmer Markets near you and give them a try.

This slideshow requires JavaScript.

Winter Squash Leaves Boiled in Salted Coconut Milk

Yod Namtao Luak Kati

ยอดน้ำเต้าลวกกะทิ

Winter Squash Leaves in Salted Coconut Milk

One bunch of winter squash leaves weighs about a pound. After removing all of the twine holding them together and the hard stems, the soft edible part weighs about six ounces; the rest goes into a compost. If I have time, I use a peeler to remove the rough skin on the stems then cook the stems down until they are soft, about 8 minutes.

There are many ways to prepare winter squash leaves, but blanching or boiling them in salted coconut milk produces my favorite quick and easy side dish. This same method can also be used with many other leafy green vegetables, which can then be served with Thai Chili Dip. You will be surprised how the flavor of winter squash leaves and leafy green vegetables are complimented by just a little coconut milk and salt.

 
Serves: 4
Cooking Time: 5 minutes
 
6 ounces winter squash leaves (see preparation above)
1/4 cup coconut milk
1 cup water
1/2 teaspoon plus 2 pinches salt

Bring coconut milk, water and salt to a boil on medium-high heat. Then add the squash leaves, using tongs to turn them around to make sure they are all cooked in the liquid—like blanching the leaves in a coconut broth. Cook from 3 to 5 minutes until the greens reach your desired degree of tenderness. Serve with the broth as a side dish, or with warm jasmine rice as a main dish.

© 2011 Pranee Khruasanit Halvorsen  
I Love Thai cooking 
 Pranee teaches Thai Cooking classes in the Seattle area. Her website is: I Love Thai cooking.com . 

Related articles

Read Full Post »

Drink Me

It has been exactly a week since I returned from Thailand and I am still trying to catch up with our Seattle summer. My friends have all assured me that I didn’t miss much during the past month as we are still having the same cold weather we had in June. This July, Seattle hit the record lowest temperature for summer, so all I really need to catch up on is eating the plentiful seasonal fruits and vegetables from the local farmers markets and nearby towns.  

Hami Melon

During my first grocery shopping back here in Seattle, my cart was full with all sorts of berries. And then my eye caught on a good-looking melon that I haven’t tried: Hami melon. It is grown in California and available from mid-May to July and from September to December. I let it ripen at home for a few days and its sweet aroma was inviting me to taste it. The sweet scent reminds me of the Thai long muskmelon that I used to grow a long time ago in my organic garden in Phuket—it grew abundantly despite my lack of knowledge and farming experience.

Hami Melon

Hami melon is a type of muskmelon, a Chinese melon variety. A good one can taste sweeter and have a higher sugar content than most other varieties of melon. I decided to make a smoothie with coconut milk to duplicate Taeng Thai Kati, a famous Thai muskmelon dessert made with coconut milk, but we will drink ours instead of eating it. I kept the flavor profile and the amounts of ingredients the same as in Taeng Thai Kati, but added a generous amount of crushed ice and simple syrup to turn it into a nice cold smoothie. I used only one-third cup coconut milk in my recipe, a perfect amount to make a smoothie, a healthy summer drink. But if you are looking for a nice milkshake-like drink and dessert combo, add a scoop or two of coconut ice cream; it would taste heavenly. When a sweet flavor is needed, honey or palm sugar simple syrup are good choices to add a dimension of sweetness and aroma.

Coconut Melon Smoothie

Stock up on a few cans of coconut milk, then anytime the sweet floral scents of melon invite you, all you have to do is prepare this recipe. Hami melon is hard to resist, especially when it is combined with alluring fresh coconut milk. Drink me.

Coconut Melon Smoothie

Nam Kati Taeng Thai Smoothie

น้ำกะทิแตงไทยสมูทตี้

Serves: 2 to 4

Yield: 3 cups

16 ounces (see note) diced Hami melon, seeded, peeled and diced, or substitute honey-dew melon
⅓ cup coconut milk or coconut ice cream, more as desired
1½ cups crushed ice
2 tablespoons palm sugar simple syrup, optional (see note)
pinch of salt

Place melon, coconut milk, ice, sugar and salt in the blender and blend until smooth. Pour into a tall glass and serve right away with a straw.

Pranee’s Note

A 4-pound Hami melon (medium size), seeded, peeled and diced will yield about 2 pounds of diced melon.
 
To make palm sugar simple syrup, place a disc of palm sugar (about 4 tablespoons) and about ¼ cup water in a saucepan.
Bring to a boil and cook on medium heat for 5 minutes. Cool and chill. Keeps in the refrigerator for up to a week.   Yield: ¼ cup.
 
© 2011 Pranee Khruasanit Halvorsen  
I Love Thai cooking 
 Pranee teaches Thai Cooking classes in the Seattle area. Her website is: I Love Thai cooking.com .

Read Full Post »

Celebrating New Year with Thai Sticky Rice and Alms Giving

Alms Giving with Jasmine Rice or Sticky Rice

Yesterday, April 17, 2011, I celebrated Thai New Year’s Day~ Songkran~ with Thai and American friends at the Songkran Festival at the Washington Buddhavanaram (Buddhist temple in Auburn, Washington ) It was so much fun, Sanuk.

First, we started with the alms-giving ritual. We gave offerings to the monks of steamed jasmine rice and steamed sticky rice, and for the first time I offered Chicken Biryani Rice (Kao Mok Gai) instead of the two other kinds of cooked rice.

Som Tum ~ Green Papaya Salad

Outside in the yard there were tents with prepared street foods of Thailand, just like at festivals in Thai villages. I sampled almost everything including grilled Thai sausage (Sai Grok Isan), sticky rice (Khoa Neow), green papaya salad (Som Tum), and noodle soup (Kuey Tiow Nahm), to name a few.

A majority of the guests at the festival were from Laos, northeastern Thailand and Cambodia. Steamed Sticky Rice (Khao Neow) is an important part of the day at many Thai gatherings, and Khao Neow and Som Tum are well-loved dishes for Thais who live abroad. As I have mentioned before, these two dishes are a good cure for homesickness for Thais.

Thai Chili Dip ~ Nam Prik

We walked around, enjoying the sunny day and buying street food like Thai Chili Dip (Nam Prik) to take home. I got three different versions of this red-hot chili paste to season my steamed jasmine rice: Red Eye Chili Dip (Nam Prik Ta Daeng), Tilapia Chili Dip (Nam Prik Pla Nill) and Crunchy Pork Chili Dip (Nam Prik Moo Grob). Now these three Nam Prik are in my freezer for days when spicy hot food will comfort my mood.

Bathing and Placing Gold Leaves On the Buddha Image

In Burma, Laos, Thailand, Southern China and Cambodia, a part of celebrating Solar New Year is bathing and cleaning an image of Buddha. I celebrated this ritual here in Washington with many people from these countries.

Flags on Sand Mount

Building a sand hillock and decorating it with flags is also a common practice. 

Dancing to the Laotian Music

Eating a lot of sticky rice and dancing  to Laotian live music was a perfect “sanuk” day to welcome the new year.


Steamed Sticky rice

Khao Neow Nueng

ข้าวเหนียวหนึ่ง

Serves 6 to 8

Sticky rice is a long-grain rice with a sticky and soft texture. There are several names for sticky rice, including sweet rice and glutinous rice. Sticky rice is ideal for desserts as well as for serving with Northeastern dishes such Som Tum (green papaya salad) and Laab Neua (beef mint salad). There are also main dishes on my blog that are great to serve with steamed sticky rice, such as Green Papaya Salad with Smoked SalmonGrilled Fish Sauce Chicken Wings (Peek Gai Nam Pla Yang), and Green Papaya Salad with Salted Crab and Rice Noodle (Som Tum Sua). This last recipe includes a video of my sister-in-law preparing the salad.

After 30 minutes, flip the sticky rice over

I hope you have a chance to learn how to cook steamed sticky rice. You may use a double boiler/steamer or purchase a bamboo steamer.

2 cups sticky rice

Cover sticky rice with room temperature water at least 3 inches above the rice. Let rice sit for 2 hours or overnight, then drain off any excess water.

Steam sticky rice in a steamer with a lid over high heat for about 30 minutes, or until the rice is soft. Flip the rice over so that the sticky rice on the top will go on the bottom and steam with the lid on for 5 more minutes. You can keep the rice warm for a few more minutes with the steamer on simmer, or remove it and keep it in a thermal-controlled container.

The steamed sticky rice is ready to serve with main dishes or to use in a dessert that requires steamed sticky rice.

© 2011 Pranee Khruasanit Halvorsen 
I Love Thai cooking
 Pranee teaches Thai Cooking classes in the Seattle area. 
Her website is: I Love Thai cooking.com .

Read Full Post »

Playing with Food: Cassava

Cassava-Sweet Potato Pancake, a delicious Thai Dessert

I noticed recently that I have told my students to play with food in almost every class. I hope they have. After learning all the essential tips and techniques, the way to become a good cook is by experiencing the ingredients and having fun.

On the weekends, I clean up the fridge and cook creatively.  This weekend I had fresh cassava and sweet potato leftover from my class. While I was holding them in my hand, I heard an echo of Rösti. Rösti is a fried, grated potato dish made in Switzerland. I made a quick decision and at almost the same time my hand reached to turn on the oven to 450°F. I will heat up my well-seasoned 8-inch cast iron pan and make this quick & easy Thai dessert, Rösti style.

Cooking with cassavas is not hard at all. After grating the cassava, Thai simply add enough sugar to sweeten to taste, and some salt to bridge the flavor; a bit of coconut milk can also be added to heighten the flavor. Then the mixture is steamed and grilled until it is cooked and translucent. But something new today that I haven’t tried before is adding grated sweet potato. Why not? It was perfect. I used about 2 parts cassava to 1 part sweet potato. The glutinous property of cassava helps the sweet potato hold up nicely, and the sweet potato gives a nice orange color and sweet compliment to the dish.

Learn something new while playing with food and discover a new excitement and a sweet reward to the lesson. Cassava-Sweet Potato Pancake makes a perfect snack or dessert with light herbal tea.

Cassava - Sweet Potato Pancake

Cassava – Sweet Potato Pancake

Khanom Man Sumpalang Oop

มันสำปะหลังมันเทศแพนเค้ก

Servings: 6-8

2 cups grated cassava, fresh or frozen (if fresh , use a 10-inch-long cassava and remove the skin before grating)
1 cup grated sweet potato, about 1 small or medium
1/2 cup palm sugar or brown sugar
1/2 teaspoon salt
6 tablespoons coconut milk
2 tablespoon rice flour, optional
1 tablespoon cooking oil
 
Preheat the oven to 450 F.
 
Combine grated cassava, sweet potato, sugar, salt, coconut milk and rice flour in a large bowl; stir until well mixed.
 
Heat 8-inch cast iron pan on medium heat and cover the entire surface with cooking oil. Pour cassava-sweet potato pancake mixture into the pan and spread out evenly. Place uncovered in the center of the oven and bake for 20 minutes, until the bottom is crusty brown. Then turn the oven to broil and place the pan right underneath. The top of the pancake should be 6 inches below the heat source. Remove when the top is brown, about 3 to 5 minutes. Keep an eye on it! A nice crusty brown is the most delicious part of the cake. Let the pancake rest for 5 to 10 minutes before serving. Serve warm or cold.
Cassava (yuca) roots, the Taínos' main crop

Image via Wikipedia

Pranee’s Thai Kitchen note:

Cassava is a root from the Cassava or Tapioca Plant (Manihot esculenta Crantz). It is a bushy plant that grows to about 3 meters tall. It is an annual plant with underground food-storing root-tubers. The tuber is large and long with a dark brown skin and pink underneath to protect and keep the white flesh moist. In Thailand, cassava is usually boiled or roasted and serve with sugar. It also is made into various sweets combined with grated coconut and/or coconut milk and sugar. Raw cassava is poisonous, but when cooked it became a delicious dessert.  Pearl tapioca and tapioca starch and flour are all products of cassava roots.

© 2011 Pranee Khruasanit Halvorsen

I Love Thai cooking

Pranee teaches Thai Cooking classes in the Seattle area.

Her website is: I Love Thai cooking.com .


Read Full Post »

Comfort Me with Kabocha & Rum

I amuse myself in the kitchen every year by discovering new ways to use Kabocha, my favorite squash. Seeing snow on the ground meant no going out today, so I decided to get into the kitchen to play with the Kabocha puree that I made the other day.

I was thinking of a decadent dessert that did not require any cooking on the stovetop. I had classic cream cheese in the fridge and many basic staples in my kitchen, so I started from there. After finding the right ratio between the puree and the cream cheese, I added enough sugar to make a good balance. Then I added spiced rum, one tablespoon at a time. Spiced rum is a Caribbean rum that has an amazing blend of spices, caramel and other natural flavors. I may get a little carried away in my recipe below with the Sailor Jerry Spiced Rum, but when it comes to rum, the amount to add is very personal. At this point, there was still something missing from the recipe, and when I went through my spice rack, the nutmeg was yelling at me. Adding it did the trick—nothing more or less was needed.

While watching the snow melting away, my hand was busy spooning away this decadent dessert. It is pumpkin-creamy, sweet, with rummy-coconut and aromatic nutmeg. Just a perfect way to pamper oneself with comfort—a decadent dessert. Winter will be here for a while.

Pranee’s Spiced Rum Kabocha Mousse with Coconut Cream

Spiced Rum Kabocha Mousse

Serves: 6

8 ounces classic cream cheese
1½ cups Kabocha puree (see note)
⅓ cup evaporated cane sugar
¼ cup Sailor Jerry Spiced Rum, divided
¼ to 1 teaspoon nutmeg
6 tablespoons coconut cream (the thick top layer from a can of coconut milk)
6 Kaffir lime leaves or mint sprigs to garnish

Use an electric mixer to blend cream cheese in a large bowl until soft, about 30 seconds. Add Kabocha squash puree, sugar, 3 tablespoons rum, and nutmeg; blend on medium speed until well-blended and smooth, about 1 minute. Chill mixture in the fridge at least 3 hours before serving.

To make spiced rum coconut cream topping, whisk coconut cream and 1 tablespoon rum in a small bowl for 10 seconds. Set aside in the fridge.

To serve, place equal amounts of the mousse mixture into 6 glasses. Garnish the top with coconut cream and lime leaves or mint sprigs.

Pranee’s Tip on Making Kabocha Puree

A medium size Kabocha squash will yield 3 to 4 cups Kabocha puree. To prepare Kabocha pumpkin puree for dumplings or pie, simply remove the skin and seeds and then cut into 1-inch chunks. Steam about 15 minutes, or until tender. Use a ricer to make a fine mash.

More recipes on this blog with Kabocha pumpkin:

Thai Pumpkin Custard, nam tao sangkaya (recipe and slide show)

Stir-fried Kabocha Pumpkin with Pork (recipe and vedio)

© 2011  Pranee Khruasanit Halvorsen
I Love Thai cooking
Pranee teaches Thai Cooking classes in the Seattle area.
Her website is: I Love Thai cooking.com .

Read Full Post »

Spiced Up Cranberry Sauce with Thai Herbs

Cranberry Sauce with a Touch of Thai Herbs

Spiced Up Cranberry Sauce with Thai Herbs

Many years ago, when I cooked my very first cranberry sauce, I just followed the recipe on the back of the cranberry package. Now that I have lived in America for almost twenty years, I know the ingredients in the sauce quite well and have done some experimenting. For the past few years, I have enjoyed adding Thai flavors to the sauce, but now I have settled on this flavor profile. The sweet from the evaporated cane juice organic sugar (Wholesome Sweeteners Brand) goes well with the hint of caramel from the rum. Thai herbs and a unique sea salt balance out the flavors. This recipe has the sweet, sour, salty and spicy elements that add the Thai accent to my family’s Thanksgiving traditions. I hope you will enjoy cooking this recipe. Have a great Thanksgiving.

Pranee's Cranberry Sauce with Spiced Rum and Thai Herbs

Pranee’s Cranberry Sauce with Spiced Rum and Thai Herbs

Yield: 4½ cups

2 (12 ounce) packages fresh cranberries, washed and drained
2 cups organic evaporated cane sugar, or regular white sugar
1 ½ teaspoons Hawaiian Kine Seasoning Salt – Lemon Grass, or regular sea salt
1/2 cup water
2 tablespoons Sailor Jerry Spiced Rum
2 tablespoons Triple Sec orange-flavored liqueur
3 tablespoons lime juice, about 1 lime
1 stalk lemongrass, trimmed (cut off the lower bulb and remove tough, outer leaves) and smashed
1 to 2 fresh Thai chilies, smashed
3 Kaffir lime leaves
1 shallot, peeled and minced
2 tablespoons minced cilantro roots or stems

Place cranberries, sugar, salt, water, rum, triple sec, lime juice, chilies, shallot and cilantro root in a large pot, stir well and bring to a boil. Then stir as needed while cooking on medium heat until it reaches a jam-like texture, about 15 to 20 minutes. Remove lemongrass, chilies, and Kaffir lime leaves. Pour cooked cranberry sauce into sterilized jars. Keep in the refrigerator for up to two weeks, or freeze.

Pranee’s note:

Sailor Jerry Spiced Rum is a Caribbean rum with spice, caramel and other natural flavors.

Hawaiian Kine Seasoning Salt – Lemongrass is made from rock salt, pepper, garlic, ginger and lemongrass. You may use any sea salt.

Cilantro roots (rahk pak chee) are an important Thai flavoring ingredient. Unfortunately, cilantro usually comes with its roots already cut off. Look for whole cilantro plants with roots at farmer’s markets, grow your own, or substitute the bottom stems. If you do find cilantro with roots, rinse them well and use the roots along with about an inch of the bottom stems to which they are attached. You may also find frozen cilantro root in Asian markets.

© 2010  Pranee Khruasanit Halvorsen
I Love Thai cooking
Pranee teaches Thai Cooking classes in the Seattle area.   Her website is: I Love Thai cooking.com .

Read Full Post »

Inle Lake Green Tomato Salad, a Recipe from Shan StateMyanmar

Green Tomato, Red Tomato and Somewhere in Between

Today, on my way back from the University District Farmers Market, I visited a friend and saw her tomatoes in various shades of colors on her windowsill. Then I remembered that I wanted to share this recipe with you.

When I see green tomatoes, I think of my family’s visit to Inle Lake, Myanmar in June 2008. Our two-hour boat ride was enchanting, and we saw a fisherman using his foot to row his canoe. At the shallow edge of the lake were floating gardens with rows and rows of tomato plants. We had a chance to see the hydroponic farms and miles of tomatoes growing on floating gardens.

Inle Lake Fisherman

When we stopped for lunch and a cooking class at the View Point Restaurant, the chef surprised us with a green tomato salad along with many famous Shan State dishes. The menu reflected the local abundance of tomatoes from local farming, as Inle lake is the largest source of tomatoes and vegetables in Myanmar.

If you are planning to visit Myanmar anytime soon, please do make sure that the View Point Restaurant & Cooking School is in your itinerary. I love the people who work there, and the views of rice fields, the river, and the bridge—a great place to observe locals going about their daily lives.

This slideshow requires JavaScript.

I had never eaten green tomatoes before but I am familiar with the concepts of fried green tomatoes, pickled green tomatoes, and green tomato relish. So what else can you do with green tomatoes? Inle Lake Green Tomato Salad is an answer here.

Before cooking and eating green tomatoes, this is what you should know.

Thisis an excerpt about Tomatoes & Health that I copied from About.com:.“Although green tomatoes are wonderful when cooked or pickled, they should be avoided in large amounts when raw. Green tomatoes contain large amounts of tomatine, a toxin in the same alkaloid family as solanine which may be found in green potatoes, another member of the nightshade family. ”

I ate a few pieces of green tomato slices and felt fine but didn’t like the taste; it was too tart and bitter.  My friend Deb had mentioned that green tomatoes shouldn’t be eaten fresh, so I  decided to bake the green tomato slices for 15 to 20 minutes at 350 degrees Fahrenheit. The cooked tomatoes  tasted great, but the color was dark green.  I bake my green tomatoes or simply use firm ripe tomatoes instead.

Inle Lake Green Tomato Salad

This green tomato salad is very simple to make. You start by making  Lemongrass Vinegar.  I would recommend making a lot of it and storing it in the refrigerator.  It can be added to any recipe that calls for vinegar.

Inle LakeGreen Tomato Salad

Yum Makruatad Keow

4 large green or ripe tomatoes, sliced
1 shallot, peeled and minced
1 tablespoon chopped  peanuts, dry roasted and unsalted peanut
1 tablespoon fried minced garlic plus 1 teaspoon garlic oil ( this the oil that the garlic was fried in)
1 to 2 tablespoons lemongrass vinegar 
1 teaspoon toasted dark or light  sesame oil
½ teaspoon black sesame seeds
Salt to taste

Place green tomato slices on a large platter.

To make salad dressing, combine the shallot, peanuts, fried garlic, garlic oil, lemongrass vinegar, and sesame oil in a small bowl and whisk until combined. Pour over green tomatoes and garnish with black sesame seeds.

© 2010  Pranee Khruasanit Halvorsen 

 I Love Thai cooking   
Pranee teaches Thai Cooking classes in the Seattle area. Her website is: I Love Thai cooking.com .

Read Full Post »

Pranee’s Thai Lime-Green Chili Jam   


Thai Lime-Green Chili Jam

I have three different kinds of chili jam in my kitchen cabinet: Plum-Ginger Thai Pepper Jelly, Mango Madness, and Sweet Pepper Jalapeño Jam. These were precious gifts from good friends and they inspired me to create my own jam recipes. When my friend Ron gave me a bag of fresh green Star Fire Chilies from his favorite farm, “Krueger Family Peppers and Produce, Inc.” in Wapato, Washington, a journey began.

I wanted to create a Thai Lime-Green Chili Jam with a fun flavor from Kaffir lime leaf. First I explored the jam-making process and daydreamed about the flavor combinations, then I got a hands-on lesson on canning from my friend Kaia. She recommended a few books, and I purchased one, the “Ball Complete Book of Home Preserving.” A week later, I found the best price for canning jars, and in the past few weeks, I have created three combinations of chili jam. Honestly, I love all of them: Sweet Red, Lime-Green and Pineapple-Orange.

I have also learned my lessons on the do’s and don’ts of using powdered pectin. If the jam doesn’t set, follow the Sure-Jell instructions on how to remake the jam. After a few experiences, I became comfortable with the process. The most important part was that I had so much fun making close to one hundred jars of jam, and so did my friends. All I have to do now is to listen to their creative ways of using the chili jam.

I would like to share my Thai Lime-Green Chili Jam with you. It would be fun to serve side-by-side with cranberry sauce at Thanksgiving. You can learn to use it creatively during the holidays, and it makes a great gift for families and friends.

Thai Lime-Green Chili Jam with Citrus Flavors

Like green curry paste, the green color in this jam comes from fresh Thai green chilies. I also use green-colored peppers, herbs, lime juice, and all the Thai herbs to give it a real Thai flavor.

Thai Lime-Green Chili Jam  

Yam Prik Keow  

Yield: 5 1/2 cups or 14 (4-ounce) jars or 6 (8-ounce) jars

4 green bell peppers, cored and diced
30-40 fresh Thai green chilies, stems removed (I used Star Fire chilies)
1/2 cup diced red onion, about 1/2 medium-size onion
1 package Sure-Jell fruit pectin
2 cups cane vinegar (a vinegar made from cane sugar, available in most Asian markets)
2 to 4 tablespoons lime juice
4 cups sugar
1 1/2 teaspoons salt
10 Kaffir lime leaves
1 stalk lemongrass, trimmed and smashed
1 tablespoon butter
1 drop green food coloring, optional

Place bell pepper, fresh Thai green chilies, and onion in a food processor;  pulse to make a fine chunk (about 3 cups). Combine the  mixture with Sure-Jell, vinegar, lime juice and salt in a large, deep, stainless steel saucepan. Mix well until the pectin is dissolved. Bring to a boil over high heat. Stir in Kaffir lime, lemongrass and butter. Bring to a boil and cook for 3 minutes, stirring constantly. Stir in sugar all at once and return to a full rolling boil; stir constantly for 4 minutes. 

Remove from heat and ladle into jars filling to within 1/8 inch of the top. Wipe jar rims and threads. Cover tightly and store in refrigerator.

Note:  If you want a jam that can be stored (unopened) at room temperature, visit the Sure Jell website for instructions on how to process the jars.

 © 2010  Pranee Khruasanit Halvorsen 
 I Love Thai cooking   
Pranee teaches Thai Cooking classes in the Seattle area. Her website is: I Love Thai cooking.com .
 

Read Full Post »

Amazing Thai & Vietnamese Flavors with Local Organic Farm Produce from Orting

Last Saturday, October 1st, was my first visit to the town of Orting, which is only one hour from Seattle. It was a beautiful fall day and I had a beautiful drive. I love the town. I was doing a cooking demo for PCC Cooks and PCC Farmland Trust at the Orting Valley Farms. It is PCC Culinary Trust’s latest preserved farm to save local organic farmland forever! It was also Pierce Country Harvest Fest and there were many people visiting, including young kids who decided on the spot that they love Thai and Vietnamese flavors.

At Tahoma Farms, Dan, the owner of the farm, grilled corn and served warm apple cider, while I cooked and  handed out samples of my Northwest Salad with Thai Chili-Lime Vinaigrette and Vietnamese Lemongrass-Scented Eggplant Stew. Groups of visitors came by either before or after taking a hayride,  and live country music was playing in the barn.

It was fun to meet so many people, including many families with young kids. It was great to learn that they all enjoyed my cooking. Therefore, I would like to share one of the recipes with you: Northwest Salad with Thai Chili-Lime Vinaigrette. At the farm I used dinosaur kale, sweet basil, Johnny Nardello peppers, and heirloom tomatoes for the salad. A Roy Dee Kha!

This slideshow requires JavaScript.

Northwest Salad with Thai Chili-Lime Vinaigrette

Yum Pak

Northwest salad with Thai chili-Lime vinaigrette Recipe, Yum Pak

I created this simple recipe this summer using fresh Northwest produce. The Thai-flavored vinaigrette uses olive oil, chili, lime and fish sauce. It makes a bright salad with interesting flavors.
 
 Serves 8 
 
4 tablespoons extra-virgin olive oil or garlic oil
1 teaspoon sea salt or 4 teaspoons fish sauce
1 teaspoon evaporated cane sugar
1/2 teaspoon black pepper
1/2 teaspoon chili powder
2 tablespoons lime juice or lemon juice
2 shallots, peeled and sliced
24 cherry tomatoes, whole, or  2 heirloom tomatoes, sliced
1 cup sweet basil leaves, washed and drained
1 cup kale, washed and chopped
1 cup mixed sweet pepper varieties, julienned
1 cup dill or cilantro leaves (or any Asian herbs such as basil, lemon basil)
2 tablespoons toasted sunflower or pumpkin seeds

Whisk olive oil, sea salt or fish sauce, sugar, pepper, chili powder and lime or lemon juice until well mixed. Fold in shallots, tomatoes, arugula, kale, sweet peppers, dill or cilantro and mix gently. Sprinkle with sunflower seeds and serve immediately.

© 2010  Pranee Khruasanit Halvorsen
I Love Thai cooking
Pranee teaches Thai Cooking classes in the Seattle area. Her website is: I Love Thai cooking.com
 

Read Full Post »

I Couldn’t Say No to Nectarines

It was too much temptation for me! Yesterday I went to a market and saw a box of a dozen local nectarines. Off course I purchased a box to take home. I had no idea at the time what I wanted to do with them. I ate a few and still had nine left. Then I remembered the cookbook that I had purchased the day before: A Passion for Ice Cream by Emily Luchetti. It won an IACP award. It was just perfect–I looked through the index and found a nectarine ice cream recipe. I want to give it a try today since I already had my ice cream machine ready in the freezer. It is not difficult nor time-consuming to make ice cream, but it is all about planning.

I spent a good forty-five minutes prepping and cooking, and now everything is ready to chill in the fridge. I will put the mixtures in the ice cream machine tomorrow while I am working at home, then let the machine do the work.

Nectarine and Coconut Cream, Ready for the Ice Cream Machine

This is my Thai adaptation with tamarind and coconut milk.

Nectarine-Coconut Ice Cream

2 1/2 pounds of nectarines (about 5 fruits), peeled, pitted and chopped
1 tablespoon tamarind concentrate, or lemon juice
8 tablespoons sugar, divided
1 pinch of salt
1 1/2 cups heavy whipping cream
1/2 cup coconut milk

Place nectarines, tamarind concentrate, 4 tablespoons sugar, and salt in a medium size pot and bring to a boil. Let it cook on medium heat until it looks like a jam, about 15 to 20 minutes. Set aside to cool. It should yield about 2 1/2 cups.

Stir cream, coconut milk and the rest of the sugar in a sauce pan on medium heat until the sugar is melted. When it steams up, remove and let it cool.

Now I have both mixtures in separate containers and ready to go into the ice-cream machine. I will keep you posted on how it goes–with photos, off course. It will take a while, though. There is no natural sunshine in Seattle today for a food photograph.

I can’t wait to try the nectarine-coconut ice cream tomorrow.

September 22

Before lunch I placed the chilled nectarine and coconut cream mixtures in my ice cream machine. By the time I finished my lunch, the ice cream was done. I left it in the container and put it in the freezer.

At 2:20pm, I tasted it. OMG, delicious!

Nectarine-Coconut Ice Cream served on a nectarine and topped with coconut flakes.

© 2013  Pranee Khruasanit Halvorsen
I Love Thai cooking
Pranee teaches Thai Cooking classes in the Seattle area.
Her website is: I Love Thai cooking.com 
 
Related articles

Read Full Post »

Thai Cooking with Mussels

Steamed Mediterranean Mussels with Sweet Chili Sauce

I love mussels, and Thai cuisine has so many great mussel recipes. Unfortunately, cooking classes with mussels don’t sell well in Seattle. But you can enjoy my recipe without being in my class. This delightful, easy recipe uses fresh Mediterranean mussels that are at their peak season right now. The Taylor Shellfish Farm stall at many Seattle Farmers Markets is a good place to get them.

Cooking Tips from the Expert, Jon Rowley

The Mediterranean mussels, which are just now coming into season and will be very plump, aren’t done when they open. They need to continue cooking after they open until you see the meat contract. This makes a BIG difference in the flavor. If the mussels are not cooked enough, they have an unpleasant, fleshy taste. If cooked properly they are gloriously sweet. These mussels are so fat, you don’t have to worry about overcooking.

Also if some mussels don’t open and the others are done, the ones that are closed will also be done, they just need to be pried open. Bum mussels will be open before cooking and should be discarded. Mediterranean mussels that are still closed after cooking (if you have any) are fine.

This slideshow requires JavaScript.

Steamed Mediterranean Mussels with Lemon Basil and Shallot, and Homemade Chili Sauce

Hoy Nueng Bai Meang Luck

Servings: 8 as appetizer


30 Mediterranean mussels, about 2 pounds
2 tablespoons grape seed oil
3 shallots, peeled and sliced
1 cup lemon basil leaves, or any type of basil
1 Serrano pepper, halved
1 cup sweet chili sauce (see recipe below)

De-beard mussels and clean under running water to remove sand and grit. Discard any mussels that open before cooking.

Heat canola oil in a pan and stir in shallots and basil for 30 seconds on high heat. Add mussels, cover the pan, and shake it back and forth without opening the lid until the mussels start to open, about 2 minutes. Keep cooking until the mussels contract and look plump and round, about 1 more minute.

Serve with sweet chili sauce as a dipping sauce or place ½ teaspoon sweet chili sauce on each mussel. Garnish with lemon basil leaves.

Wine Pairing: Washington Pinot Gris

© 2010  Pranee Khruasanit Halvorsen
I Love Thai cooking
 
 
Pranee teaches Thai Cooking classes in the Seattle area. Her website is: I Love Thai cooking.com

Read Full Post »

Sunflower Sprouts Salad with Chili-Lime vinaigrette

Yum Med Tan Tawan Ngawk

Sunflower Sprouts by the Alm Hill Gardens Stall – The Columbia City Farmer Market

July 15, 2010 – Yesterday I was at the Columbia Farmers Market. While waiting for my friend, I visited the Alm Hill Gardens stall, and was introduced to sunflower sprouts. I have tasted it before, but these fresh sprouts from the farm I will never forget. It was fresh, buttery and nutty. I brought some home and made a salad for a side dish to accompany my Thai chicken Baryani rice, Kao Mok Gai.

Chili-Lime Vinaigrette, tomato and dill

August 4, 2010- My friend Annette came over for lunch today and it is a perfect day for me to perfect my Sunflower Sprout Salad Recipe and do some photos for the blog. As I envisioned to add some texture, and sunflower seed is a perfect theme for salad. I have no reservations about adding the abundant and flavorful mixed heirloom cherry tomatoes. The rest is simple. I hope you like my chili-lime vinaigrette. Interesting and freshest  ingredients in an easy recipe is a way to go.

Sunflower Sprouts S

Sunflower Sprout Salad with Chili-Lime Vinaigrette

alad with Chili-Lime vinaigrette

Yum Dork Tan Tawan Ngawk 

Serves: 4

2 tablespoons extra virgin olive oil or garlic oil
1/2 teaspoon sea salt or 2 teaspoons fish sauce
1/2 teaspoon evaporated cane sugar
1/4 teaspoon black pepper flake
1/4 teaspoon chili powder
1 tablespoon lime juice or lemon juice
1 shallot, peeled and sliced
12 cherry tomatoes, whole or halved
2 cups sunflower sprouts, washed and drained
1/4 dill or cilantro leaves
2 tablespoons toasted sunflower seeds

Whisk olive oil, sea salt, sugar, black pepper, chili powder, lime juice until it is well mixed. Fold in shallot, tomatoes, sunflower sprouts and dill, and mix gently. Sprinkle sunflower seeds  before serving. Serve immediately.

 © 2010  Pranee Khruasanit Halvorsen  

 I Love Thai cooking 

 Pranee teaches Thai Cooking class in Seattle areas, her website is: I Love Thai cooking.com

Read Full Post »

Thai Village Style Cooking    

Fried fish recipe from the Southern region of Thailand 

The other day, when I was at Pike Place Market, wandering around almost aimlessly like a tourist. I purchased a pound of sardines, I hadn’t tasted fresh sardines for the longest time perhaps since my grandma’s kitchen. I want to rediscover more Thai village style cooking with local ingredients here in Seattle. This was a good start.  

Thai Fried Sardines--Very Rustic Thai Cooking

The sardines are fresh from the Gulf of California and there is no need to worry about mercury because it is known to be very low. There are many good reasons to eat sardines, they are rich with Omega-3 fatty acids, Vitamin D, calcium and B 12. Perhaps that’s why both of my grandmother hardly saw any doctors in their life time. Every single day growing up, fried fish with turmeric and salt was on the table, besides other fish dishes. It was my grandma’s rule. The fish was the cheapest and healthiest protein that Phuket villagers could provide for their family way back then. I love fried sardines, they have a mouthful flavor and the aroma is unique.

If you are trying this for the first time, the challenge is how you will cook them, so you can eat everything including the soft bone and when crunchy enough, the back bone. It is a calcium intake time. As my rule goes, if it is chewable then it is edible! But trust your judgment and comfort zone also.


This slideshow requires JavaScript.

First I removed the fish guts. That was not fun. The problem is the sardines were so small and the belly was so relatively big. I tried the best I can to make sardines look good in the photos. After I gutted, cleaned and dried the fish, I followed my grandma’s old advice. I cut the flesh through the skin into tiny strips (the knife is perpendicular to the fish back bone) just enough to hit the backbone (please see the slide show). I repeated on the other side. I salted them and seasoned with turmeric. I placed 8 sardines in a food container and kept in the refrigerator for a day. I had something else planned for dinner that evening. When you want to keep the fish for a day in fridge, be generous with salt and turmeric. It is a way that we use to keep the fish fresh for the next day, back when we didn’t have electricity.

You may use the recipe below and cook sardines on the grill on medium heat on both sides until crispy. The problem with frying in your kitchen is the smell of the fish lingers for a day. I just want you to know that, but it tastes divine with hot steamed jasmine rice. Especially good if you eat it with your fingers, and easy way to remove the backbone then mix the fish by hand against the warm jasmine rice before eating,  just like Thais in the Thai village do.

 Thai Fried Sardines  

 Pla Sardine Tod

ปลาซาร์ดีนทอด 

 Serves: 4

 1 pound sardine, about 8 sardines, gutted and cleaned and dried with towels
2  teaspoons sea salt
1/2 teaspoon turmeric
3 to 5 tablespoons canola oil

 Lay the fish perpendicular to you on the cutting board, cut the flesh through the skin into tiny strips (the knife is perpendicular to the fish back bone) just enough to hit the backbone (please see the slide show), Repeated on the other side. Follow the same steps with the rest of the fish. Sprinkle salt all over the fish and follow by turmeric until the fish is evenly cover.

Heat the frying pan on medium heat, when the pan is hot add canola oil. Fry on both sides until they are crispy by the touch and a light brown color. Serve with warm jasmine rice.


 © 2010  Pranee Khruasanit Halvorsen  
I Love Thai cooking 
 Pranee teaches Thai Cooking class in Seattle areas, her website is: I Love Thai cooking.com  

Read Full Post »

Lovage and Snap Pea Soup

Kaeng Jued Pak

There is no real Thai name for this soup, but I started the process by stir-frying, adding broth and cooking until the vegetables are soft. It’s like a Thai soup that is called Kaeng Jued Pak. I pureed it down like western soup. It is best to enjoy lovage that way. It’s not a typical Thai dish but my grandma would have done the same — a dish from the garden or the nearest farm to the table. The freshness and simplicity were key. I don’t make it a habit to call for take-out or frozen food. I prefer to enjoy real food. When there is nothing else, steamed rice and fried eggs with some soy sauce and cucumber on top is enough. This is a kind of lunch; I enjoy it when I am at home by myself.

Lovage-Snap Pea Soup

Lovage and Snap Pea Soup

This morning while working in the garden, I trimmed overgrown lovage. Some was young and tender; so I decided not to throw it away. Then around lunch break, I made a soup with some snap peas that I got from the farmers market the day before. All I had to do is find the right spice to go with it. I had some freshly ground coriander powder–seeds that I brought from Thailand. I gave it a try, and it was right on. It was a quick and easy summer soup. With a lovage plant, you will receive an annual return every summer with flavorful soup–the best tasting soup that no other restaurants can compete with because you have got the freshest one a few steps from your kitchen. 

Serves: 4

Yield: 2 cups

3 tablespoons canola oil or extra light olive oil
2 cloves garlic, minced
1/2 cup chopped onion
1 cup chopped lovage
1 cup whole snap peas, end trimmed — about 20 snap peas
1 teaspoon sea salt
1 teaspoon freshly ground-toasted coriander powder
2 cups chicken brother or 2 cups water plus 2 teaspoons chicken powder

Heat a frying pan on medium-high heat and when it is hot add canola oil. Stir in garlic and onion until fragrant and onion become translucent. Stir in lovage for 30 seconds before adding snap pea, sea salt and coriander. Pour into a large pot and add chicken broth and bring to a boil. Lets it cook on medium heat until snap peas is cooked. About 8 minutes. Serve as is or use a blend in the blender. Garnish with chopped lovage or lovage leaf.

Vegetarian option: substitute chicken broth with vegetable or mushroom broth.

© 2010  Pranee Khruasanit Halvorsen
 I Love Thai cooking
 
Pranee teaches Thai Cooking class in Seattle areas, her website is: I Love Thai cooking.com

Read Full Post »

Thai Rice Salad with Nasturtiums & Sardines Recipe

Kao Yum Pak Tai, Southern Thai rice salad with edible flower and sardine

Thai rice Salad with Nasturtiums

Photograph by Pranee

I grew up in the Southern region of Thailand, the origin of the Thai rice salad Kao Yum and my grandmother was a pro.  I have several versions for my classes. I am a gardener and I planted some nasturtium for Kao Yum. That was when I planned to write this recipe, and today is a perfect time. I have cooked rice, fried sardines, dill and cilantro in my fridge and the nasturtiums are at their peak in my garden. Quick and easy Thai dish I put together in the summer day. It is a cool dish, so there is no cooking require. This is a versatile recipe that you can adjust to your needs as there is no wrong way of making it. If the sardines are omitted, then I serve grilled salmon on top. There are so many creative ways to use this recipe.

First, the fish is very important part of this recipe, but you may use smoked salmon instead. In my grandmas kitchen we used anything from grilled fish, fried fish, dry anchovies and dried shrimp powder. Just use enough to give a mouthful of flavor to the dish. The second, an important element is fresh herbs, and you may use any herbs that pair well with the fish you choose. Last, for edible flowers, I chose nasturtium because it has a nice pungent and peppery flavor. It is easy to grow them here in Seattle.  Choose one edible flower that pair well with your fish.

Serves: 2

1 1/2 cup cooked rice, at room temperature
1/4 cup fried sardine or smoked salmon, bone removed and cut into chunk
8 nasturtiums, removed petals by hand into small pieces
6 nasturtiums leaves, thinly sliced
1/4 cup chiffonade fresh and tender Kaffir lime leaves or chopped cilantro
1/4 cup chopped dill
2 tablespoons sliced shallot
1 teaspoon chili powder
1 tablespoon fish sauce, or more as needed
1 tablespoon lime juice
2 lime wedges, for garnish

Place rice in the center of salad bowl. Place sardine, nasturtiums petals and leaves, cilantro, dill, shallot and chili powder along the side of salad bowl. When ready to serve, stir in fish sauce, lime juice and mix gently and serve right away with lime wedge on the side.

This slideshow requires JavaScript.

Thai Vegetarian Option: Saute shiitake mushroom with sea salt to substitute sardine, and sea salt instead of fish sauce.

Thai Cooking Recipe for Kids: add chili powder toward the end after kid serving portion is served.

Gluten-Free Recipe

© 2010  Pranee Khruasanit Halvorsen
I Love Thai cooking
 
Pranee teachs Thai Cooking class in Seattle areas, her website is: I Love Thai cooking.com

Read Full Post »

Older Posts »

%d bloggers like this: