Feeds:
Posts
Comments

Archive for the ‘Thai Snack & Street Food Recipe’ Category

Heavenly Dessert

When I was young I could not resist eating Khanom Mo Gang – ขนมหม้อแกงถั่ว – Thai Coconut Custard with Mung Beans. One small parcel in a banana leaf was not enough for my hungry soul.

In Thai cuisine there are many kinds of Mo Gang Thai custard but two types dominate: one with egg, palm sugar and coconut milk, and another that includes cooked split mung beans or cooked taro. What makes this Thai custard so special is the coconut milk and fried shallot oil. These two ingredients set Thai Mo Gang apart from other custards.

One event that I have never forgotten was when my aunt purchased a little parcel of Mo Gaeng for everyone for breakfast and my brothers and sister woke to discover that their shares were gone. They have long ago forgiven me and forgotten this, but I still have lingering memories of the taste and my mischief. 

Thai Coconut Custard with Mung Beans

In Thailand an individual serving of this Thai dessert is wrapped in a banana leaf and secured with a little wood stick like a toothpick.

Kanom Mor Gaeng

Kanom Mor Gaeng Tua

Thais commonly open up the little parcel and use a small spoon to leisurely take one small bite at a time. The banana leaf is not only used as a wrapper, but as a disposable plate as well.

Step-by-Step: How to Make Thai Coconut Custard with Mung Beans

Steamed Mung Beans

Cooked Split Mung Beans

The first step is to steam split mung beans ahead of time using Pranee’s Step-by Step instructions from an earlier post for preparing Steamed Peeled Split Mung Beans. The second step is to make fried shallots and shallot oil following the recipe on this youTube video: https://youtu.be/5LTCo3SRWLk. Then the rest of the preparation is very simple.

Run egg, sugar batter through a sieve

Prepare the steamed split mung beans and fried shallot ahead of time and the rest is simple.

Place sugar, eggs, salt and Pandan leaf in a medium size bowl. Using a whisk or an egg beater, whip until foamy and the sugar and salt are dissolved, about 1 minute. Stir in coconut cream and repeat the mixing process until well blended, about 30 seconds. Run the egg and sugar mixture through a sieve into food processor, removing the Pandan leaf. Add steamed mung beans to the food processor or blender and blend until smooth, about 1 minute.

cook mung bean custard on low heat for 5 minutes

Cook mung bean custard on low heat for 5 minutes

Heat the mixture in a deep pan over medium heat. Add 1/2 portion of fried shallots and all of the shallot oil and stir constantly  until the texture changes to a thick soup, about 5 minutes.

photo 4

Pour thick Mung Bean Custard from the mixer onto a greased 8″ by 8″ baking pan

Pour the thick batter into a greased 8″ by 8″  baking pan. Sprinkle the remaining half of the fried shallots on the top (see picture below) before baking.

Freshly Baked Khanom Mor Geng - ขนมหม้อแกงถั่ว

Freshly Baked Khanom Mor Geng

Bake at 375°F in a preheated oven until the top is golden and the edge of the custard pulls away from the edge a little, about 45 minutes.

Thai Coconut Custard with Mung Beans

Thai Coconut Custard with Mung Beans – ขนมหม้อแกงถั่ว

Thai Coconut Custard with Mung Beans

Khanom Mo Gaeng

ขนมหม้อแกงถั่ว

Serves 8 to 16

Preparation time: 20 minutes

Baking Time: 45 minutes

3 tablespoons canola oil

2 shallots, peeled and sliced

1 1/2 cups evaporated cane sugar

6 eggs, duck eggs preferred

1/4 teaspoon salt

1 Pandan leaf

1 1/2 cups coconut cream

2 cups steamed mung beans

Heat a small skillet over medium heat and stir in canola oil and shallots. Stir back and forth until the shallots are golden brown. Using a slotted spoon, remove fried shallots and divided into two portion, and let them cool. Save the oil for later.

Place sugar, eggs, salt and Pandan leaf in a medium-size bowl, and using a hand whisk or egg beater, beat until foamy and sugar and salt are dissolved, about 1 minute. Then stir in coconut cream, and repeat the mixing process until well blended, about 30 seconds. Strain into food processor to remove Pandan leaf. Add steamed mung beans to the food processor or blender and blend until smooth, about 1 minute.

Heat the mixture in a deep pan over medium heat. Add 1/2 portion of fried shallots and all of the shallot oil into the pan. Stir constantly until the texture changes to a thick soup, about 5 minutes.

Pour the thick batter into a greased 8″ by 8″  baking pan. Sprinkle 1/2 portion of fried shallots on surface (see picture above) before baking. Bake at 375°F in a preheated oven until the top is golden and the edge of the custard begins to pull away from the sides of the pan, about 45 minutes.

© 2015  Pranee Khruasanit Halvorsen

I Love Thai cooking
Pranee teaches Thai Cooking classes in the Seattle area.
Her website is: I Love Thai cooking.com 
 
Related Links:
How to Cook Peeled Split Mung Bean (praneesthaikitchen.com)
Mung Bean (wikipedia)
Fried Shallots (https://youtu.be/5LTCo3SRWLk)


Read Full Post »

Golden Cup – กระทงทอง

Golden cup – Krathong Tong – is a classic Thai dish served as an appetizer or snack. I learned how to make golden cups when I had my first kitchen and was taking professional culinary classes. Making the filling is quite easy. The hard part is making the golden cup. It requires a perfect dough recipe, a flower mold and deep-frying. When I saw a few ready-made pastry cups, I decided to use them to make a quick and easy appetizer for a new year’s party. After all I was looking for some auspicious dishes to share with my Thai friends at our new year’s day gathering to wish for a prosperous and healthy year – Sawasdee Pee mai – สวัสดีปีใหม่.

Golden Cup - กระทงทอง

Golden Cups – กระทงทอง

Before you start to prepare this appetizer, you will have to decide what to use for the golden cup. The traditional Thai method would be to prepare the cup from scratch by deep-frying the dough, but today there are many options that can be easier and healthier as well. I happened to find these golden pastry cups at Pasta & Co. during the pre-holiday season.

Pastry Cups

Pastry cups

If these pastry cups are not available, I typically use a wonton sheet, brushing it well with cooking oil and then placing it in a small muffin pan, arranging the sheets to fit in the pan in cup-like shape. Then I bake it until it becomes golden and crispy. If you wish to make a traditional golden cup, give this video a try.

Krathong Tong Filling

IMG_3974

I give a local twist to a traditional filling for Krathong Tong

Starting at 6 o’clock and moving clockwise, add ground turkey, diced sweet petite pepper, diced celery, diced apple, black pepper and garlic, and cilantro. Place soy sauce in the center.

IMG_3983

Place ground turkey and seasoning in a pan

Heat a wok on a high heat and pour in a high-heat cooking oil such as peanut oil or canola oil. Stir-fry ground meat with Thai basic seasoning paste – Kratiem Prik Thai – until it is fragrant almost cooked through, about one minute.

IMG_3986

Ground chicken, celery, sweet pepper and apple

Stir in diced celery, sweet pepper and apple, and cook until the pork is no longer pink, about three minutes. After this is done, set it aside.

IMG_3995

Prepare garnish of sliced sweet petite pepper and cilantro leaf

While waiting for the filling to cool down, prepare the garnish. To prepare the garnish we will use 24 mini bell pepper rings and 24 cilantro leaves with about an inch and a half of the stem attached.

Place the filling in the golden cups

Place the filling in the golden cups

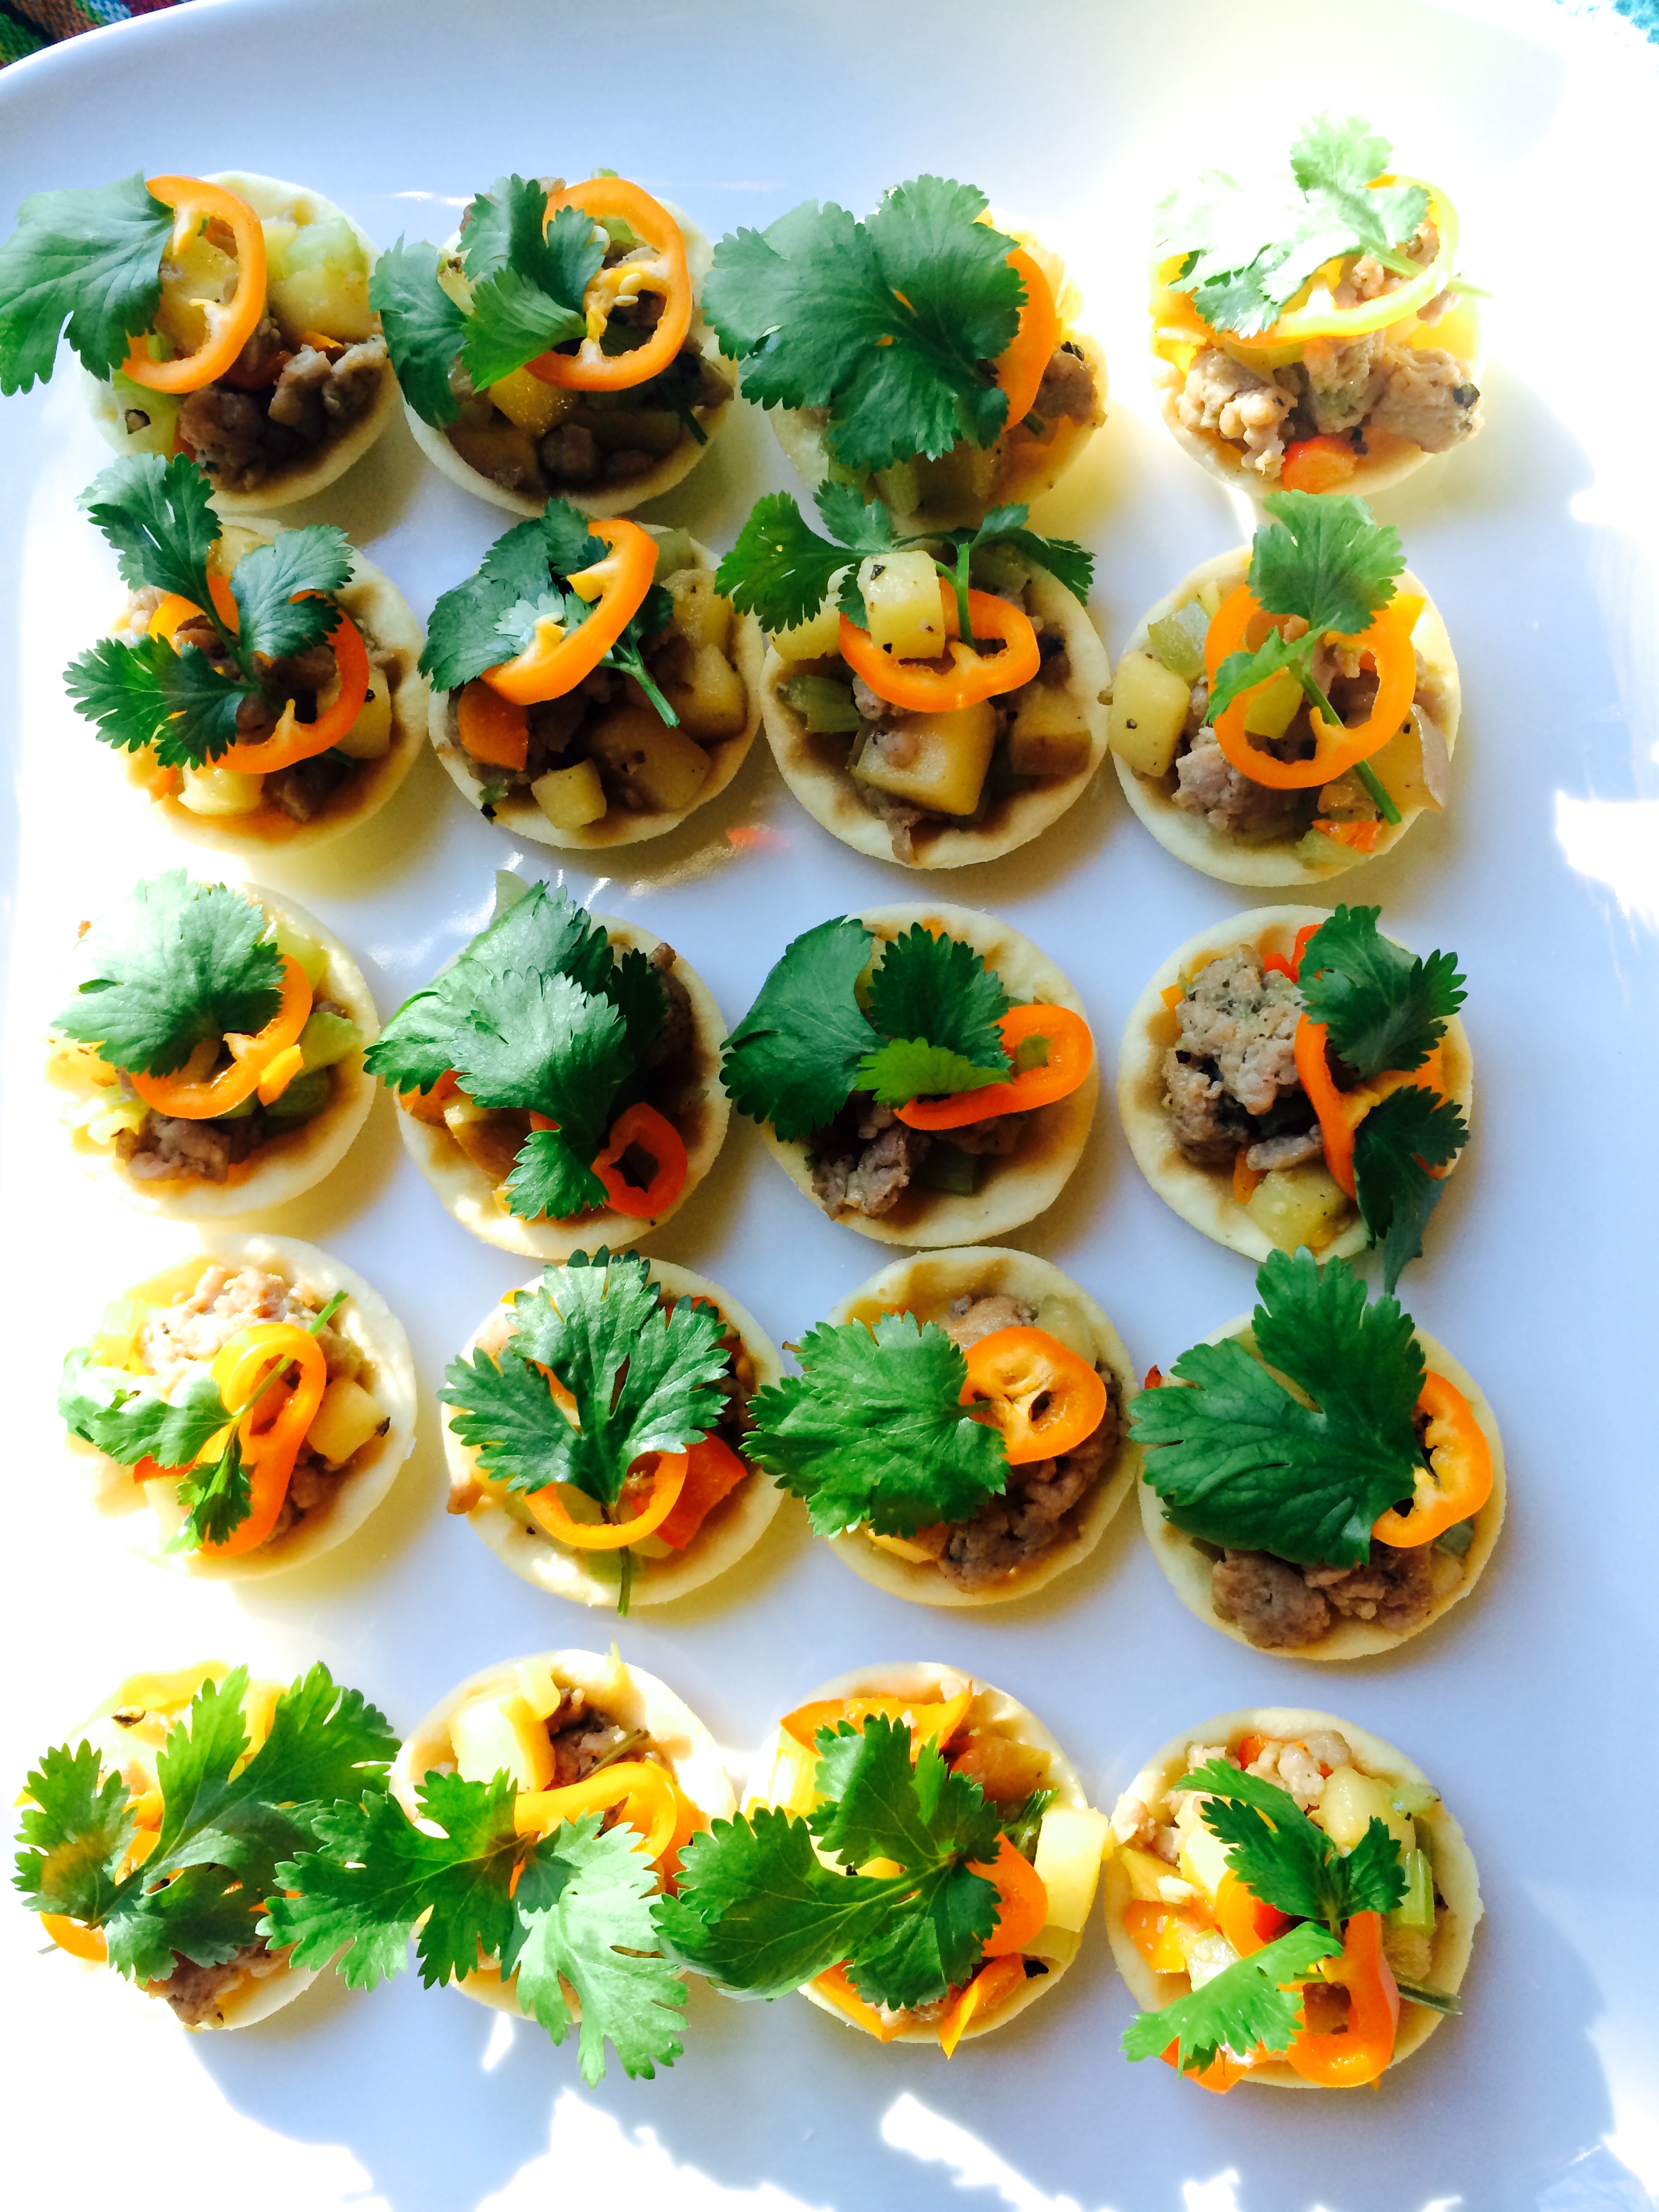
 Before serving, spoon the filling into the cups.

IMG_4010

Garnish with cilantro and sweet pepper

Golden Cup – Kratong Tong – กระทงทอง

There are many options for the types of vegetables to cook in the filling; peas and corn kernels is one combination. For the meat, you can use pork and prawns or any minced meat combined with minced prawns. The most important part of this recipe is the Thai basic seasoning paste which is fundamental to all Thai appetizers and an authentic flavor profile.

Yield: 1 1/2  cups

24 golden cups
1 tablespoon sliced garlic
1 tablespoon black pepper
1 cilantro root or 1 tablespoon chopped cilantro stems
2 tablespoons soy sauce
1/4 to 1/2 teaspoon salt
1 cup ground turkey, chicken or pork
1/4 cup diced sweet pepper
1/4 cup diced celery
1/2 cup diced apple
Optional: 24 mini bell pepper ring and 24 cilantro leaves for garnish

To make basic Thai basic seasoning paste – Kratiem Prik Thai, place garlic, black pepper and cilantro root or stem in a mortar with pestle and pound until it becomes a fine paste. Gently stir in soy sauce and salt.

Heat a wok on a high heat and pour in a high-heat cooking oil such as peanut oil or canola oil. Stir-fry ground meat with Thai basic seasoning paste until it is fragrant and almost cooked through—about one minute.

Stir in diced celery, sweet pepper and apple and continue until the pork is cooked—about three minutes. Set aside.

While waiting for the filling to cool down, prepare garnish with 24 mini bell pepper rings and 24 cilantro leaves with some stem attached.

Before serving, spoon the filling into the cups and garnish with cilantro and sweet pepper.

Vegetarian Variation:

Substitute 1 1/2 cups sliced fresh shiitake mushrooms for 1 cup ground turkey.

I Love Thai cooking
Pranee teaches Thai Cooking classes in the Seattle area.
Her website is: I Love Thai cooking.com 
 

Read Full Post »

A Journey of a Thousand Miles

Gelle, Sri Lanka

Gelle, Sri Lanka

The time machine has been playing tricks on me and preventing me from keeping you posted on where I have been and what I have been cooking since January. During part of that time I was traveling across the South China Sea and Andaman Sea on the MS Amsterdam, a Holland America Line cruise ship  (the 2014 Grand World Voyage), as a guest chef teaching Thai culinary classes. The ship traveled around the world and I joined the ship from Manila to Hong Kong, Singapore, Phuket and Sri Lanka. My full-month culinary experience on board the ship, plus my travels around Southeast and Central Asia, and the opportunity to explore the cuisine and culture of Sri Lanka were wonderful adventures which I will share with you at a later time.

The rest of the time here in Seattle I have been teaching, tasting delicious Thai foods around Seattle,  and keeping busy with my family and Seattle’s Thai community. Please visit my I Love Thai Cooking Facebook page, which I update often with photos and news. For the remainder of this year, I hope to share short recipes and techniques on my Pranee’s Thai Kitchen blog until I finally catch up with everything.

I hope you enjoy my recipe for Thai Egg Salad- ยำไข่ต้ม

Unpretentious

Summer in Seattle for me is about living a carefree life style, exploring nature and enjoying outdoor activities. Dining and entertaining are still important to me, but I try to stick with a nutritious and delicious cooking style that fits my summer style. The recipe I am sharing today reflects my cooking style at this time a year.

Hard-Boiled Eggs Salads - Yum Khai Tom

Hard-Boiled Egg Salad – Yum Khai Tom

When I had a potluck and Thai community gathering to attend one Sunday, I took the simple approach of deciding to prepare an impromptu dish using only those ingredients that I already had in my fridge or freezer, typically staple ingredients that one must have on daily basis. This hard-boiled egg recipe came naturally to mind. Eggs are a soul food for everyone, anywhere and anytime—breakfast, lunch or dinner. For me this week, I have eaten eggs at least one meal each day. I am proud to share this simple dish with friends and I hope you too will find this recipe suitable for your family, or to take to a party with ease. They are a food prepared with heart and nourishing value and the best fresh ingredients possible. Delicious, nutritious and unpretentious.

How to Prepare the Hard-Boiled Eggs – Kai Tom – ไข่ต้ม

Place 13 eggs (one more than you need in order to provide one for testing and tasting) in the bottom of a large pot; add enough water to cover them, plus two inches. Bring to a boil on high heat and then immediately lower heat to medium. Set a timer for 6 to 8 minutes depending how firm you want the egg. After 6 minutes, use one egg as a tester. Rinse the egg with cold water and peel to see how it looks inside. If the center is cooked enough for you, remove the pot from the heat, pour out the hot water, and rinse the eggs with cold water. Let them cool down completely—at least 30 minutes or longer. Once cooled, roll the eggs gently to crack and remove the shell. I learned over time that using older eggs or adding a splash of vinegar to the water makes the shells easier to peel.

The dressing below also works well with fried eggs. See Pranee’s favorite fried egg technique – Thai Fried Egg Kai Dao – ไข่ดาว

Thai Egg Salad

Yum Kai Tom

ยำไข่ต้ม

The hard-boiled eggs, dressing, and garnish can be made ahead of time and kept in separate containers until ready to use. It will only take about 15 minutes to cut the eggs and place them on the tray, randomly sprinkle sauce, and garnish the top. Then wait and see how many people say “Wow.”

12 eggs, hard-boiled, peeled and cut in half lengthwise
3 fresh Thai chilis–red or green, optional
2 large shallots, minced
3 tablespoons fish sauce
5 tablespoons lime juice
1 teaspoon roasted red chili paste, aka chili jam
1 teaspoon sugar
3 tablespoons cilantro leaves
 

Place cut, hard-boiled eggs on a deviled egg platter or a plate.

Make egg salad dressing by combining shallots, fish sauce, lime juice, roasted red chili paste and sugar.

Use a small spoon to spread sauce equally over each egg yolk. Garnish with cilantro.

Enjoy as an appetizer or side dish.

I Love Thai cooking
Pranee teaches Thai Cooking classes in the Seattle area.
Her website is: I Love Thai cooking.com 
 
Related Link
 
Thai Fried Egg (praneesthaikitchen.com)
 

Read Full Post »

Good Time & Bad Time

เวลาที่ยากลำบากและเวลาที่สบาย

I had Tom Yum Mama Noodle Soup for lunch today, instant ramen noodles made from the Mama brand with Tom Yum Goong favor. I took a short break from working in the garden and went into my kitchen, but there weren’t any leftovers and I had a craving for the flavors of Tom Yum Mama Noodle Soup. It is common—but not often—that I reach into my kitchen cabinet where a few emergency instant noodles are hidden. It is an honest confession that I take pleasure in eating instant Tom Yum Mama noodles once in a while. I am not alone. One of the photos below was taken a few years back when I visited my friend Varuunee one hot and humid afternoon at her food stand in Bangtao Village, Phuket, Thailand.

Tom Yum Mama Ramen Noodle Soup

Varunee prepared our lunch –Tom Yum Mama with egg and Chinese celery – for her neighbor and me. The neighbor happened to be the head chef for the Thai restaurant at a famous resort hotel nearby. There we were, two cooks, leisurely slurping the simplest dish prepared from instant noodles – just for good time’s sake!

Oriental Style Instant Noodles Shrimp Flavour (TOM YUM)

Mama and Wai Wai are two famous brands among instant noodles

Above is my favorite, Mama Shrimp Tom Yum flavor

In Fall 2011, I was in line at the cashier’s stand in an Asian market in Seattle when I saw a food stamp shopper demand to know when Thai instant noodles would be back on the shelves. The cashier simply could not give a precise answer due to the huge domestic demand in Thailand and the shortage due to the extreme flood crisis during the late monsoon season that September. The flood effected many families; some were living on instant noodles and other foods in their emergency food supply. Instant noodles can be kept for extended periods and by adding just a small amount of warm water they can become a good emergency food source. In fact, a hike in sales of instant noodles can be use as an index for indicating bad economic events in Thailand. In general the sale of the noodles is high at the end of the month, during economic crises, and when there are extreme weather conditions—times when when every Baht (Thai currency)- ทุกบาททุกสตางค์  – is stretched -เวลาที่ยากลำบาก

Raining Season in Phuket

Raining season in Kamala, Phuket, Thailand

May 26th, 2013

Photo above is a courtesy of Niruj Kamala News

Lately my family and friends have mentioned a lot on Facebook about power shortages and heavy rain in Phuket, Thailand. Monsoons start at the beginning of May and end around September, though the weather varies from year to year as does when a storm will hit. The posts on Facebook reminded me of the story that I want to share with you from the year 2011. That year, Thailand was faced with some of the most extreme floods in its history. Perhaps you still remember the news of the difficulties people experienced who lived in the flooded areas in central Thailand. For some people it was more than two months before the water receded.

Tom Yum Mama with Egg

Instant noodles can be a fun dish that is quick and easy for students, or for the many Thais who experience a random craving for a familiar taste during good times or bad!

It tastes like tom yom soup. Ingredients: wheat flour, palm oil, salt, sugar and CMC, soup base ingredients, kaffir lime leaf powder, lemongrass powder, sugar, MSG, chili paste, chili powder, palm oil and artificial shrimp flavor. Net Weight 2.10 oz. Product of Thailand.

Tom Yum Mama with Egg and Celery

I don’t recommend instant noodles as an everyday food for anyone. I am sharing them with you today because they tell a story about how what we eat is affected by economics, politics and environment factors. Instant noodles often serve as temporary foods to alleviate hunger. For many people, sometimes hunger is real. There are proteins that you can add to your noodle soup such as ground pork or beef, shrimp, and egg. For vegetables, the options are choy sum, bok choy and bean sprouts. For the herbs, Kaffir lime leaf, lemongrass, cilantro and chives.

Tom Yum Mama Noodles

ต้มยำบะหมี่มาม่า

Tom Yum Bamee Mama

Serve: 1

Cooking Time: 7 minutes

1 package Mama Noodles Tom Yum Flavor
1 egg
1 rib or stalk Chinese celery or celery heart, chopped (use both leaf and stalk)
1/2 lime, cut into two wedges
1/2 teaspoon chili powder, optional
 

While bringing 1 cup water to a boil in small pot on high heat, open a package of instant noodles and the seasoning packet, and chop the celery. When the water comes to a boil, add seasonings and stir, then add the noodles. Cover, and let cook for 2 minutes. Stir the noodles to loosen them and make a well in the center. Crack the egg and drop it into the center. Cover and let the egg poach in the liquid for 1 minute. Stir in half of the celery and the juice from one lime wedge. Garnish with remaining celery, lime wedge, and chili power if desired. Enjoy immediately.

© 2013  Pranee Khruasanit Halvorsen
I Love Thai cooking
Pranee teaches Thai Cooking classes in the Seattle area.
Her website is: I Love Thai cooking.com 
 

Read Full Post »

Quail Eggs, Please

ไข่นกกระทาครับ

Quail Egg - ไข่นกกระทา

Quail Egg – ไข่นกกระทา – Khai Nok Krata

When I was in Phuket last month, on my way to Talad nad – ตลาดนัด – an open air market, my friend’s son asked me to get him some hard-boiled quail eggs please: “Khai Nok Krata Krub” -ไข่นกกระทาครับ. He said it with such expectation, his simple request tickled my fond memory of this petite egg. I loved quail eggs when I was young, just like any Thai kid. On my way back from the Talad Nad, I gave him a bag of a dozen hard-boiled quail eggs. I was glad to find them, afraid that if I had not he might be disappointed. He rolled the egg on the table until its thin shell cracked all around, then pinched the shell to break it and remove it. He popped the whole egg in his mouth with delight. It is a healthy choice for a snack. I could not help but taste one myself when he asked to share with me. I enjoyed the delicious egg with its rich, creamy, mouthful of flavor. Welcome home!

Cook and learn

Cook and learn

Quail eggs are usually served in one of two basic ways: as a 3- to 4-minute hard-boiled egg, or as a sunny side up fried egg. And now you are about to learn to fry quail eggs Thai style. Please enjoy the photos showing a Thai cooking style from a southern Thai fishing village. They are from my trip to Surat Thani in 2011. This technique has a special name: “Khanom Krok Khai Nok Krata” – fried quail eggs in a Khanom Krok Pan, which is similar to a pancake puff or aebleskiver pan. This group of friends was preparing their own healthy snacks on the weekend from chicken eggs and quail eggs in a Khanom Krok pan. They were teaching and learning from each other. I hope this will inspire you to try it at home.

Quail egg cook in Khanom Krok Pan

Quail eggs cook in Khanom Krok Pan

Fried Quail Egg Thai Style

Khanom Krok Khai Nok Krata

ขนมครกไข่นกกระทา

Fried Quai eggs in Khanom Krok pan or ebleskiver

Fried quail eggs in Khanom Krok or aebleskiver pan.

Quail eggs are a delicacy in Western Europe and North America, but in Southeast Asia, quail eggs are abundant and inexpensive. At Talad Nad wet market, you can find fresh quail eggs at the egg vendors, and at the snack vendor you will often find fried or hard-boiled quail eggs ready for you to enjoy. In the Seattle area, fresh quail eggs are available at Asian markets such as Viet Wah or Uwajimaya for $2 a dozen. You can also find them at the Pike Place Market Creamery where a package of 1o eggs from California are $4.75. At University Seafood and Poultry, Washington quail eggs are $6.98 for a pack of 10 eggs.

Yield 10

1 tablespoon cooking oil
10 quail eggs
Maggi sauce and Sriracha sauce

Heat a Khanom Krok pan or Ebleskiver pan on medium-high heat. Use a heat-proof pastry brush to brush the pan with a generous amount of oil. When the pan is hot, crack quail eggs and drop one egg into each hemispherical indentation. Let it cook until the bottom of the egg is crispy, the egg white is cooked, and the egg york is slightly cooked, about 3 minutes. Cook longer if you wish the yolk cooked more. Remove the egg with a metal spoon that fits the size of the indentation. Repeat the cooking until all the eggs are done. Serve with Maggi or Sriracha sauce; use one or two drops of each per egg.

Pranee’s note:  In some cultures, slightly raw quail eggs are preferred. These basic fried quail eggs can be a snack, or incorporated into a fried egg salad, or a side dish to a meal.

© 2013  Pranee Khruasanit Halvorsen
I Love Thai cooking
Pranee teaches Thai Cooking classes in the Seattle area.
Her website is: I Love Thai cooking.com 
 
Follow Me on Pinterest

Read Full Post »

My Candy

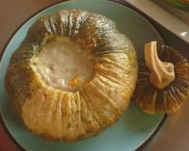
This is not a Halloween Pumpkin Candy, but it is the Thai kabocha candy I enjoyed when I was growing up in my village in Thailand. Kabocha pumpkin is a squash that Thais cook to make a variety of dishes, sweet or savory. It is my tradition for the blog to share a new kabocha recipe with you every year. (Past years’ recipes include Kabocha Pumpkin Soup, Thai Kabocha Pumpkin Custard, Spiced Rum Kabocha Pumpkin Mousse, Pumpkin Curry and my mom’s Stir-Fried Kabocha with Pork.) This year, many aspects led me to choose a recipe for Thai Kabocha Pumpkin Candy-น้ำเต้าเชื่อม–Namtao Chuam. It is easier than a pumpkin pie, with more pumpkin satisfaction as there are not many ingredients involved—just kabocha pumpkin and brown sugar. Thais are fond of cooking fruit or root vegetables such as bananas, kabocha, and sweet potatoes in brown sugar. The results comes out well-covered with caramelized sugar and taste like candy. This technique is called -Chuam – เชื่อม in Thai.

Thai Kabocha Pumpkin Candy

Another reason that I chose this recipe is that in Seattle, fall is the beginning of kabocha pumpkin season. My friend Pee Som Sawan brought Thai kabocha pumpkin candy to the potluck for the first time this year, as she has done every Sunday for the past 10 years. Then another day at a dinner party, I reconstructed my kabocha pumpkin custard with kabocha candy and the custard instead of following the regular recipe. This was because it can be hard to find the small kabocha pumpkin needed for that recipe and the timing was complicated. But most of all, I chose the Kabocha Pumplin Candy recipe for this year because it can be hard to compete with the many food bloggers out there to come with an exotic recipe and I thought what could be better than my Thai grandma’s recipe? So I hope you enjoy this old time, easy and simple recipe that you can prepare at home.

Kabocha Pumpkin Candy

I want to thank to my friend Pee Som Sawan who shared her easy tips for simplifying the cooking technique. She suggested that I cut and lay the kabocha pumpkin slices in a pan that has a glass lid, sprinkle them with brown sugar or any type of sugar, then add enough water to the bottom of the pan to create steam when they cook. My only tip to add is how to find the right kabocha pumpkin for the best results. (Please see Pranee’s tips on selecting a kabocha pumpkin.)

Kabocha Pumpkin Candy

Cover the pan with the glass lid and cook on medium heat until the kabocha is soft and tender when tested with a fork, but still holds its shape. Remove the lid. If there is too much water left, let it cook without the lid until the syrup has thickened. Serve for dessert or as a snack.

Thai Kabocha Pumpkin Candy

Namtao Chuam

น้ำเต้าเชื่อม

Serves: 4

The total time for this dish, including cutting and cleaning and cooking should be about 3o minutes. The cooking itself is about 20 minutes. It is delicious warm or cold, with whatever syrup is left behind in the pan or with salted coconut milk. It tastes so heavenly! Skin and flesh are all good together. It is like a cheesecake with a natural crust. This recipe has sugar to just the right amount. For a more decadent dessert, please add more sugar. Enjoy this any time of day!

3 to 4 wedges of Kabocha pumpkin (see instructions)
1/2 cup brown sugar
2 pinches salt
3/4 cup water
6 tablespoons coconut milk plus 2 pinches of salt, optional
 

Remove any bad skin from the kabocha squash but keep all of the green skin; wash and dry. Cut into wedges about 2 inches wide, then cut each wedge in half across the middle to get two pieces from each wedge. Lay the pumpkin in the bottom of the pan and add the water. Cover with a glass lid and cook on medium heat until the kabocha is soft and tender when tested with a fork, but still holds it shape—about 15 minutes. Remove the lid. If there is too much water left, let it cook some more until the syrup has thickened. Remove the kabocha pumpkin candy to a serving plate and pour the syrup on top. If desired, stir the salt into the coconut milk until combined, then pour it on the top of each kabocha candy as a garnish before serving.

I Love Thai cooking
Pranee teaches Thai Cooking classes in the Seattle area.
Her website is: I Love Thai cooking.com 
 
Related articles

Read Full Post »

The Old Day & The New Way

When I was in Thailand exactly a year ago, I created this recipe – Spicy Thai Coconut Chips. I wanted to create delicious snacks for upcoming cooking demo. At the same time I wanted the flavor to reflect my Southern Thai cuisine, specifically my grandmother cooking. After receiving a reminder to send in recipe from Seattle office, I went to my mom kitchen and cook with my family. This was a same day I wrote and recorded a mystery dish from Southern Thailand – Stir-fried Fresh Grated Coconut with Phuket  Curry Paste.

Stir-fried fresh grated coconut with Phuket red curry paste

It was a perfect day. I was lucky that my sister in-law – Tim was there. After she prepared the old forgotten dish of stir-fried fresh greated coconut with Phuket curry paste, I created new modern dish to reflect this flavor for the new generation. It is not often that I cooked for my family in Thailand. They were impressed seeing a recipe developer at work. I used my grandmother’s favorite spice, turmeric. I added more spice and other ingredients to create the balance of flavor of sweet, sour, salty and spicy. And my whole Thai family was excited with familiar texture and flavor from the coconut chip that was bake in my sister small oven.

Pranee’s Spicy Thai Coconut Chips

I hope you enjoy the step-by-sttep photos and recipes below taken and created in my mom’s kitchen in Phuket, Thailand. Have a great spicy Thai crunches!

Spicy Thai Coconut Chip

Maprow Krop Rod Ped 

มะพร้าวกรอบรสเผ็ดเปรี้ยวสไตล์ไทย

slice fresh coconut with peeler

First sliced fresh coconut with peeler, you may use dried coconut chips in a package. The cooking time may vary. Dried coconut chip is accessible and easy to prepare and it has longer shelve life.

fresh coconut chips

Place coconut chips in a baking sheet.

mix with spicy, salty, sour and sweet

Combine chili powder, turmeric, salt and lime juice in a large bowl or right on a baking sheet.

Spicy Thai Coconut Chips

The clue is crisp and dry and the coconut is almost brown.

1 to 2 teaspoons chili powder
2 teaspoons turmeric
1 teaspoon sea salt
2 tablespoons lime juice
3 cups dried large coconut chips or sliced fresh coconut chips

Preheat oven to 350º F. Line a baking sheet with parchment paper.

Combine chili powder, turmeric, salt and lime juice in a large bowl. Mix in coconut chips and combine well.

Spread coconut flakes in a thin layer on the baking sheet. Place in the center of the oven rack and stir every 4 minutes for 8 to 12 minutes, or until crisp and toasted.

I Love Thai cooking
Pranee teaches Thai Cooking classes in the Seattle area.
Her website is: I Love Thai cooking.com 

Recipe by Pranee Halvorsen, PCC Cooks instructor.  Demonstrated on the PCC Cooks stage at Vegfest 2011. You also can see this recipe from PCC Natural Markets website.

Read Full Post »

From Las Delicias with Love

It was Mother’s Day, May 8, 2011, when I arrived as part of a team of eight gracious women in the Nicaraguan village of Las Delicias. The village is situated in the hilly northern area in the Matagalpa region and is surrounded by coffee plantations. We were there with the organization BuildOn to present  the community with a new school on behalf of many generous donors from the United States.

May 8, 2011, Las Delicias

The welcoming and celebrating event was an indescribably heart-warming experience. It took place right on the grounds of the future school. For the next four days, our host families shared their food, their houses and their children with us and our lives were enriched by their culture, foods and hospitality.

Dinner with Rice, banana and bean

Jacqualee, one of my group members, and I were fortunate to have Thelma and Ricardo and their daughter Helene as our host family. A typical day began around 5:30am with the sound of Thelma’s tortilla-making or the rooster’s cock-a-doodle-doo. Then we would have breakfast at 7am before going to work on the building project with local volunteers. A typical meal for breakfast, lunch or dinner was corn tortillas, rice, bananas, and beans, accompanied by either eggs or chicken.

Jacqualee and I were very excited when Thelma and Ricardo asked if we could teach them the cuisine we ate back home. We happily agreed and I cooked up the menu with Jacqualee. I wanted something practical that Thelma would enjoy cooking for her family and that would use ingredients that were available in her backyard or the local market—forget about Tom Yum Goong and fancy Thai dishes. We decided on Son-In-Law Eggs, Mango Salad and Sweet Rice, Bananas & Beans Wrapped in Banana Leaf.

Banana leaf just right outside

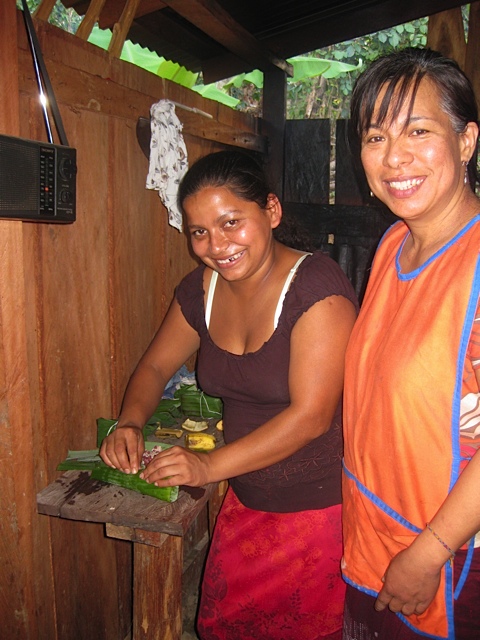
We started with Kao Tom Mud. First Ricardo helped with cutting the banana leaf from the tree which was right outside in their yard. I removed the stems and tore the leaves into pieces 8 inches wide, then cleaned them well with a damp cloth to remove dirt. I only had to show Thelma once how to use the banana leaf for wrapping, then she took over the task with confidence. We made enough of them to give some to her neighbor.

While it was in the steamer, we prepared mango salad and son-in-law eggs. While we were cooking, Danilo, our translator, translated our cooking lesson from English into Spanish. Danilo helped me explain the most important part of Thai cooking was the harmonious blend of the four essential flavors of Thai cooking: sweet, sour, salty and spicy. The sweet was the sugar, the sour available to us was mango and two citrus juices, the spicy was Nicaraguan chili and, the salty was salt and the salty peanut that Jacqualee brought from home. I loved listening to Danilo speaking in Spanish explaining to Thelma about sweet, sour, salty and spicy. It was one of the highlights for me personally and professionally, and cooking for Thelma and Ricardo gave us a chance to thank them for their warm welcome to their home.

Thelma wrapped rice, banana and bean with banana leaf

I have used my recipe below countless times in cooking classes. It is basically a two-stage process. In the first stage, the sticky rice cooks until it has a sticky texture but it is still grainy and raw and is ideal for wrapping around a banana. It is pliable like playdough to form or shape and then it gets wrapped by the banana leaf. The second stage is the actual cooking of Kao Tom Mud, which is generally done by steaming. We steamed the rice and banana all the way through, which can take from 30 to 50 minutes. After 30 minutes of steaming, open one up to check if more steaming time is needed.

Kao Tom Mud

In my Seattle kitchen, I love to put the wrap on the grill or in the oven for the second stage, which is how I teach it in my classes. Now that summer is finally here, I hope that you will enjoy preparing this recipe either in a steamer or on your grill. Banana leaves are easy to find in local Asian markets in the freezer section.

I hope that you will enjoy cooking rice, banana, and beans wrapped with banana leaves. You will feel like you are in the tropical countries of Thailand or Nicaragua.

Kao Tom Mud, Steamed Sweet Rice and Banana Wrapped in Banana Leaf

Sweet Rice and Banana Wrapped in Banana Leaf

Kao Tom Mud 

ข้าวต้มมัด

Servings: 8

2 cups Thai sticky rice, soaked for 3 hours or overnight, and drained
¾ cup coconut milk
¼ cup water
2 tablespoons granulated sugar, optional
1 cup canned black beans, drained, optional
1 teaspoon salt
2 bananas, peeled, cut in half lengthwise and also crosswise to get 4 pieces from each banana
8 (8 X 8-inch) banana leaves or pieces of parchment paper
 
Stir sticky rice, coconut milk, sugar and salt together in a large pan over medium heat. Stir until all the coconut milk is absorbed. Stir in black beans and fold gently to mix.

Divide sticky rice mixture into 8 equal portions. Spread each portion onto a banana leaf, spreading to cover an area 6 by 4 inches, then place a section of the banana in the center. Fold the banana leaf to wrap the sticky rice around the banana.

Then fold the banana leaf into tamale-like envelope and secure both ends with a toothpick that pokes down and then up through the banana leaf. Grill for 5 minutes on each side, or until the sticky rice is translucent and cooked.

Pranee’s note:

If banana leaf is not available, you can use parchment paper. See Pranee’s Grill Sticky Rice in Bamboo Tube Recipe for details.

Pulut Lapa

Image by chooyutshing via Flickr

Read Full Post »

Best Phad Thai on Mahachai Road, Bangkok 

The Golden Mount

Image via Wikipedia

I just returned home from three weeks of savoring Thailand. I still have a little jet lag and a lingering sense of all the flavors from Thailand. My first day in Bangkok was spent with my nieces and nephew who knew the best places to eat in Bangkok. First we intended to go to Thip Samai, but the restaurant was closed. Thip Samai is open evening hours from 5:30pm till 1:30 am, but we were not in luck. Next to Thip Samai is the Lueng Pha Phad Thai restaurant, which is very good. We savored every menu item and were very happy with our lunch—we all know that good Phad Thai can make one happy! We then continued exploring the neighborhood, and decided to walk up to the top of the Golden Mountain Temple, Phu Khao Thong. It was a very pleasant day, cool and sunny, and I spent a good time bonding with my two nieces and nephew.

For Thai foodies, I strongly recommend that when you visit Bangkok, plan to go for more than a week and include Lueng Pha or Thip Samai Phad Thai on your to-do list. They are in a great location with interesting tourist sites nearby such as: San Chao Pho Suea, Sao Chingcha, Kao San Road, and the Golden Mountain Temple.

After having a good time at the Golden Mountain Temple, we were able to enjoy our afternoon visiting San Chao Pho Suea and Khao San Road. Of course, in Bangkok there were plenty of street foods to enjoy. As we walked, we tasted all of the good looking snacks along the way. It was a perfect day and a wonderful first day to welcome myself back home. We joked that it was an  “Eat Pray Love” kind of day.

Please enjoy the video below showing how Phad Thai is prepared and wrapped in an omelette.

Phad Thai Lueng Pa Mahachai Road

Omelette wrapped Phad Thai with Prawns


Phad Thai with Shrimp Fat, Fresh Shrimps and Egg

Phad Thai Lueng Pa (Jao Gao)

Phad Thai Regular without egg, 35 Baht ($1)

Phad Thai Regular with egg, 35 Baht

Phad Thai with Shrimp Fat and Egg, 50 Baht

Phad Thai with Shrimp Fat, Fresh Shrimp and Egg, 70 Baht

Phad Thai , Shrimp Fat, Fresh Shrimp, Wrapped with Omelet, 70 Baht

Additional Egg, 10 Baht each

Thank you for your support


The decor inside the restaurant

Lueng Pha Phad Thai (next to Phad Thai Thip Samai on Mahachai Road, Bangkok)

315/1 Mahachai Road
Samran Rat, Phra Nakhon
Bangkok 10200
Thailand


Read Full Post »

Sticky Rice in a Bamboo Tube, Kao Lam

I have fond memories of sticky rice in a bamboo tube—it looks so cool! At every festival in my village when I was growing up, there was a man who made and sold this Kao Lam. We would eat some at the festival then bring home a few for family members who couldn’t go. It is a perfect take-home food, since it is already packaged in a bamboo tube.

Sticky Rice in a Bamboo Tube, Cambodia

The sticky rice is cooked in a segment of bamboo, the kind that has a thin wall so the heat can penetrate to cook the rice inside the tube. After it is filled with the sticky rice ingredients, the bamboo is plugged with a piece of coconut husk wrapped with banana leaf to keep in the steam for cooking the rice. Then the bamboo tubes are placed over charcoal. When it is done, the outer skin of bamboo is removed and a thin wall left behind to protect the rice inside. All Southeast Asian countries have some version of this, and they are all cooked in a similar way. The photo below is from Cambodia. In Thailand this dish is called Kao Lam; in Malaysia it’s Lemang.

Thai Sticky Rice in Bamboo Sticks in Cambodia

If you like sticky rice with mango, you will like Kao Lam, too. I love the fact that when you peel the bamboo away (see photo below), the powdery fiber in the bamboo tube leaves a sheen. The rice comes out shaped like a stick and looks like it was wrapped in edible paper. The vendor in my village usually made three varieties: white sticky rice, black sticky rice, and white sticky rice with black beans.

How to open the bamboo tube

In America you can find cooked sticky rice that comes straight from Thailand in the frozen food section in Asian markets. But I would rather you try my sticky rice recipe below. I wrap it up in parchment paper, roll it into a cylinder, and bake it. It is delicious, has a very nice texture, and is as satisfying as the original.

During the summer of 2010, I taught Grilled Sticky Rice with Black Bean and Banana Stuffing in a Banana Leaf (Kao Neow Mad) in my Thai Grill class. Organizing my photos from my recent trip to Cambodia led me to this project, a Kao Lam version baked in the oven. It is not easy to cook sticky rice in a bamboo tube—only a few experts from each Thai village know how. Last August I created this adaptation, wrapping and rolling the sticky rice in pieces of parchment paper and then baking them. The results were good. It was easy, and the flavor and texture were satisfying. Then I made a lot of them in small packages and even put some in the freezer. I microwave them or reheat them in the oven and eat them for a protein snack before teaching my classes. In Thailand, most farmers eat sticky rice before working in the rice field.

Baked Sticky Rice and Black Bean Wrapped in Banana Leaf

Kao Neow Yang

Serveings: 8

2 cups Thai sticky rice, soaked in water for 3 hours or overnight, then drained (see note)
¾ cup coconut milk
¼ cup water
2 tablespoons granulated sugar, optional
1 teaspoon salt
1 cup canned black beans, drained
8 (8×8) inch pieces of banana leaves or parchment paper

Preheat oven to 350°F.

Stir sticky rice, coconut milk, water, sugar and salt in a large pan over medium heat. Stir until all coconut milk is absorbed. Stir in black beans and fold gently to mix.

Put equal amounts of the sticky rice mixture onto 8 banana leaves. Form the rice into a cylinder about 6″ long and lay it in the center of the leaf so that you have about 1 inch left on either end. Fold the banana leaf in half around the rice, then roll it around the cylinder; fold in both ends and secure them with a toothpick, poking down and then up, or you can twist the ends and tie them. When you are done, each bundle will make a round tube about 6 inches long and 1 to 1 1/2 inches in diameter. Grill for 5 minutes on each side until the sticky rice is translucent and cooked, or bake in the oven for 10 minutes.

Pranee’s note:

In Thailand, recipes generally use one of two types of rice: jasmine rice or Thai sticky rice. The starch in rice is made up of two components, amylose and amylopectin. Jasmine rice has more amylose than amylopectin, giving it a puffy appearance, whereas Thai sticky rice has more amylopectin than amylose, creating its sticky texture. Both white and purple Thai sticky rice are long-grain rices with a firm grain and become sticky when cooked. They are tropical rices, and different from Japanese, Chinese or Mediterranean (Arborio and Valencia) rices, which have a medium or short grain and grow in temperate climates.

© 2010 Pranee Khruasanit Halvorsen
I Love Thai cooking
Pranee teaches Thai Cooking class in Seattle areas, her website is: I Love Thai cooking.com


Outer layer of bamboo tube is removed


Read Full Post »

Ramadan 2010

Follow the Tradition of Thai Muslim Cooking on Phuket Island during the Ramadan

Now

Phuket Chicken Biryani Rice, also known as Kao Mok Gai, is a well known Thai-Muslim rice dish. Southern Thai cuisine gets its distinguished flavor from the neighboring countries of Malaysia and Indonesia. Growing up in Phuket I loved the diversity of our local cuisines. Our family cooked Thai and Chinese cuisines and at the market I enjoyed Thai Muslim cooking. After Persian Muslims settled in Phuket, their descendants took their traditional Biryani Rice and created a Thai variation, Koa Mok Gai. It is cooked for special occasions like weddings or during Ramadan. It is not a common dish to cook at home but most of the time we can purchase it from Kao Mok Gai vendors. If you want to try it when you visit Phuket, stop by an open air market in Bangtao or Kamala.

Phuket Chicken Biryani Rice—Kao Mok Gai Phuket

Over the past 10 years I have stayed in contact with a few chefs from Bangtao and Kamala Village. I learned to cook Kao Mok Gai from Varunee, my Thai chef for the culinary tour in Phuket. Her mom is a renowned caterer among the Muslim population in the Bangtao area. Over the years, I have written down many versions of her Kao Mok Gai.

Kao Mok Gai with Fresh Vegetable, Chile Sauce and Chicken Soup

The other day I wanted an easy lunch, which led to the creation of a quick and easy version of Kao Mok Gai. It took me 10 minutes to make, since I already had the ingredients in the house. It may take you 15 to 20 minutes to prepare the ingredients.

If you have an old-style rice cooker that is easy to clean, I recommend using that. Otherwise place everything in a Pyrex 9″x13″ pan and cover neatly with foil, bake in an oven at 350F for 25 minutes and let rest for 10 minutes before removing the foil and serving.

Phuket Chicken Baryani Rice

Kao Mok Gai

Serves: 4 to 6

Active Time: 10 minutes

2 cups jasmine rice, basmati rice, or any long grain rice
2 1/2 cups water or chicken broth
1 tablespoon fried garlic or shallot, plus 1 tablespoon for garnish
1 tablespoon canola oil, garlic oil or shallot oil
2 tablespoons Madras curry powder
1 tablespoon lemongrass powder
1/2 teaspoon galangal or ginger powder, optional
1 bay leaf
6 pieces fried or baked chicken
 
Rinse the rice and drain, put in a rice cooker with water, fried garlic, canola oil, curry powder, lemongrass powder, galangal powder and bay leaf. Mix well and place cooked chicken in the center of the rice cooker, cover, turn on rice cooker. It takes about 30 minutes to cook and then let it sit for 15 more minutes before serving.
 
Serving suggestions:

Buffet Style: Place rice and chicken on a nice platter and garnish the top with fried garlic or shallot. Served with condiments suggested below (please also see photo).

Individual serving: One cup rice, 1 piece chicken, garnish with fried garlic served with condiment and sauce.

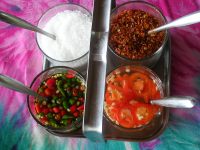
Condiments: Sweet chili sauce, sliced cucumber, sliced tomato, cilantro and green onion.

Thai Vegetarian Option: Saute shiitake mushroom, fried firm tofu, raisin and cashew nut. Thai Cooking for Kids Gluten-Free Recipe


Then

Here is a famous Kao Mok Gai prepared by Varunee’s mom for 250 children. I hosted this event for school children at the Kamala Beach School 6 month after the Tsunami. We served the food at the temporary kitchen in July 2005.


Pranee with Mama Boo, July 2005


Kao Mok Gai, Lunch for Kamala School Students July 2005

© 2010  Pranee Khruasanit Halvorsen I Love Thai cooking

Pranee teaches Thai Cooking classes in the Seattle, Edmonds, Redmond, Issaquah, Lynwood and Olympia areas. Her website is:  I Love Thai cooking.com 
 
To learn more on the history of Biryani Rice: http://en.wikipedia.org/wiki/Biryani

Read Full Post »

Som Tum, a Green Papaya POK POK 

Som Tum - Thai Green Papaya Salad

Pok Pok is the sound made when a wooden pestle hits a clay mortar. This is a classic sound in the green papaya making process and it is a familiar sound for Thais and tourists alike because Som Tum vendors are everywhere in Thailand. When I teach papaya salad recipes, I make sure to carry my clay mortar and wooden pestle with me to my cooking classes in Seattle, Lynwood, Edmonds and even Portland. I feel that it is important for students to understand the cultural and traditional aspects of  Thai cuisineFor me, making and eating green papaya salad is a cure for homesickness. But is not easy to find green papayas outside of Thailand, so sometimes we have to improvise.

Shredded Green Papaya and Carrot for Som Tum

Carrots are always a great substitute when fresh green papaya is not available. My first experience eating Som Tum made from other vegetables besides green papaya was when I was traveling in Switzerland and France visiting friends and relatives.

In Seattle you can find green papaya everyday at the Asian markets, but at farmers market events in Washington I always enjoy making Som Tum with various farm fresh vegetables. And I am always delighted that it still makes a great impression on everyone. First the Pok, Pok sound, then the flavors of chili-lime and peanuts dressing that make all fresh salad tastes so good. My favorite vegetables and fruits for this recipe are carrots, kale, green apples, green mangos, green beans and cucumbers.

Som Tum – Thai Green Papaya Pok Pok

Yesterday I was making special version of Som Tum for a Pike Place Market Sunday Event. I combined Som Tum made from local carrots and kale with cooked rice noodles and smoked local King salmon. Combining Thai and northwest flavors together using a mortar and pestle produced a delicious dish.  Let’s cook with the Thai rhythms!

Please also see Pranee’s Somtum Recipe featured in Seattle Times, Pacific Northwest Sunday Magazine

SOM TUM PLA SALMON

Green Papaya Salad with Smoked Salmon and Rice Vermicelli

Servings: 4
 
3-6 garlic cloves, peeled
5 Thai chilies, whole
2-3 tablespoons palm sugar or brown sugar
6 tablespoons dry roasted peanuts
3 tablespoons fish sauce
3 tablespoons lime juice
¼ lime, cut into 4 small wedges
8 cherry tomatoes, halved, or 2 large tomatoes cut into wedges
½ cup green beans, cut into 1 inch lengths
2 ounce smoked salmon, sliced, about ¼ cup, divided
2 cups shredded green papaya, carrot, cabbage, kale or any fresh vegetable
1 cup rice noodles or rice vermicelli, cooked using the instruction on the package

To make a dressing, use a wooden pestle to crush garlic, chilies, palm sugar and 1 tablespoon roasted peanuts in a clay mortar until it forms a paste. Stir in fish sauce and lime juice with pestle in circular motion until blended.  With pestle, gently mix in lime wedges, tomatoes, string beans, half of the smoked salmon and shredded papaya by pushing down the ingredients against one side of the mortar and using a large spoon to lift up on the opposite side. Repeat a few times until well incorporated.  Serve right away with rice noodles and topped with the rest of the smoked salmon.

Cook’s note: If you don’t have a mortar and pestle, here is an easy way to make a salad dressing. Blend garlic, Thai chilies, palm sugar, 1 tablespoon roasted peanuts, fish sauce and lime juice in a blender until smooth. Mix the rest of peanuts, string beans, dried shrimps, tomatoes and green papaya in a salad bowl. Pour the dressing over the salad and gently mix them together by hand until salad is well coated with the dressing.

© 2010  Pranee Khruasanit Halvorsen
I Love Thai cooking

Pranee teaches Thai Cooking classes in the Seattle area. Her website is: I Love Thai cooking.com

Read Full Post »

Corn and Scallion, a perfect pair

On the street corner of Hoi An, sliced scallion is soon ready for making into scallion oil.

The most memorable time for me in Hoi An was getting up to see the sunrise over the Bon River while drinking Vietnamese coffee shortly before heading for the market.  Then I walked along the street, and the scenery was very beautiful. The aromas and sounds were so enlivening and the taste of the food was phenomenal. I tasted many street foods along the streets and took a lot of it back to the hotel so that I could taste more during the day. This is part of the learning, culture and cuisine. Now, as I look at all my photos, I am getting hungry from the taste of foods that I still remember and long for.

I came to love one particularly famous grilled corn dish in Hoi An, Mo Hanh. It is made of grilled corn with scallion oil. You will see pictures of why the Vietnamese are so fond of this dish by the amount of corn on the street of Hoi An.

This slideshow requires JavaScript.

Yesterday, I was grilling corn for a special event at Magnuson Park in Seattle. About 500 people were there. I have 3 flavors for them to choose from: with spicy coconut sauce, jalapeno sweet and sour sauce and scallion oil. They were all a big hit at the event. I am delighted to share grilled corn with scallion oil recipe with you and hope that you will get a chance to enjoy until the last harvest of local fresh corn.

Grilled Corn with Scallion Oil

Serves: 8

1 cup thin sliced green onion, only green part–about 4 green onions
¼ cup canola oil
1 teaspoon sea salt
1 teaspoon sugar
8 ears of corn, peeled

 Pre-heat the grill to medium-high heat.

To make scallion oil or  Mo Hanh, heat canola oil until very hot and drop in green and let it cook for 40 seconds. Stir in salt. Let it sit until cool. Keep well in refrigerator for a week.

Grill corns over high heat 6 to 8 minutes, until some pope with nice brown cornel. When serve, dip each ear in scallion oil. Enjoy while it is warm.

© 2010  Pranee Khruasanit Halvorsen  
I Love Thai cooking

Read Full Post »

February 2010, Old Quarter in Hanoi

Hanoi Confetti Corn from the street of Hanoi Old Quarter

I love writing recipes from my culinary trip in my kitchen because it is like traveling through time.  And I love to travel, so when the journey ended then I was in pain with nostalgia. I missed the places I have been and the friends I have made. Then I decided to revisit the experience by recreating the food of that land. Like what I did last week with this Hanoi confetti Corn here in my kitchen.

This slideshow requires JavaScript.

This year my culinary trip to Southeast Asia started in Hanoi. After the long flight from Seattle and we arrived in the middle of the day.  After checking into the hotel, we headed off to the famous old quarter of Hanoi. No time for jet-lag, and old quarter is a best to start with exciting sight and sound. I already knew which street we wanted to walk, eat and shop. No time to waste we only have two days in Hanoi.

We came across the mobile foods just before Cha Ca Street, and the aroma of scallion oil and corn that caught our attention and find the confetti corn was cooking. Three of us tried to remember the all of the ingredients: cooking oil, corn, green onion, dried small shrimps, fish sauce and sugar. We ordered one and shared it on the street, it was delicious. Every day in Vietnam, the foods we loved consisted of a few simple ingredients put together in a stunningly simple way but the use of fresh ingredients made all the difference. This was a great welcome to the next world leading culinary destination.

Hanoi Confetti Corn with Shrimp Powder

I purchased the freshest local white corn from PCC Natural Market (in Hanoi, it was glutinous corn), shrimp powder is always in my freezer ready to use, I used chives from my garden instead of green onions and the rest of ingredients were staple foods.  I know how to revisit Hanoi again until the fresh corn runs out.

From Hanoi to your kitchen! Bon Appetite.

Hanoi Confetti Corn    

Serves: 4 

3 tablespoons butter 

2 cups corn kernels cut from 3 ears yellow or white corn 

1/4 cup chopped green onion, from 2 green onions or chives 

3 teaspoons shrimp powder, plus 1 teaspoon for garnish 

1 teaspoon sugar, optional –omit when use freshest corn 

1/2 teaspoon chili powder 

1 to 2 teaspoons fish sauce

Heat the butter over medium heat in a large skillet. Allow the butter to melt, add the corn and cook for 5 minutes. Stir in green onion and shrimp powder and chili powder and let it cook for 1 or 2 more minutes. When the corn loses its starch and  stir in fish sauce and serve right away.

© 2010  Pranee Khruasanit Halvorsen 
I Love Thai cooking  Pranee teaches Thai Cooking class in Seattle areas, her website is: I Love Thai cooking.com  
 

Read Full Post »

My very  first breakfast in Yangon.

Yangon Almond Pancake

When I was in Yangon last year I spent my first morning looking for a market near the hotel. It was a street that had many stalls and breakfast type food stands. Everything in Yangon was very exciting for me, as a neighbouring country to Thailand. I found that our culture and cuisine are very different in many ways. The thing that catched my eye most was a lady making an almond pancake on the street. I stood in line and signalled for some almond pancake, the same one that she just did for the customer in front of me.  First she poured the pancake batter in the pan, sprinkled generous amount of almond on top, then she placed a charcoal heater on top. Like baking, the cake actually rise after a few minutes. She then gave it to me in a plastic bag. I ate there on the street. I really loved it, as its almond flavor and texture were very pronounced, crispy, and aromatic.

This slideshow requires JavaScript.

I asked for permission to take picture and I was glad I did and it is helpful to write this recipe. I still remember the flavors, so here I am trying to duplicate the recipe from the memory– Here in Seattle in my kitchen.

I created Honey-Lime Syrup to go with the pancake. In Southeast Asia, it is typical way of using honey-lime for a syrup in a dessert. Also you can simply add more hot water to melt honey and put over ice as a tonic drink. It is very versatile recipe. I like local pure honey. I use “Twin Peaks”  Mountain Honey from Snoqualmie Valley Honey Farm, located in North Bend, Washington. The bees collect nectar from the local wild flowers the scent of the wild flower is present in the honey. You may use any honey.

I want to tell you that this pancake is beyond breakfast. I popped frozen left-over in the toaster this morning, and the almonds on the pancake were very crunchy and delicious with my Vietnamese coffee. I almost cry, I miss Burma.

Honey-Lime Syrup

 Nam Pueng Ruang Manao

Yield: 1/4 cup

 3 tablespoons honey
1 tablespoon hot water
2 teaspoons lime juice
1 drop almond extract, optional
 

Combine honey and hot water in a microwave save small bowl. Heat in the microwave for 15 seconds and stir until uniform. Stir in lime juice and almond extract. Stir really well and set a side. Store in refrigerator up for a week.

Yangon Almond Pancake

Yields: 1 1/2 cup pancake batter

Make: 4 to 6 pancakes
 
1 cup flour
1 tablespoon baking powder
1/2 teaspoon salt
3/4 cup almond meal flour
1 egg
2-3 tablespoons sugar
2 tablespoons melted butter, plus 4 tablespoons to cook pancake
1 1/4 cups milk
1/2 teaspoon pure almond extract
1/2 cup sliced almonds, toasted
 

Sift flour, baking powder and salt twice and place into a large bowl along with almond meal flour. Beat eggs, sugar and butter in a medium size bowl for 30 seconds. Combine with milk and almond extract. Then pour in the flour mixture, fold it gently just to mix.

To duplicate the technique shown in the pictures, I use a heated cast iron pan as a hot lid. Cover the pancake while cooking.

Heat a pancake pan with 1 tablespoon butter on medium heat when melt pour 1/3 to 1/2 cup batter. Sprinkle 2 tablespoons toasted sliced almond on the surface of the pancake, cover with heated cast iron pan and let’s it cook for 3 minutes. It should rise, when the edge is golden, use spatula to lift the pancake to see if it yellow-brown. If it does, it is ready. Flip with spatula to cook another side. It should take about 30 seconds, more or less. Check the same way if it is done. Don’t let the almond burn, it should take about 3o seconds. Repeat the process to make 3 or 4 more pancakes. Serve right away with Honey-Lime Syrup.

Note: I freeze the uneaten pancake by letting it cool, line with parchment paper and put in the zip lock bag. Freeze. Next time around all you have to do is put in the toaster. 

 © 2010  Pranee Khruasanit Halvorsen
 I Love Thai cooking
Pranee teaches Thai Cooking class in Seattle areas, her website is: I Love Thai cooking.com

Read Full Post »

Ten years ago, I developed the best (my students say so) recipe for Phad Thai to teach and share with my students in the cooking class. Because it is a trade secret, I can not share that version with you. However, for my Thai food blog I am in search of Phad Thai recipes from the vendors and restaurant chefs in Thailand. The fascinating thing about Phad Thai is the ingredients. They are different from town to town and region to region. For example, in Korat one of the ingredients is salted soy beans, and in Phuket we use fresh rice noodles, “chow fun”.  I hope you enjoy the discovery of Phad Thai with me.

My first step, I called my sister last week for her contribution to my blog; Phuket Phad Thai. From her e-mail, I copied her Thai barebone recipe down–this is how one Thai gives recipes to another Thai. To make a recipe work, you need to decode, experience, and record the version that you have come up with. Simply follow the principle of balancing sweet, sour, salty, and spicy. When I am done with decoding my sister’s recipe in my kitchen into an American-standard recipe, then I will share it with you in another blog entree. Please don’t wait for me, but try it on your own. I have included a slide show from a street vendor in Phuket taken a few years ago near Chalong Temple in Chalong District, Phuket, Thailand.

ผัดไทย
พริกใหญ่   แห้ง   1         ขีด                  แช่น้ำ
พริกเล็ก           1          กำ          แช่น้ำ
กรเทียม            1          หัว
มะขามเปียก         1           กำ(  แช่น้ำ  ไม่เอาเม็ด)
เกลือ               1              ช้อนชา
น้ำตาล               3            ช้อนโต๊
นำทุกอย่างมาปันรวมกัน       แล้วตั้งไฟเปาไฟ
แล้วตั้งให้เย็น       เก็บในต้เย็น
วิธีทำ
เต๋ากั๋ว หั่นเป็นสีเหลียมลูกเต๋า      แล้ว
ตั้งไฟ   ใส่กุ้ง    เต๋ากั่ว   แล้ว    ตีไข่ผัดกับเส้น   จนเส้นนุ่ม ใส่น้ำผัดไทยวีอิ๋วดำ  นิด   น้ำปลา   น้ำตาล  ออกหลายแล้วตามด้วยถ้วงอก
กุ๋ยฉ่าย

Translation 

Phad Thai 

Sauce
Large dried chili, 1/10 kg, soaked in water
Small dried chili, 1 handful
Garlic, 1 bulb
Tamarind paste, 1 handful, soaked in water
Salt, 1 teaspoon
Sugar, 3 tablespoons
 
Place everything in a blender and blend until smooth. Bring to boil in a pot. When it has cooled down, keep in the fridge.
 

Stir-fry

Heat a wok, add cooking oil, shrimp, tofu, beat the egg to stir-fried noodles until the noodle is soft. Stir in Phad Thai sauce, a little bit of dark soy sauce, a little bit of fish sauce, sugar. Finish the stir-fry with bean sprout and garlic chives.

Phad Thai - Phuket, mobile vendor

Phad Thai Phuket at Chalong Temple

Final touch with bean spout and garlic chive

Note: Rudee Piboon is my sister who owns a wok-fast food restaurant in Thalang Phuket. She is a regular contributor, you will find her recipes and cooking demo at this food blog and the I Love Thai Cooking youtube channel. .

Read Full Post »


Fish Sauce Chicken Wing

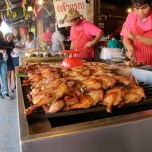
My son loves Teriyaki Chicken and also chicken wing. After eating and inhaling fish sauce chicken wing with sticky rice at the Pok Pok Thai Restaurant in Portland , I decided to create a recipe that is close to my tasting memories. I substituted fish sauce for soy sauce in my own teriyaki sauce recipe created way back. And it works, now everyone loves the fish sauce chicken wings as well. To get a nice even brown, you have to be patient and keep turning the chicken every 5 minutes. Please remember that the high heat can burn the skin quickly due to the brown sugar used in the marinade.   After a few tries, I am happy with the result. Time to get your fingers dirty by eating this dish and  might as well with Thai sticky rice, because that is the best way to eat it.  

Grilled Fish Sauce Chicken Wing  

Gai Nampla Yang  

Yield: 10 wings
4 tablespoons brown sugar
4 tablespoons fish sauce
2 tablespoons dry sherry
2 tablespoons rice vinegar
2 pounds chicken wings, about 10 wings

To make a marinade, stir sugar, fish sauce, dry sherry and rice vinegar in a large bowl until sugar is dissolved. Place chicken wings in a zip-lock bag and pour in marinade. Remove the air from the bag and seal. Let’s it marinated in refrigerator for at least three hours and flip the bag every half hour. Drain well before grilling.Pre-heat the gas grill, then set at medium heat. Grill both side until nicely brown but not burnt and it will take about 20 to 30 minutes.  

Serve with jasmine rice or sticky rice and  Somtum: Thai Green Papaya Salad. Sriracha hot sauce and sweet chili sauce also are ideal dipping sauces for chicken wings.  

© 2010  Pranee Khruasanit Halvorsen  

Read Full Post »

Stir-fried Phuket Hokkien Mee with Choy Sum

PHUKET HOKKIEN MEE RECIPE
Stir-fried egg noodles Phuket style

Serving: 1
Prep Time: 15    Cook Time: 5 minutes

On Chinese New Year Day, I always enjoy Phuket Hokkien Mee – an egg noodle dish similar to stir-fried chow mien.

In America, I use Miki noodle or yakisoba. For this recipe you may use any fresh egg noodles but I prefer ones the size of spaghetti. For vegetable choices, select a combination of mixed vegetables that you like, personally I love Choy sum or Chinese broccoli. For meat choices, substitute pork and/or seafood combination for tofu and mushrooms.  To serve, I always enjoy eating it with chopsticks and a little kick of Sriracha hot sauce.

3 tablespoons cooking oil
1 garlic, minced
¼ cup sliced pork
¼ cup sliced pork liver, optional
3 shrimp, peeled and deveined
1 cup egg noodles, yakisoba or Miki noodles
1 cup cut Chinese kale or Choy Sum
2 teaspoons dark soy sauce
2 teaspoons light soy sauce
½ cup chicken broth
1 teaspoon sugar
A dash of white pepper powder

Heat a wok or cast iron pan over high heat; add canola oil. Stir in garlic, sliced pork, pork liver and shrimp. Continue to stir until the meat is almost completely cooked, then stir in egg noodles, Chinese broccoli, and dark soy and light soy sauces. Stir for 10 seconds, then add chicken broth. Stir and continue to cook until the broth is almost absorbed.  When the sauce has reduced to ¼ cup, add the white pepper powder. Place in a noodle bowl and serve with chopstick and spoon.

Vegetarian option: omit meat and substitute it with 1/4 cup cut extra firm tofu and 1/4 sliced brown button mushroom

Gluten-Free option: use wheat free soy sauce and rice stick or rice vermicelli instead of egg noodles.

© 2009  Pranee Khruasanit Halvorsen
I Love Thai cooking

Read Full Post »

Pranee's Banh Mi

My obsession for food this week is all about Banh Mi, a lucious Vietnamese baguette sandwich filled with meats, crunchy pickled veggies, herbs, mayo and heat from chilies. It’s the product of the French influence on Vietnamese culture at its tastiest.

As much as I have heard about Banh Mi and sampled it in Seattle Vietnamese sandwich shops, my real love affair with Banh Mi began less than a year ago in the Banh Mi home city of Saigon. I still remember the experience vividly – I was on a mission to find the best Bahn Mi in town. Late at night and by myself, after managing to get lost a few times, I was finally munching my sandwich on the street corner while watching a wave of motorbikes flow by. It was a blissful culinary moment.

I admit to not being much of a sandwich fan – with the exception of a French baguette – but everything about this Vietnamese sandwich and its explosion of flavor was perfect – the aroma of fish sauce and vinegar, the texture of cucumber, carrot and daikon, piles of savory meat and pate on light, crusty bread. I fell in love at first crunch.

Now back home in Seattle, I have made many versions of Bahn Mi, as I continue to create recipes for my Vietnamese cooking classes. By chance, the one I prepared today in my kitchen was the closest in taste to the ones I had in Saigon. And I included my own special ingredient – Washabi mayonnaise. Let’s keep it a secret between us!

Next time, you’re wanting to expand your Vietnamese culinary horizons, search out a Bahn Mi sandwich shop and enjoy.

Banh Mi, unstacked by NY Times

Read Full Post »

Cilantro, also known as coriander, is a key ingredient in Thai and Southeast Asian cooking, especially the cilantro root.Thai cooks treasure the roots and in Thailand cilantro is always sold with its roots.The root is very aromatic and has lots of flavor when cooked. It’s a precious ingredient—a treat among herbs—and an important ingredient in curry paste, marinades and meat stir-frys. When the root is not available, substitute four stems for one root. Try the recipe featured below for an opportunity to experience the unique flavor and fragrance of cilantro root.

Kratiem Prik Thai Goong – กระเทียมพริกไทยกุ้ง

Goong Kratiem PrikThai
Sautéed Garlic Prawn Recipe
Servings: 8
Preparation Time: 15 minutes   
Cooking Time: 5 minutes

These garlic prawns have a peppery accent and are an astonishingly easy-to-prepare crowd pleaser. The first six ingredients in this recipe make a classic spicy Thai marinade paste. You can use it to create many simple dishes by using it as a marinade for chicken or a spicy paste for chicken or pork patties. For best results, grind the marinade paste using a mortar and pestle. Otherwise, use a small food processor.

½-1 tablespoon black peppercorns
¼-½ teaspoon salt
10 cloves garlic, finely minced
3 cilantro roots or 5 cilantro stems
3 tablespoons light soy sauce
1 teaspoon brown sugar
32 prawns, peeled and deveined
5 tablespoons cooking oil
Cilantro and lime wedges for garnish

In mortar, place black peppercorns, salt, 5 cloves of garlic and cilantro roots; pound with pestle until it becomes a paste. Stir in light soy sauce and brown sugar to make marinade sauce. Pour the marinade sauce over prawns and mix well. Set aside. In a frying pan, fry remaining garlic until golden yellow; remove and set aside. In the same frying pan, fry prawns until cooked. Place prawns on a serving plate and garnish with fried garlic and cilantro leaves. Serve lime wedges on the side.

 
© 2009  Pranee Khruasanit Halvorsen
I Love Thai cooking
 

Read Full Post »