Feeds:
Posts
Comments

Archive for the ‘Thai Gluten Free Recipe’ Category

Under a Tamarind Tree

Tamarind branches provide shade for animal and people

The tamarind tree (Tamarindus Indica L) is a large tree that can grow to be 80 to 100 feet tall. Native to Africa, it was introduced to Southeast Asia and South America where it is now well established. From India to Myanmar, Thailand, Laos, Cambodia, Vietnam, Philippine, Malaysia and Indonesia, tamarind trees play a significant role in Southeast Asian cuisine and culture. I have been fortunate to have traveled to Malaysia, Laos, Myanmar and Vietnam and have seen how our cultures and cuisines have evolved in almost the same ways around tamarind trees and their fruit.

young tamarind leaves

The tamarind tree bears leaves and flowers that can be cooked like vegetables.

Tamarind pods

When the fruits are green, we snack or pickle them. The mature brown pods are made into a candy or kept for cooking. My grandmother loved adding a young tamarind leaf to her fish soup, and she also cleaned her brass ware with tamarind until it was shiny and pinkish. When I was young I loved playing with tamarind flowers. They were small, but have a beautiful orchid-like flower. The wood from tamarind tree is perfect for making a butcher block or cutting board. And most importantly of all, the large tamarind tree provides shade and a social gathering place during the day.

Shops under tamarind tree, Myanmar

One of the first things you will want to learn about cooking with tamarind is how to turn a dry tamarind fruit paste or fruit pulp into a concentrate form that is ready to use in daily cooking. You won’t have any problem finding tamarind paste to buy;  it is abundant in Asian and Latino markets. In southern Thailand we use tamarind concentrate in dipping sauces, sorbets, salad dressings, chutney, beverages, peanut sauce, stir-fry sauce, curry, soup, and any dish that needs a gentle acidic flavor to heighten it. You can also find new ways of your own to use this fruity, acidic concentrate; below are several photos of dishes from my hometown to give you ideas.Tamarind is one of the ingredients in Worcestershire sauce, but there is not a perfect substitute for it as the fruity flavor of tamarind is so unique.

Tamarind Fruit is a Heart of Southeast Asian Cooking

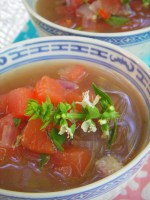
Chicken Soup with Tamarind Added for Sour Flavor

Above is my home town spicy soup similar to Tom Kha Gai (chicken sweet and sour soup with galangal and coconut milk). Tamarind gives the soup a nice gentle sour and refreshing taste.

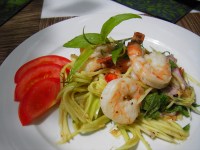
Pomelo Salad with Prawns, Fried Shallots and Tamarind Dressing

Tamarind concentrate is used in salad dressings to add a nice layer of flavors to a fruit salad. When combines with palm sugar, it provides a sophisticated  balance to the flavors.

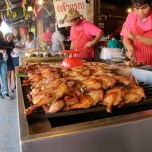
Grilled Jackfish with Phuket Tamarind Sauce

Phuket’s signature tamarind sauce (Nam Jim Makham) for grilled jackfish over charcoal husks.

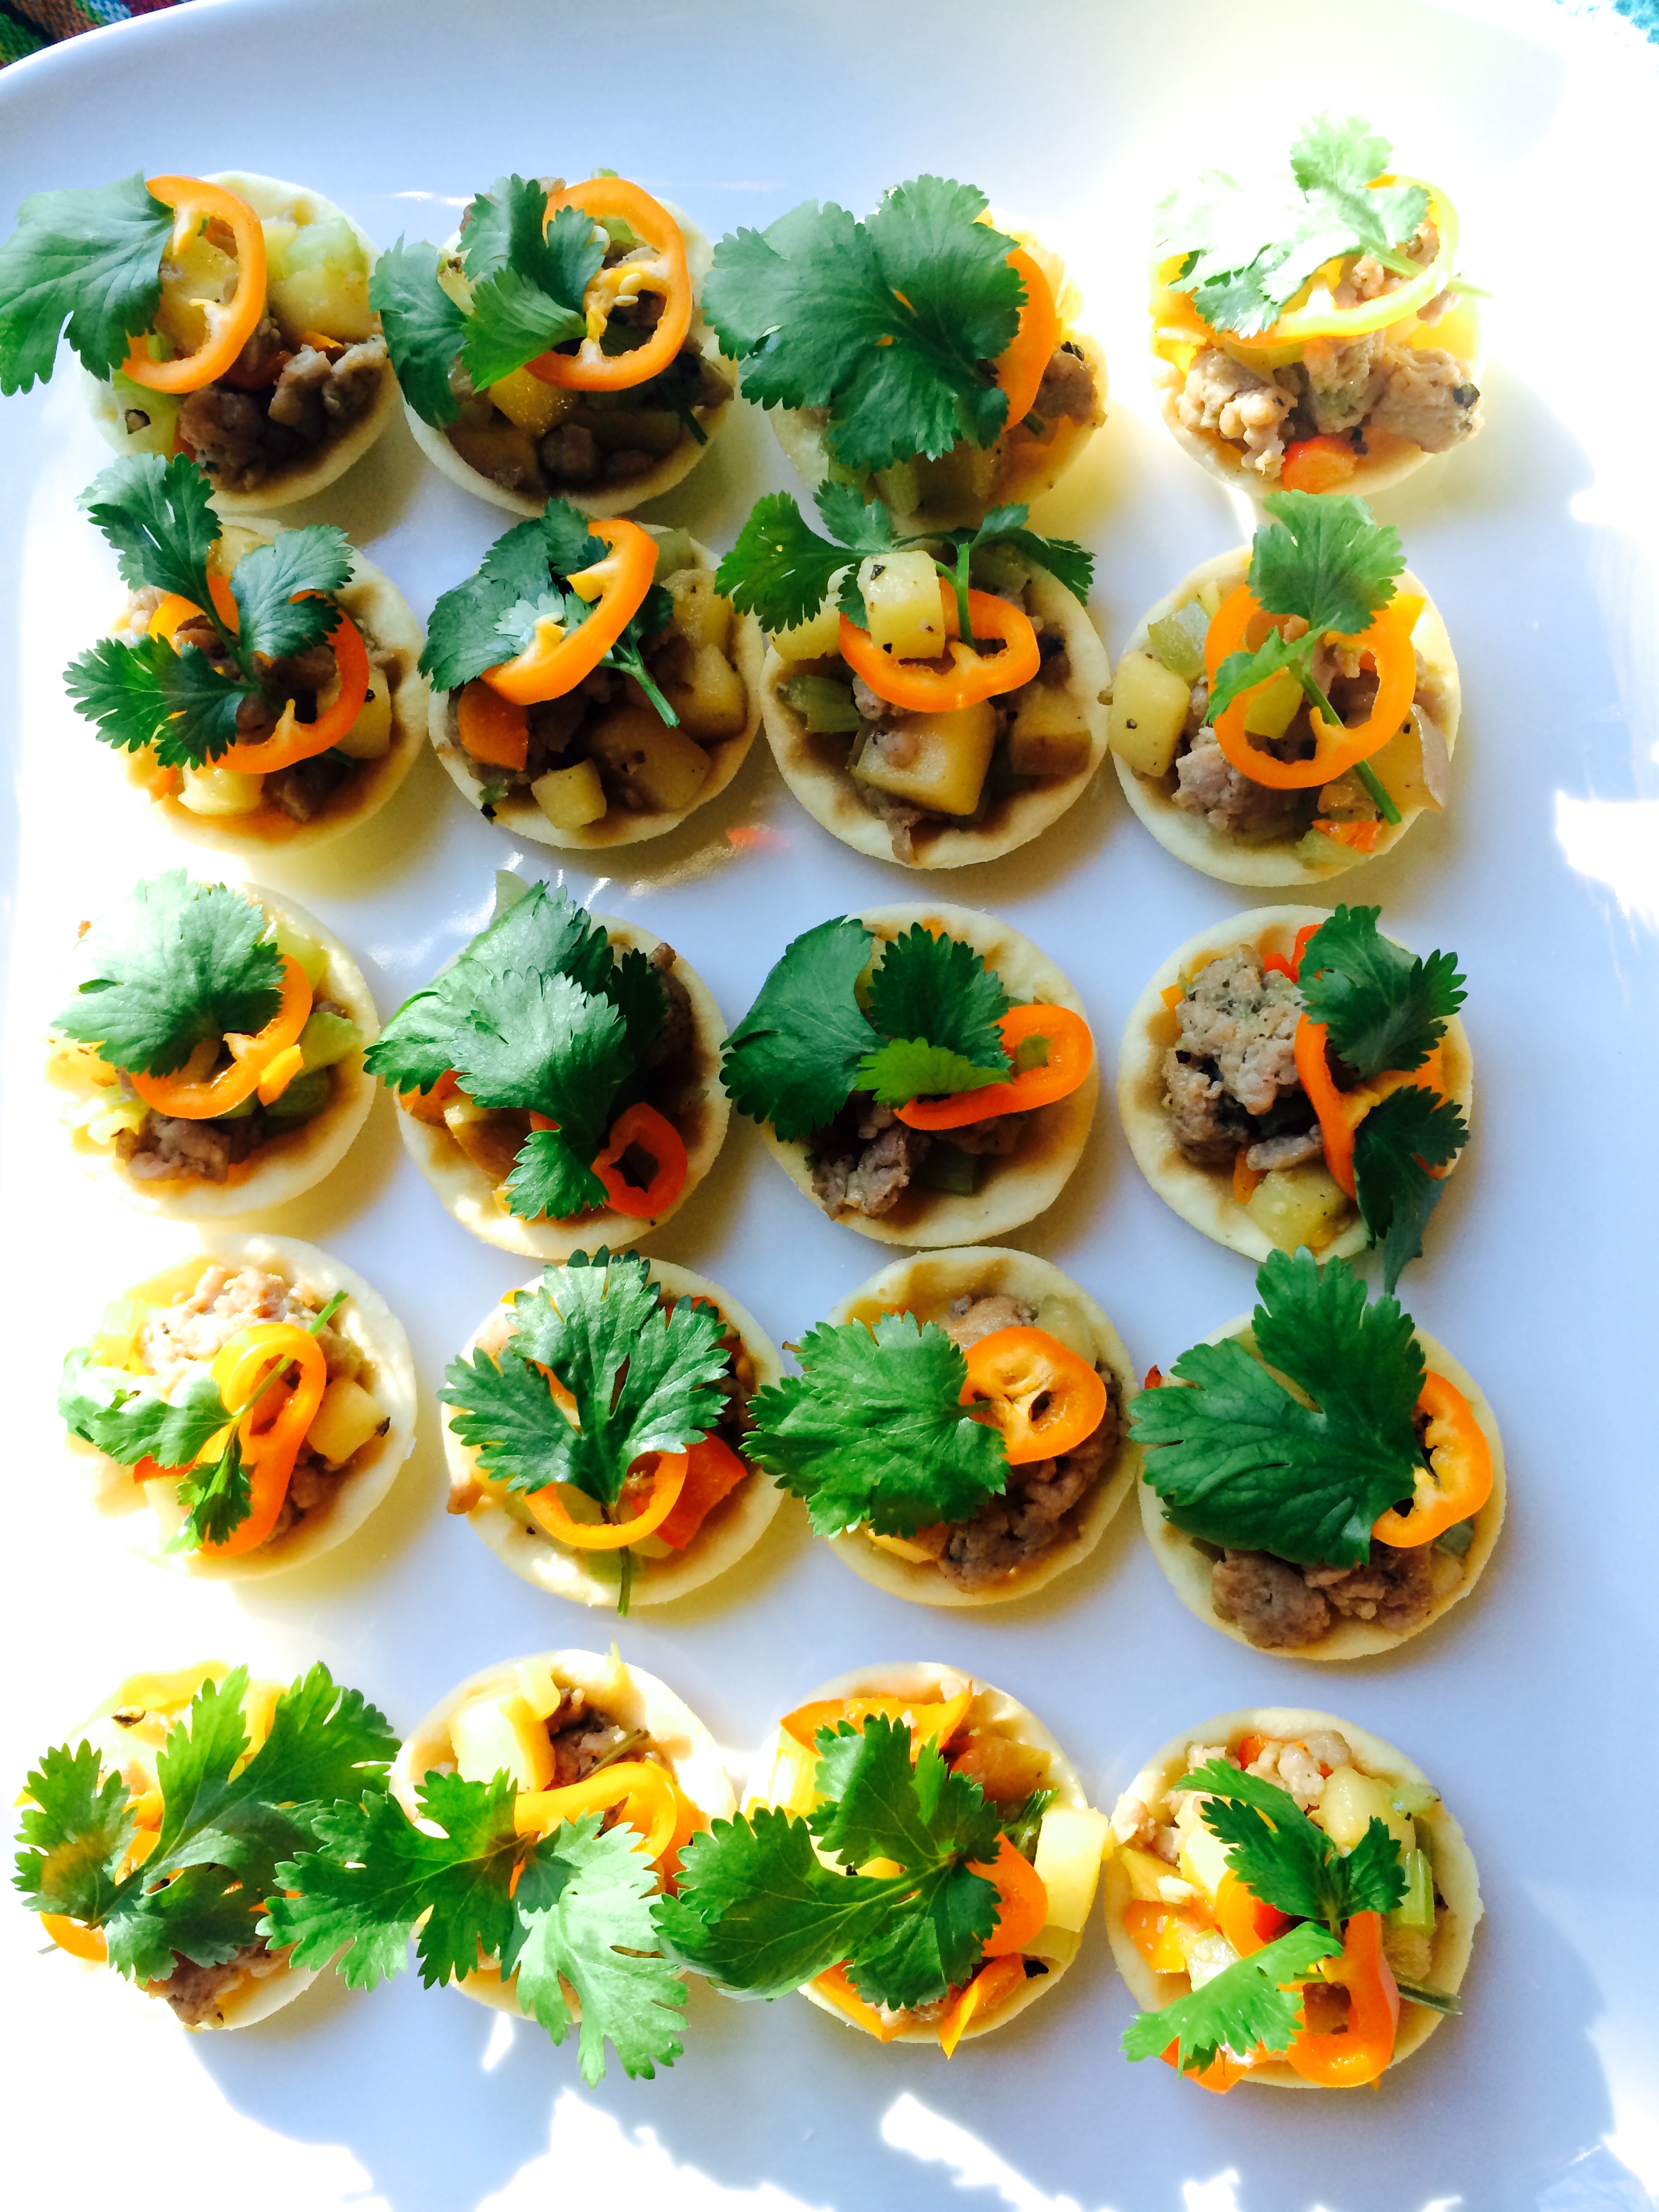
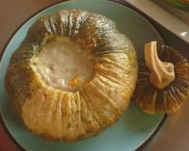
Kai Leuk Koey - Son-in-law eggs

The famous Thai Kai Look Keuy, Son-In-Law Eggs, has a well-balanced, gentle and fruity sour taste from tamarind, the sweet of palm sugar, a highlight of fish sauce, and the excitement of a few pinches of chili powder. It also has umami—or savoriness—one of the five basic tastes together with sweet, sour, bitter, and salty.

Phad Thai with Tamarind Sauce

Tamarind concentrate is an important part of Phad Thai, the renowned dish of Thailand. We can’t call it Phad Thai without tamarind concentrate!

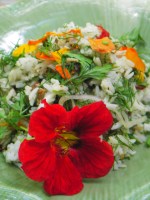
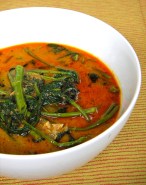
Sour Curry Prawns with Cha-Om Omelette

Sour curry is a non-coconut curry soup.  Tamarind is an important part of the fish broth that gives the sour curry fish or seafood a harmonious balance. It’s flavor profile combines fruity, sour-sweet, and spicy.

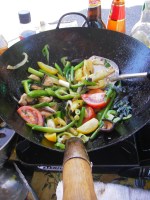
Stir-Fried Prawns in Tamarind Sauce

 Stir-fried prawns with tamarind sauce is another signature dish from Phuket.

Tamarind Candy from Thailand

Tamarind Fruit 

Makham มะขาม

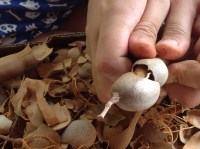
Thailand ranks first in the world in the production of Tamarind and has the largest tamarind plantation in the world. Tamarind fruits resemble brown, flat, fava beans. When ripe, the fruit has a long, dark-brown pod with 5 to 8 seeds. Remove the shell, vein and seeds to get the dried and sometimes sticky fruit flesh. It will stay fresh for a year.

Two varieties of tamarind from Thailand are available in the US markets. One of them is the sweet variety, which you seldom see. It comes in a beautiful box with many good looking brown pods that you can crack open and eat like any dried fruit. It has a sweet fruity taste, reminiscent of dried apricots.

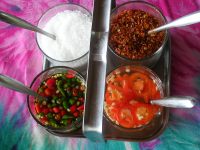
Tamarind pods, tamarind concentrate and tamarind paste

The sour variety of tamarind is the most common and the most important for Thai and Southeast Asia cooking. It is available in Asian markets either as a package of dried fruit in a 16-ounce rectangular brick, or ready to use in a plastic jar. The three forms of tamarind are shown in the photo above.  The dried fruit form give a purer sour flavor and doesn’t need refrigeration. The concentrate form must be kept in the refrigerator or freezer until ready for use. There is no best substitute for tamarind.

How to make a ready-to-use tamarind concentrate

Nam Makham

น้ำมะขาม

Yield: 2 cups

8 ounces tamarind flesh, about half of a 16-ounce package
2 1/2 cups boiling water

Place the chunk of tamarind into a large bowl, then pour boiling water over it and let it sit until the water is cool enough to handle. Massage and squeeze the tamarind in the water with both hands so the water and hands rub the tamarind to make a thick concentrate; the pulp and liquid should resemble a thick soup. Strain liquid though a large sieve into a medium pot. Squeeze the tamarind to get out all of the liquid, then discard the solid. Bring the strained liquid to a boil and cook for 2 minutes. Store and keep in refrigerator for two weeks, or in the freezer for 6 months.

Pranee’s note: To be safe, I recommend only using Tamarind grown in Thailand in my recipes.

© 2011 Pranee Khruasanit Halvorsen
I Love Thai cooking
Pranee teaches Thai Cooking classes in the Seattle area.
Her website is: I Love Thai cooking.com .

Read Full Post »

Eat Like a Local

Papa Seafood Restaurant, Laem Sing, Phuket, Thailand

Stir-fried Blue Crab with Black Pepper – ผัดปูม้ากับพริกไทยดำ

It was less than a month ago that I was at Laem Sing, Phuket, soaking up the warm sunshine before leaving for Seattle. Laem Sing is my favorite beach for getting away for a half day—or all day—to just hang out on the beach with nature and good Phuket seafood. Typically one should visit early enough to choose the best location among the sun loungers that are lined up along the beach. The sun lounger will cost 50 to 100 baht ($2 to $3), which is paid to the owner of the restaurant in front of which the sun lounger sets. It also means that you should order food and drink from that restaurant as well. That’s how I came to know Papa Seafood Restaurant, as I make sure to visit Laem Sing each year. This is a private beach but it is open to the public. It is located on the northwest coast of Phuket on Millionaire Road between Kamala and Surin Beaches.

Pay for parking (40 baht) near the road, then walk down the hill to this quiet beach.

Laem Sing Beach

At Papa Seafood Restaurant, the seafood is purchased fresh each day and the menu is full of mouth-watering dishes—from local Thai seafood favorites to a few western dishes for those who prefer western comfort food such as sandwiches. The drink menu has a long list of tropical smoothies and other beverages that can keep you hydrated throughout the day.

As my eye glanced over the menu, I began to wonder about the possibility of taping the cooking at the restaurant to share with my students and Thai foods fans. Never afraid to ask, I found that the cook didn’t mind me taking photographs and video. I hope that you will enjoy the video on Stir-fried Blue Crab with Black Pepper recipe and that it will help you to duplicate this dish at home. If you get a chance to visit Phuket, please check out Laem Sing Beach and stop by Papa Seafood Restaurant. From Laem Sing Beach to your kitchen!

Stir-Fried Blue Crab with Black Pepper Recipe

Phad Phu Ma Kub Prik Thai Dum

ผัดปูม้ากับพริกไทยดำ

I grew up in the southern region of Thailand eating two kinds of crab: a rice-field crab (Phu Dum) and blue crab (Phu Ma), which is the most common crab caught in the Indian ocean. My family’s favorite ways to prepare the blue crab are either to steam it and serve it with a lime-garlic dipping sauce, or to stir-fry the crab with black pepper and green onion. Blue crab is so sweet and delicate in flavor, the cooking is best when it is simple with few ingredients. I love stir-fried blue crab with black pepper and the contrast of the sweet, juicy, fresh crab and the excitement of crushed black pepper. Kin Hai Aroy! Bon Appetite!

Serves: 2

Cooking Time: 5 to 7 minutes

3 tablespoons cooking oil
2 tablespoons garlic 
1/2 onion, sliced
4 Thai chilies, cut in half
2 blue crabs, cleaned and cut into large pieces
2 tablespoons black peppercorns, crushed
2 teaspoons oyster sauce
1 teaspoon sugar
2 teaspoons soy sauce
1/2 cup water or more as needed
1/2 tomato, sliced
1/2 cup Chinese celery and green onions cut into one inch length 
 
Heat the wok on high heat and stir in onion and chili; stir back and forth until fragrant, about 30 seconds. Then stir in blue crab and let it cook for 2 minutes. Stir in black pepper, oyster sauce, sugar and soy sauce. Stir well, then add water and let it cook until the crab is completely pink in color and the crab meat is opaque, not translucent. It takes about  3 to 5 minutes for the crab meat to cook.  Add more water in between to make a good amount of sauce but not too watery. Last, stir in tomato, Chinese celery and green onion and continue stirring for 30 seconds. Serve right away with steamed jasmine rice.

Credit: Papa Seafood Restaurant

Laem Sing, Phuket, Thailand

© 2011 Pranee Khruasanit Halvorsen  
I Love Thai cooking 
 Pranee teaches Thai Cooking classes in the Seattle area. Her website is: I Love Thai cooking.com . 
 
Related articles

Read Full Post »

Are Winter Squash Leaves Edible?

I enjoyed the Seattle sun last Wednesday at the Columbia City Farmers Market along with the delicious food from the stalls. I purchased a few fresh vegetables from various farmers and, like always, a bunch of winter squash leaves from a Hmong farmer’s stall. This time the squash leaves prompted me to cook and share with you a recipe from my Thai kitchen: how to cook winter squash leaves –Yod Namtao – ยอดน้ำเต้า.

Winter squash leaves are edible. In fact, all parts of squash family plants are edible, from leaves to stems, flowers, fruit, skin and seeds. The young leaves and stems are shown in the photos above and below. These edible greens become available when a farmer cuts back the leaves on a plant in order to encourage it to produce fewer but larger fruits. Winter squash leaves are popular in rustic-style cooking in Southeast Asia and they are great sources of fiber and other nutritional benefits.

Winter Squash Leaves and Blossoms - my visit to Hoi An Market 2009

Though they may feel a little rough to the touch, the young leaves from winter squash have amazing flavors when cooked. They have a  spinach-like texture, but are richer and denser with a bite to it in flavor. Like any leafy green vegetable, you can stir-fry, steam or stew them. In my kitchen, I either blanch them in salted coconut milk or saute them with butter, then add water and chicken stock and cook them down until the leaves are softened but not mushy, about 5 minutes. Last year I made a winter melon leaves stew with dried fish and shallots using a Hmong farmer’s verbal recipe. It was similar to my Watermelon Rind Soup and made a delicious vegetable stew.           

Winter squash leaves are only available in the summer and only at the Hmong farmers’ stalls. Because of this limitation, I never fail to purchase a bunch of winter squash leaves each visit to the market. Supporting the Hmong farmers also helps me to ensure that there will be a continuing supply due to the demand. When you get a chance, please pick up some winter squash leaves at a Seattle Farmer Markets near you and give them a try.

This slideshow requires JavaScript.

Winter Squash Leaves Boiled in Salted Coconut Milk

Yod Namtao Luak Kati

ยอดน้ำเต้าลวกกะทิ

Winter Squash Leaves in Salted Coconut Milk

One bunch of winter squash leaves weighs about a pound. After removing all of the twine holding them together and the hard stems, the soft edible part weighs about six ounces; the rest goes into a compost. If I have time, I use a peeler to remove the rough skin on the stems then cook the stems down until they are soft, about 8 minutes.

There are many ways to prepare winter squash leaves, but blanching or boiling them in salted coconut milk produces my favorite quick and easy side dish. This same method can also be used with many other leafy green vegetables, which can then be served with Thai Chili Dip. You will be surprised how the flavor of winter squash leaves and leafy green vegetables are complimented by just a little coconut milk and salt.

 
Serves: 4
Cooking Time: 5 minutes
 
6 ounces winter squash leaves (see preparation above)
1/4 cup coconut milk
1 cup water
1/2 teaspoon plus 2 pinches salt

Bring coconut milk, water and salt to a boil on medium-high heat. Then add the squash leaves, using tongs to turn them around to make sure they are all cooked in the liquid—like blanching the leaves in a coconut broth. Cook from 3 to 5 minutes until the greens reach your desired degree of tenderness. Serve with the broth as a side dish, or with warm jasmine rice as a main dish.

© 2011 Pranee Khruasanit Halvorsen  
I Love Thai cooking 
 Pranee teaches Thai Cooking classes in the Seattle area. Her website is: I Love Thai cooking.com . 

Related articles

Read Full Post »

The Sweet is a Faintness and the Bitter is a Medicine

I often hear the old Thai saying  หวานเป็นลม ขมเป็นยา: kwan pen lom kom pen yah. This culinary wisdom literally says “the sweet is a faintness and the bitter is a medicine.” Growing up in a village in Thailand with my grandma and her friends, I acquired a taste for the bitter and exotic vegetables from their gardens and the wilderness around us.

Bitter melon or Bitter Gourd is called มะระ—Mara—in Thai. Its scientific name is Momordica charantia and it is native to Asia and Africa. It is a climbing annual plant that one can grow anytime, anywhere in Southeast Asia and South Asia regardless of the season.

Bitter Melon – Photo from my morning walk in Hoi An, Vietnam

In most Thai or Asian villages, where there is a fence or an arbor there will be a climbing plant next to it. There just needs to be a space large enough for seeds to grow.

Chinese Bitter Melon – the China phenotype is common in Thailand

Bitter melon is best eaten when it is green and young. When the fruit grows older, the taste gets more bitter. It is not common to eat the older fruit when it turns yellow-orange and the seeds become red; at this later stage the plant is mainly used for growing the seeds for future new plants.

Indian variety of bitter melon – photo from my visit to a market in Hue, Vietnam

Bitter melon is widely cooked in many ways in Southeast Asia. In Thailand, I often enjoy it in stir-fried dishes with soy sauce and with or without egg. It is also popular with mara yad sai—stuffed with pork in a soup. Fresh green or boiled bitter melon can be served in a Thai crudites platter with Thai chili dip, or it can accompany pickled cabbage in a pork-bone soup or stewed bitter melon and pork-bone soup. It can also be cooked in a curry dish as well. In Myanmar and Bangladeshi, bitter melon is often stir-fried with garlic and turmeric powder.

How to prepare bitter melon

All parts of the fruit are edible after you remove the seeds and stem. For stir-fries, thin-slice the melon as shown above. Then I often take steps to reduce some of the bitterness. There are two ways to do this: put the sliced melon in boiling water for a few minutes and then strain out the melon and discard the water. Or sprinkle some salt on the melon, mix it in well and let it sit for a few minutes before rinsing them in water. You may squeeze to dry. I personally like to use this latter method before making my stir-fries as some of the bitter flavor is left behind.

Why should you eat bitter melon? For much the same reason that you eat broccoli or spinach: for their health benefits. Bitter melon is an aid to diabetes control. It lowers blood sugar and promotes healthy insulin levels; besides that it also has Vitamin C, B1 and B2. While more studies need to be done, it is time to learn about new vegetables like bitter melon or get back to eating them routinely and celebrating the sweet truth about bitter melon. Cheers to a bitter melon!

Stir-fried Bitter Melon with Egg

Stir-fried Bitter Melon with Egg

Phad Mara Kub Khai 

ผัดมะระกับไข่

Serves: 4

Cooking Time: 4 minutes

When one has acquired a taste for bitter melon, stir-fried bitter melon with egg is a delightful dish. Personally, it makes me happy like after eating bitter-sweet chocolate. A bite of sliced bitter melon contrasts with the sweet, cooked egg and the hint of salty-soy flavor,  making this three-flavor combination very memorable and it lingers on my palate. When trying this dish for the first time, don’t be afraid of the bitter that you will taste at first. Wait a little while and you will taste the sweet from the egg, then the salty from the soy sauce. Serve the stir-fried bitter melon as a side with a curry dish and warm steamed jasmine rice.

Serves: 2

3 to 5 tablespoons canola oil
3 cloves garlic, peeled and chopped
2 eggs
1½ cups sliced bitter melon, about 1 large bitter melon
2 tablespoons soy sauce
1 teaspoon sugar
½ cup water or chicken broth
 
Heat a wok on high heat until it is hot. Pour in 3 tablespoons canola oil and stir in garlic. When garlic is golden, stir in one egg and stir a few times. When the egg is cooked, stir in bitter melon. Stir for 1 minute, then add another egg and stir a few times before adding soy sauce and sugar. Add water or chicken broth and let it cook 1 minute. Depending on one’s liking, the melon should be not too soft or to firm; it should still have some crunch. Serve warm with steamed jasmine rice.
 
© 2011 Pranee Khruasanit Halvorsen  
I Love Thai cooking 
 Pranee teaches Thai Cooking classes in the Seattle area. Her website is: I Love Thai cooking.com .
 

This slideshow requires JavaScript.

 
Related articles

Read Full Post »

Drink Me

It has been exactly a week since I returned from Thailand and I am still trying to catch up with our Seattle summer. My friends have all assured me that I didn’t miss much during the past month as we are still having the same cold weather we had in June. This July, Seattle hit the record lowest temperature for summer, so all I really need to catch up on is eating the plentiful seasonal fruits and vegetables from the local farmers markets and nearby towns.  

Hami Melon

During my first grocery shopping back here in Seattle, my cart was full with all sorts of berries. And then my eye caught on a good-looking melon that I haven’t tried: Hami melon. It is grown in California and available from mid-May to July and from September to December. I let it ripen at home for a few days and its sweet aroma was inviting me to taste it. The sweet scent reminds me of the Thai long muskmelon that I used to grow a long time ago in my organic garden in Phuket—it grew abundantly despite my lack of knowledge and farming experience.

Hami Melon

Hami melon is a type of muskmelon, a Chinese melon variety. A good one can taste sweeter and have a higher sugar content than most other varieties of melon. I decided to make a smoothie with coconut milk to duplicate Taeng Thai Kati, a famous Thai muskmelon dessert made with coconut milk, but we will drink ours instead of eating it. I kept the flavor profile and the amounts of ingredients the same as in Taeng Thai Kati, but added a generous amount of crushed ice and simple syrup to turn it into a nice cold smoothie. I used only one-third cup coconut milk in my recipe, a perfect amount to make a smoothie, a healthy summer drink. But if you are looking for a nice milkshake-like drink and dessert combo, add a scoop or two of coconut ice cream; it would taste heavenly. When a sweet flavor is needed, honey or palm sugar simple syrup are good choices to add a dimension of sweetness and aroma.

Coconut Melon Smoothie

Stock up on a few cans of coconut milk, then anytime the sweet floral scents of melon invite you, all you have to do is prepare this recipe. Hami melon is hard to resist, especially when it is combined with alluring fresh coconut milk. Drink me.

Coconut Melon Smoothie

Nam Kati Taeng Thai Smoothie

น้ำกะทิแตงไทยสมูทตี้

Serves: 2 to 4

Yield: 3 cups

16 ounces (see note) diced Hami melon, seeded, peeled and diced, or substitute honey-dew melon
⅓ cup coconut milk or coconut ice cream, more as desired
1½ cups crushed ice
2 tablespoons palm sugar simple syrup, optional (see note)
pinch of salt

Place melon, coconut milk, ice, sugar and salt in the blender and blend until smooth. Pour into a tall glass and serve right away with a straw.

Pranee’s Note

A 4-pound Hami melon (medium size), seeded, peeled and diced will yield about 2 pounds of diced melon.
 
To make palm sugar simple syrup, place a disc of palm sugar (about 4 tablespoons) and about ¼ cup water in a saucepan.
Bring to a boil and cook on medium heat for 5 minutes. Cool and chill. Keeps in the refrigerator for up to a week.   Yield: ¼ cup.
 
© 2011 Pranee Khruasanit Halvorsen  
I Love Thai cooking 
 Pranee teaches Thai Cooking classes in the Seattle area. Her website is: I Love Thai cooking.com .

Read Full Post »

Your Bilimbi, My Taling Pling

My favorite plant and fruit to watch as it grows is Taling Pling. It is also known as bilimbi and other countries have their own names for it as well. Its flowers and fruits grow in a cluster from the trunk and the main branches of the tree. First the cluster of maroon flowers comes out, then within a few days a cluster of cucumber-like fruits appears. The mature fruit can grow to 2.5 inches long. Because of its greenish color and the shape of the fruits, this tree has been nicknamed the Cucumber Tree. Its young leaves can be cooked and eaten or it can be used as an herb. The leaves have a sour flavor similar to sorrel and they are also know as Tree Sorrel.

Bilimbi or Taling Pling (Averrhoa bilimbi) is a relative of carambola or star fruit (Averrhoa carambola); it belongs to the genus Averrhoa and family Oxalidaceae. Bilimbi is native to Indonesia and the Malayan Peninsula and known throughout Southeast Asia, though it was not introduced to other parts of the world until the late 17th century. It is easy to grow and I grew up with a Taling Pling tree in my backyard. Most of the children growing up in my village had the experience of getting the fruit from the tree with a stick. We used to snack on it with sugar, salt and chili powder, just like we often did with green mango.

The Taling Pling that grows in Thailand is a sour variety. I cut it into small cubes to substitute for lime wedges in Miang Kam, a Thai snack dish. My family often adds it to sour curry as an alternative to tamarind chunks. The fruits are usually plentiful all year round, but we often neglect them.

Bilimbi Fruits

Bilimbi serves as an inspiration when the fruits are available and plenty. We use Taling Pling creatively in place of other sour fruits such as tamarind, lime and mango, depending on the dish. As I mentioned above, I also use it in place of star fruit. But there is no other fruit around quite like it, so it is hard to find a substitute for its distinctive sour flavor. The two ways that I can think of to cook this dish outside of Thailand would be to substitute two star fruits plus one to two tablespoons lime juice to whatever you are cooking, or you could substitute 1 cup sorrel leaves in the recipe below. Star fruit will give you the flavor and aroma of Taling Pling, but you will need to add lime juice to get the sour that the star fruit is lacking. Sorrel leaves, on the other hand, provide the same nice sour taste, but not bilimbi’s distinct aroma and texture.

Fish Head Sour Curry with Bilimbi – Southern Thai Cuisine

Fish Head Sour Curry with Bilimbi

Fish Head Sour Curry with Bilimbi

Gaeng Som Hue Pla Taling Pling

แก้งส้มหัวปลากับตะลิงปลิง

Serves: 4

2 cups water
3 tablespoons sour curry red curry paste aka Gaeng Som Curry Paste
2 fish heads, cut in half, or 1 pound black cod or halibut, cut into large pieces with the skin on
8 Taling Pling, cut in half lengthwise, or 2 star fruits, sliced, plus 2-4 tablespoons lime juice
1 ½ to 2 tablespoons brown sugar

Add water and curry paste to a large pot and bring to a boil on high heat. Stir well before adding fish head or fish chunks and let it cook on medium heat for 2 minutes. Add Taling Pling or star fruit with lime juice and let it cook on medium heat until the fish heads are cooked and the Taling Pling is soft and juicy but still firm enough to hold it shape, about 5 minutes. Gently stir in sugar. Taste to find the balance of spicy, sour and sweet and adjust the flavor to your liking before serving. Serve warm with steamed jasmine rice.

Pranee’s Note:

There are many kinds of Fish head curry in Southeast Asia. I have more stories and tips to share in the future.

© 2011 Pranee Khruasanit Halvorsen  
I Love Thai cooking 
 Pranee teaches Thai Cooking classes in the Seattle area. Her website is: I Love Thai cooking.com .
 
Related articles

Read Full Post »

Chasing the Monkey Tails

Early Morning around Surathani Province

Coconut Trees along the Roads, Southern Thailand Scenery

Kadaejae Monkey School, Surathani

I have been home again on Phuket Island for a few days now but still haven’t gotten used to the weather yet. Not that I want to complain about 94°F weather that feels like 104° F because of the humidity. I always love my visits with family and the foods here are truly exquisite.

While allowing myself to acclimate to the weather by drinking cool coconut water, I pulled out a lot of my notes, pictures and videos from my previous trip to Surathani. I was searching for information about a monkey school in Southern Thailand where monkeys learn how to pick coconuts from the coconut trees. My video took place at the monkey school.

Before leaving Seattle, I had been enjoying cooking with all forms of coconut: spicy-lime coconut chips, green or red curry with coconut milk, cucumber salad with coconut water vinegar and stir-fried fresh grated coconut with Phuket curry paste. Perhaps today is an appropriate time to learn about coconuts. What is a coconut anyway?

Before I answer this question, I want to first share some of the highlights of my trip to Surathani, a province in Southern Thailand that is famous as the land of a million coconut trees. I was lucky to have my brother as my tour guide taking me to all the famous Thai food restaurants and important sites along the way. He is a professional tour guide  and an expert on the Southern region. Most importantly we had a good time visiting the monkey school. Everyone was so warm and agreed to give me information and be part of the video taping, which you will see below. Thank you for P’ Paew, the owner of Kadaejae Monkey School and brother Sumit for the insight and patience. I had so much fun “Sanuk.”

When you start Thai cooking at home, you will encounter a lot of terms and types of coconut, so I think it is a good idea to start at the beginning with what is a coconut? In short, it is a seed, a fruit and a nut (in the botanical sense) What part of the coconut is used in cooking? In my Thai kitchen I cook with palm sugar which is made from the sap of the coconut flower. I use the heart of a coconut palm, which is nice and crunchy, in Sour Curry with Fish, and the heart of coconut palm (Gaeng Som Pla khab Yod Maprow). I also use coconut water vinegar, coconut milk, coconut cream, young coconut with coconut water and grated fresh and dry coconut—to name a few.

So here is a quick lesson on a coconut: coconut cream, coconut milk and coconut water.

When you remove the coconut husk (mesocarp) from a whole coconut, you can see the coconut shell (endocarp). After cracking the coconut shell, you get to the natural water inside the nut and this is called coconut water. The white meaty part inside the shell is the coconut meat (endosperm). Grating a chunk of white of coconut meat with a coconut grater gives you fresh wet grated coconut. To extract coconut milk, add a cup of water to 2 cups fresh grated coconut, then squeeze out the white milky liquid; this is concentrated coconut milk. (Thai call this the “head” of coconut milk). Add 1/2 cup water to the used grated coconut to extract  a thin coconut milk (Thai call this the “tail” of coconut milk). Let the coconut milk sit, and a fat creamy layer will form on the top; this is the coconut cream.

Back to the coconut water. Coconut water occurs naturally and has nothing to do with the process of making coconut milk. Nature provides the coconut meat and water as nutrients for shoots to grow near the three germination pores, or “eyes,” on the coconut. This coconut water inside the coconut shell is very good for the coconut plant, but it is also very good for you. It is full of vitamins and minerals. It is especially high in potassium and electrolytes, and has a neutral ph level. I strongly recommend that tourists traveling to paradise island drink this natural drink to help with rehydration, and it has the added benefit of being a sterile juice inside the shell.

I have  over 20 recipes on this blog that use coconut milk, coconut cream, coconut water vinegar and palm (coconut) sugar.

I hope this is a good start and I hope that my next trip to Thailand I will bring more inspired recipes to share with you.

Related articles

Read Full Post »

From Las Delicias with Love

It was Mother’s Day, May 8, 2011, when I arrived as part of a team of eight gracious women in the Nicaraguan village of Las Delicias. The village is situated in the hilly northern area in the Matagalpa region and is surrounded by coffee plantations. We were there with the organization BuildOn to present  the community with a new school on behalf of many generous donors from the United States.

May 8, 2011, Las Delicias

The welcoming and celebrating event was an indescribably heart-warming experience. It took place right on the grounds of the future school. For the next four days, our host families shared their food, their houses and their children with us and our lives were enriched by their culture, foods and hospitality.

Dinner with Rice, banana and bean

Jacqualee, one of my group members, and I were fortunate to have Thelma and Ricardo and their daughter Helene as our host family. A typical day began around 5:30am with the sound of Thelma’s tortilla-making or the rooster’s cock-a-doodle-doo. Then we would have breakfast at 7am before going to work on the building project with local volunteers. A typical meal for breakfast, lunch or dinner was corn tortillas, rice, bananas, and beans, accompanied by either eggs or chicken.

Jacqualee and I were very excited when Thelma and Ricardo asked if we could teach them the cuisine we ate back home. We happily agreed and I cooked up the menu with Jacqualee. I wanted something practical that Thelma would enjoy cooking for her family and that would use ingredients that were available in her backyard or the local market—forget about Tom Yum Goong and fancy Thai dishes. We decided on Son-In-Law Eggs, Mango Salad and Sweet Rice, Bananas & Beans Wrapped in Banana Leaf.

Banana leaf just right outside

We started with Kao Tom Mud. First Ricardo helped with cutting the banana leaf from the tree which was right outside in their yard. I removed the stems and tore the leaves into pieces 8 inches wide, then cleaned them well with a damp cloth to remove dirt. I only had to show Thelma once how to use the banana leaf for wrapping, then she took over the task with confidence. We made enough of them to give some to her neighbor.

While it was in the steamer, we prepared mango salad and son-in-law eggs. While we were cooking, Danilo, our translator, translated our cooking lesson from English into Spanish. Danilo helped me explain the most important part of Thai cooking was the harmonious blend of the four essential flavors of Thai cooking: sweet, sour, salty and spicy. The sweet was the sugar, the sour available to us was mango and two citrus juices, the spicy was Nicaraguan chili and, the salty was salt and the salty peanut that Jacqualee brought from home. I loved listening to Danilo speaking in Spanish explaining to Thelma about sweet, sour, salty and spicy. It was one of the highlights for me personally and professionally, and cooking for Thelma and Ricardo gave us a chance to thank them for their warm welcome to their home.

Thelma wrapped rice, banana and bean with banana leaf

I have used my recipe below countless times in cooking classes. It is basically a two-stage process. In the first stage, the sticky rice cooks until it has a sticky texture but it is still grainy and raw and is ideal for wrapping around a banana. It is pliable like playdough to form or shape and then it gets wrapped by the banana leaf. The second stage is the actual cooking of Kao Tom Mud, which is generally done by steaming. We steamed the rice and banana all the way through, which can take from 30 to 50 minutes. After 30 minutes of steaming, open one up to check if more steaming time is needed.

Kao Tom Mud

In my Seattle kitchen, I love to put the wrap on the grill or in the oven for the second stage, which is how I teach it in my classes. Now that summer is finally here, I hope that you will enjoy preparing this recipe either in a steamer or on your grill. Banana leaves are easy to find in local Asian markets in the freezer section.

I hope that you will enjoy cooking rice, banana, and beans wrapped with banana leaves. You will feel like you are in the tropical countries of Thailand or Nicaragua.

Kao Tom Mud, Steamed Sweet Rice and Banana Wrapped in Banana Leaf

Sweet Rice and Banana Wrapped in Banana Leaf

Kao Tom Mud 

ข้าวต้มมัด

Servings: 8

2 cups Thai sticky rice, soaked for 3 hours or overnight, and drained
¾ cup coconut milk
¼ cup water
2 tablespoons granulated sugar, optional
1 cup canned black beans, drained, optional
1 teaspoon salt
2 bananas, peeled, cut in half lengthwise and also crosswise to get 4 pieces from each banana
8 (8 X 8-inch) banana leaves or pieces of parchment paper
 
Stir sticky rice, coconut milk, sugar and salt together in a large pan over medium heat. Stir until all the coconut milk is absorbed. Stir in black beans and fold gently to mix.

Divide sticky rice mixture into 8 equal portions. Spread each portion onto a banana leaf, spreading to cover an area 6 by 4 inches, then place a section of the banana in the center. Fold the banana leaf to wrap the sticky rice around the banana.

Then fold the banana leaf into tamale-like envelope and secure both ends with a toothpick that pokes down and then up through the banana leaf. Grill for 5 minutes on each side, or until the sticky rice is translucent and cooked.

Pranee’s note:

If banana leaf is not available, you can use parchment paper. See Pranee’s Grill Sticky Rice in Bamboo Tube Recipe for details.

Pulut Lapa

Image by chooyutshing via Flickr

Read Full Post »

My Everyday  Asian Vegetable

Choy Sum - Flowering Cabbage

Choy Sum (also known as flowering cabbage) is a most popular vegetable in Southeast Asia. It belongs to the Brassica family along with Bok Choy and Gai Lan (Chinese kale or broccoli). The most common uses are in stir-fries and soups. My favorite way of preparing this is to stir-fry it as a side dish with salt and pepper or stir-fry with any rice noodles or egg noodles. It takes a short time to cook and is easy to pair with other ingredients. 

Stir-fried Choy Sum as a Side dish

Stir-fried Choy Sum

Phad Pak Gwang Tung

ผัดผักกวางตุ้ง

Servings: 4

Preparation: 5 minutes

Cooking time: 5 minutes

3 tablespoons canola oil
3 garlic cloves, peeled and minced
12 choy sum 0r about 12 ounces, cleaned and cut into 2 inch-lengths
Salt and pepper to taste

Heat canola oil in a wok on high heat and stir in garlic. When garlic is golden, stir in choy sum. Stir in a few drops of water and season with salt and pepper to taste, stirring well. Serve hot as a side dish with steamed jasmine rice.

© 2011 Pranee Khruasanit Halvorsen 
I Love Thai cooking
 Pranee teaches Thai Cooking classes in the Seattle area.
Her website is: I Love Thai cooking.com .
 

Stir-fried Phuket Hokkien Mee with Choy Sum

 
Related articles

Read Full Post »

Two Uncommon Ingredients in a Pot of Curry Stew

My sister and I once had a dream that we would work together in our own restaurant in Phuket. But as it turns out, she has her restaurant and I am a culinary instructor here in Seattle. But we do share with each other what we have learned over the years. During my last trip home I learned about an herb in the mint family called Bai Lah. It is an herb used in Thai cuisine. I took a picture of my sister’s Lah plant. I believe that Lah is a Thai word that is short for perilla.

Green Perilla—also called Green Shiso or Beefstalk—is a member of the mint family Lamiaceae, but it doesn’t taste like mint. The  Purple Perilla is more common in the markets, but it belongs to a different species in the botanical world. Purple Perilla is also known as Japanese basil or purple mint. It has a very refreshing taste. To me it tastes like lemon verbena, cinnamon and grass.

In Seattle, I was familiar with the plant Green Perilla because I am a Vietnamese food fanatic and I have a passion for herbs. I even made Jerry Traunfeld’s Green Apple & Green Shiso Sorbet once. But seeing Lah in Thai cuisine is a new experience for me.

Thai Bai Lah ~ Green Perilla, my sister’s plant in Thailand

The second unusual ingredient in my stew is stingray. In Thailand, stingray is hard to come by so my mom would be sure to bring some home whenever it appeared in the market. In Phuket, stingray is available in the market already barbecued and ready to be eaten. The venders would grill it in pieces about 2 to 3 inch wide and the length of half of the wing.

We eat stingray with spicy chili and lime dipping sauce and steamed jasmine rice. It is simply delicious. Another delicious way to eat stingray is to cook the flesh from a barbecued stingray in a curry with a flavorful leaf such as wild pepper leaf (please see Pranee’s Blog entree on wild pepper leaf). Stingray is eaten in Southeast Asia in Malaysia, Singapore and Southern Thailand. We eat the wings or flaps and the flesh, but not the bone and skin. Because they have such a strong flavor and aroma, the first thing we do with fish like stingray, tuna and catfish is to barbecue them with salt to temper the strong fishy flavors and aromas.

One day I decided to cook stingray and Green Perilla leaves together in a curry. It turned out to be a splendid idea. The perilla leaves left behind a unique flavor and aroma of lemon, cinnamon and cloves in my new creation of fish curry stew ~ Pla Kraban Kub Bai Lah ~ Stingray Curry Stew with Green Perilla.

Two uncommon ingredients - Stingray and Green Perilla

Through I haven’t had stingray curry for over 20 years, seeing a frozen stingray at Mekong Rainier Asian Market inspired me to cook it for the blog and for myself to revisit the flavor. I bought small portions of the stingray flap at the Asian market, then took them home and baked them instead of grilling or barbecuing them. It needed to be cooked first before I did anything else because we never handle fresh stingray.

Stingray curry with green perilla

This recipe is not  hot like most curries. This allows you to enjoy the flavor of the fish more than in a hot curry sauce.  But if you wish it to be hot like any curry, follow the steps below, but double the amounts of curry paste and coconut milk.

This recipe is for anyone who might  find stingray in the market and be interested in learning how to cook it. It was fun to make this recipe with stingray, but on a regular basis I am more likely to make this recipe using halibut cheeks or grilled catfish.

Stingray Curry Stew with Green Perilla

Gaeng Pla Kra Baen Bai Lah 

เคี่ยวแกงปลากระเบน

Serves 4

1 ½ pounds stingray, prepared as describe below (or halibut or grilled tuna)
2 tablespoons canola oil
1 ½ tablespoon red curry paste
6 tablespoons coconut milk, divided
1 cup water
1 cup green perilla leaves, stems removed
1 teaspoon fish sauce

Pre-heat oven to 350F.

Place parchment paper on the bottom of a baking sheet and place the stingray on top. Bake stingray for 30 minutes, or until the meat pulls away from the bone as shown in the photo below. Using a fork, remove the cooked fish from the bone and the skin; it should come off easily. Discard the bone and skin.

Heat a heavy bottom pot and stir in canola oil;  pan-fry curry paste in the oil until fragrant. Add coconut milk and let it cook on medium-high heat until oil is separated and the curry is fragrant. Stir in coconut milk and water and bring to a boil. Stir in the previously prepared stingray and boil for 3 minutes. Add green perilla. Let it boil for 1 more minute to allow the flavor of perilla into the soup, but not so long that the fresh herb flavor disappears. Serve with steamed jasmine rice.

© 2011 Pranee Khruasanit Halvorsen
I Love Thai cooking
Pranee teaches Thai Cooking classes in the Seattle area.
Her website is: I Love Thai cooking.com .

This slideshow requires JavaScript.


Read Full Post »

A Stir-Fry from the Palm of My Hand

When I was growing up, in the mornings my grandma would often drop a few coins in the palm of my hand and tell me to go purchase Tao Gua (Tofu), Tao Nge (Mung Bean Sprout), and Guiy Chai (garlic chives) from a mobile market—a pick up truck filled with ingredients. I would return with a bag full of three pieces of tofu cake, mung bean sprouts, and a bunch of garlic chives. Together they made the cheapest and best stir-fry and we ate it about once a week. We would usually stir-fry them later for lunch; if it were for dinner, my grandma would soak the bean sprouts in cold water to keep them fresh in the tropical climate. This was back before we had a refrigerator. When I was at the Asian Market yesterday, I purchased these three ingredients in almost the same quantities as I did then and it came up to $ 2.75, only a few dollars and some coins.

Thais call bean sprouts Thua Ngok (ถั่วงอก), but in my hometown of Phuket we call them Tau Nge, a  Phuket Hokkien word. Hokkien is a Chinese dialect spoken by many Chinese throughout Southeast Asia. Tauge, is the word for mung bean sprouts in Chinese Hokkien and in Indonesian and Malaysian languages as well. Perhaps not surprisingly, the Dutch also use taugé for bean sprouts, probably a holdover from the time when they occupied Indonesia.

Mung bean sprouts, tofu and garlic chives are long-time favorite vegetables of Chinese Hokkien cuisine and culture, even though bean sprouts are actually native to Bangladesh.

Firm Tofu, Mung Bean Sprouts and Garlic Chives

Green onions or regular chives are usually a good substitute for garlic chives, but in this case I strongly recommend that you use garlic chives in order to maintain the flavors and authenticity of this dish. Garlic chives are available all year round at the Asian Market and it is a perennial herb in the Northwest. You may find other recipes where you will want to use them as well.

The other day when I was dining with a friend, I was so impressed to find a similar dish served at the Tamarind Tree Restaurant in Seattle. Their dish was almost identical in flavor, but instead of tofu, it used shitake mushrooms. I hope when you are at the Tamarind Tree Restaurant, you will please try Nấm xào giá ~ Bean sprout mushroom.

Phuket Stir-fried Mung Bean Sprouts and Tofu with Garlic Chives

Stir-fried Mung Bean Sprouts and Tofu with Garlic Chives

Phad Tao Gua Tao Nge Phuket

ผัดถั่วงอกกับเต้าหู้ภูเก็ต

5 minutes total preparation and cooking time, 3 ingredients and less than $3. It is my all time favorite stir-fry.

Serves: 4
 
3 tablespoons canola oil, divided
1 (16 ounce) package  firm tofu, cut into large pieces about 1/4-inch thick
1 cup garlic chives cut into 1-inch lengths (about 15 garlic chives),
6 cups mung bean sproutss, washed with cold water and strained
2 tablespoons soy sauce, or 1 tablespoon soy sauce plus one tablespoon oyster sauce
1 teaspoon sugar

Heat the wok on high heat, then test it with a few drops of water. If the water evaporates in two seconds, pour in 1 tablespoon canola oil. Cover the surface with oil by using a spatula or other utensil, then spread out tofu in the wok and fry on medium heat until they firm up and turn a golden color. This will take 1 to 2 minutes. Transfer to a plate.

Heat the same wok on high heat and add the remaining canola oil and the garlic; stir until golden, about 10 seconds. Stir in bean sprouts and cook on high heat for 45 seconds to 1 minute, stirring constantly. It will sound really interesting and steaming. It is the moisture from the bean sprouts creating the sounds against the hot wok. You will see steam, but not smoke. Then stir in garlic chives to cook lightly, about 45 seconds. Stir in tofu, soy sauce and sugar. Mix together, then serve promptly with hot steamed jasmine rice.

Pranee’s note:

The bean sprouts should not cook longer than 2 minutes, or they will lost their crunch. This dish is very simple and the flavors depend on having the freshest bean sprouts, tofu and chives—and that is enough! I love this dish because it has a clean and simple flavor and texture. The moisture released from the bean sprouts makes a sauce. If that doesn’t happen, add one or two tablespoons of water.

Another variation of this dish that you might see in Thailand substitutes calamari, prawns or pig blood cake for the tofu.

© 2011 Pranee Khruasanit Halvorsen 
I Love Thai cooking
Pranee teaches Thai Cooking classes in the Seattle area. 
Her website is: I Love Thai cooking.com .


Read Full Post »

My Very First Fresh Garbanzo Beans

Fresh Garbanzo Bean or Chickpea

Please don’t think that I always play cat and mouse with my food before eating it. But when I am teaching myself how to cook something new, I often think of it as playing with food. And that is what I did with my very first fresh garbanzo beans.

I had never seen fresh garbanzo beans before. I found them at the store in a 10-ounce package. They were in a plastic container for $2.99 on the shelf among many vegetables. I purchased them thinking they would provide a good opportunity to learn something new.

In my kitchen, I enjoyed opening up the individual beans to see how they looked on the inside. A beautiful rounded bean was snuggling in the pod. Some pods had one large bean and some had two smaller beans. I pressed some beans between my fingers and found that they were pretty airy—less dense and not creamy like edamame or peas. Another night I dropped a few beans in boiling water while cooking spaghetti; 12 minutes was way too long for the beans. Finally I felt I knew enough to make an educated guess about a better cooking time and method. Yes, I steamed the whole package of beans as-is for 10 minutes. Then I placed them in a bowl and sprinkled on generous amounts of sea salt and ate them like edamame. They turned out just perfect for eating warm or cold.

Fresh Garbanzo Beans from Mexico

In Thailand we don’t use garbanzo beans—fresh, dried or canned—in Thai cuisine. But we do use them when cooking Indian or middle eastern dishes. The beans are grown in India, but in Southern Thailand many Indian or Bengal merchants sold a variety of spicy legumes from village to village. When we were kids at a festival or open-air movie, I always loved cracking and eating dried, salted, spicy chickpeas. They were served in a paper bag, just like popcorn, and were good for sharing with friends.

A beautiful bean in a green pod, garbanzo beans, also known as chickpeas, belong to the legume family. They are full of protein and fiber. Interestingly, the flavor of garbanzo beans is mild and unassertive and they have a soft (not dense) texture that holds it shape well in gentle cooking, like in a rice soup or a salad. It is healthier to snack on steamed garbanzo beans than anything else. So if you happen to see fresh garbanzo beans, don’t hesitate to take some home to try. It is fun and everyone is kept busy opening the pods while they enjoy the conversation.

© 2011 Pranee Khruasanit Halvorsen I Love Thai cooking
Pranee teaches Thai Cooking classes in the Seattle area.Her website is: I Love Thai cooking.com .
 
Related articles

Read Full Post »

Celebrating New Year with Thai Sticky Rice and Alms Giving

Alms Giving with Jasmine Rice or Sticky Rice

Yesterday, April 17, 2011, I celebrated Thai New Year’s Day~ Songkran~ with Thai and American friends at the Songkran Festival at the Washington Buddhavanaram (Buddhist temple in Auburn, Washington ) It was so much fun, Sanuk.

First, we started with the alms-giving ritual. We gave offerings to the monks of steamed jasmine rice and steamed sticky rice, and for the first time I offered Chicken Biryani Rice (Kao Mok Gai) instead of the two other kinds of cooked rice.

Som Tum ~ Green Papaya Salad

Outside in the yard there were tents with prepared street foods of Thailand, just like at festivals in Thai villages. I sampled almost everything including grilled Thai sausage (Sai Grok Isan), sticky rice (Khoa Neow), green papaya salad (Som Tum), and noodle soup (Kuey Tiow Nahm), to name a few.

A majority of the guests at the festival were from Laos, northeastern Thailand and Cambodia. Steamed Sticky Rice (Khao Neow) is an important part of the day at many Thai gatherings, and Khao Neow and Som Tum are well-loved dishes for Thais who live abroad. As I have mentioned before, these two dishes are a good cure for homesickness for Thais.

Thai Chili Dip ~ Nam Prik

We walked around, enjoying the sunny day and buying street food like Thai Chili Dip (Nam Prik) to take home. I got three different versions of this red-hot chili paste to season my steamed jasmine rice: Red Eye Chili Dip (Nam Prik Ta Daeng), Tilapia Chili Dip (Nam Prik Pla Nill) and Crunchy Pork Chili Dip (Nam Prik Moo Grob). Now these three Nam Prik are in my freezer for days when spicy hot food will comfort my mood.

Bathing and Placing Gold Leaves On the Buddha Image

In Burma, Laos, Thailand, Southern China and Cambodia, a part of celebrating Solar New Year is bathing and cleaning an image of Buddha. I celebrated this ritual here in Washington with many people from these countries.

Flags on Sand Mount

Building a sand hillock and decorating it with flags is also a common practice. 

Dancing to the Laotian Music

Eating a lot of sticky rice and dancing  to Laotian live music was a perfect “sanuk” day to welcome the new year.


Steamed Sticky rice

Khao Neow Nueng

ข้าวเหนียวหนึ่ง

Serves 6 to 8

Sticky rice is a long-grain rice with a sticky and soft texture. There are several names for sticky rice, including sweet rice and glutinous rice. Sticky rice is ideal for desserts as well as for serving with Northeastern dishes such Som Tum (green papaya salad) and Laab Neua (beef mint salad). There are also main dishes on my blog that are great to serve with steamed sticky rice, such as Green Papaya Salad with Smoked SalmonGrilled Fish Sauce Chicken Wings (Peek Gai Nam Pla Yang), and Green Papaya Salad with Salted Crab and Rice Noodle (Som Tum Sua). This last recipe includes a video of my sister-in-law preparing the salad.

After 30 minutes, flip the sticky rice over

I hope you have a chance to learn how to cook steamed sticky rice. You may use a double boiler/steamer or purchase a bamboo steamer.

2 cups sticky rice

Cover sticky rice with room temperature water at least 3 inches above the rice. Let rice sit for 2 hours or overnight, then drain off any excess water.

Steam sticky rice in a steamer with a lid over high heat for about 30 minutes, or until the rice is soft. Flip the rice over so that the sticky rice on the top will go on the bottom and steam with the lid on for 5 more minutes. You can keep the rice warm for a few more minutes with the steamer on simmer, or remove it and keep it in a thermal-controlled container.

The steamed sticky rice is ready to serve with main dishes or to use in a dessert that requires steamed sticky rice.

© 2011 Pranee Khruasanit Halvorsen 
I Love Thai cooking
 Pranee teaches Thai Cooking classes in the Seattle area. 
Her website is: I Love Thai cooking.com .

Read Full Post »

泼水节

Image via Wikipedia

Sanuk Mai? This is a question Thais ask each other when they share experiences of any activities you do in life.

สนุก-Sanuk means to have a good time, to enjoy or to get pleasure and joy from anything we do. Tiew hai sanuk means travel and have a good time. Tum Ngan hai snuk, is to work and to enjoy working. When making choices in our life,“Sanuk” is a factor in our decision making: some pleasure has to be combined with whatever we do.  And when life is lacking Sanuk, then let’s plan it. This week in Seattle, I am going to do something I actually planned a month ahead to “Sanuk” with friends and that is to celebrate Thai New Year’s Day, or Songkran, with friends at the Washington Buddhavanaram.

Songkran is Thai New Year’s Day. It is is a national holiday in Thailand celebrated on April 13th. It is also a New Year’s Day for Lao, Burma and Cambodia. The Thai New Year is a solar new year, and not to be confused with the Chinese New Year, which is a lunar new year. In Seattle, the Thai community celebrates the holiday on Sundays so that locals can take time off on the weekend to celebrate. Please click here to see how these countries celebrate: Cambodia, Laos, Mon-Burmese and Thai. Many westerners know this celebration in Southeast Asia as the Water Festival.

Songkran is such a special day that we can’t complete our Sanuk without sharing food. Everyone brings food to share, which is set out on the table, then a bell is rung to signal lunch time. Sticky rice is well-loved, and the most popular dish to share.

Thai Community Potluck in Washington

I decided to do Kao Mok Gai (Phuket Baryani Rice) as a main dish, and sticky rice in bamboo tubes (my version with parchment paper in the oven) for a dessert. I chose these recipes because I wanted to do something that was easy to cook in large quantities and also something that is a traditional dish and a crown pleasure. Kao Mok Gai is a special dish from Phuket for a special event. In Cambodia,sticky rice in a bamboo tube, known as Kralan, is a traditional dish to be eaten on New Year’s Day.  Here are links to recipes for these dishes that are already available on this blog: Kao Mok Gai and Kao Lam.

Phuket Chicken Baryani Rice--Kao Mok Gai Phuket

Thai Kao Lam, Sticky Rice in Bambo Tube

I hope to get some more recipe ideas at this event as well as some photos to share with you.

May I wish you a Happy Thai New Year and have a lot of Sanuk in the coming year.

สวัสดีปีใหม่ค่ะ

Pranee

Read Full Post »

Pandanus leaf (Bai Toey), a Thai Culinary Treasure

Something about spring made me want to share my favorite cup of tea recipe with you. Maybe it is the fragrance of fresh pandanus leaf, which is like fresh green grass, or jasmine rice that makes me anticipate more spring. The long narrow leaf looks like a gladiolus leaf however pandanus belongs in the screw pine genus. It is known in Southeast Asia as Pandan. Besides using the leaf for cooking, I grow Bai Toey as a decorative plant and use it in flower arrangements. In my village in the old days, every household grew them near a damp place in their garden. If you are interested in growing Pandan as a house plant, please check with your local nursery. The scientific name for Bai Toey is Pandanus Amaryllifolius.

Pandanus Leaf-Bai Toey

Thai cooking depends on Bai Toey much like Westerners depend on vanilla. That is a simple comparison I often use when I introduce this plant in my cooking classes. But pandanus leaf has so many uses I would need many pages and recipes to show and tell you all of them. But I will try to make it short and just highlight the plant’s significant qualities. Over time I will provide recipes in upcoming posts that highlight the broad uses of Bai Toey.

Below are pictures and short descriptions of how I have used pandanus during the past four months while I was in Thailand and in my classroom and my kitchen here in Seattle.

Roses made from Pandanus leaves for worship or air freshener

Thais use pandanus leaves to make  rose flowers for worship or to use as an air freshener.

Please click the picture to see Pranee’s YouTube video and learn how to make rose flowers from pandan leaves.

Pandanus leaf cups

Thais use Pandanus leaves to make decorative containers.

Adding green color extract from pandanus leaf to pearl tapioca pudding

Thais extract the green color from Pandanus to use as food coloring in Thai desserts.

This slideshow requires JavaScript.

A Perfect Thai Herbal Tea

My usual cup of tea is a light tea that I brew from a combination of pandanus leaf and jasmine tea. I grew up with this tea in a village where, in addition to the famous Thai Ice Tea, it seemed to be available everywhere,  rain or shine, in everyone’s kitchen, or to welcome guests at a big gathering. For funerals or other large  functions, this tea is brewed in large quantities, steeped in a pot that can serve up to 100 people. I love this tea both warm and cold. The fragrance and flavors of pandan leaves and jasmine tea seems to be a perfect pair – my favorite combination. Not to mention that my favorite hand lotion from Thailand is a combination of pandan leaf and jasmine—classic Thai aromatherapy. Please click here to learn more about pandan leaves and their medicinal benefits.

Pandan leaf is available fresh or frozen at Asian markets.

Jasmine Pandanus Tea

Cha Mali Toey Horm

ชามะลิใบเตย

Jasmine and pandanus is a classic fragrant infusion for Thai tea and desserts. This tea is very popular,  but it is served mostly at large group functions such as funerals. In my village it is prepared in a large pot three feet in diameter by three feet tall, ready to serve tea for the whole village. It can be served with a snack, dinner or dessert. Serve plain without sugar. The tip is don’t make the tea too strong.

1 to 2 teaspoons loose jasmine tea
1 pandanus leaves, torn lengthwise into narrow strip and tied in a bun, or folded to fit the teapot
2 cups boiling water

Place jasmine tea and pandanus leaf in a teapot. Pour boiling water over all and let it steep for 5 minutes. Serve right away.

© 2011 Pranee Khruasanit Halvorsen
I Love Thai cooking
Pranee teaches Thai Cooking classes in the Seattle area.
Her website is: I Love Thai cooking.com .


Read Full Post »

The Mystery Dish of Southern Thailand

Stir-fried Fresh Grated Coconut with Phuket Curry Paste and Chapoo Leaf

I uncovered a mystery about my grandmother’s cooking during my last trip to Phuket. I asked around about Phad Maprow Khub Kruang Gaeng, a stir-fried, fresh grated coconut with Phuket curry paste. During my childhood and adult life, I had never seen it cooked or eaten or even mentioned by anyone except members of my family. And it was only my grandmother who always asked me to assist her with it when I was young. I always wondered if it was served for health or economic reasons, or simply a food that the women of the house put on the table for their large extended family. It was never served alone, but with other main dishes and steamed jasmine rice.

I described the dish to my family to refresh their memories. My mom said that mostly we prepared it with a special kind of coconut (out of a thousand different kinds of coconuts, we used one that has an interesting texture with more like a virgin coconut oil). Then my sister-in-law, who was born in Phang Nga (80 kilometers away from Phuket), recalled eating the dish in her hometown. She said she had prepared it before, but not often. Luckily for me, she was very happy to prepare this for me while I took notes and photographs. She did it exactly the way I remember my grandmother preparing it. Thank you to my sister-in-law Tim, who helped me preserve the history of this lost recipe.

We shared the dish afterwards and more than anything else, more than its just being an interesting dish, it was a moment of rediscovery of the old time flavors of the south. We bonded again with foods. I hope that some of you will try this recipe so it won’t be lost forever.

Curry paste and fresh grated coconut in a mortar mix with pestle

First, Tim pounds the Phuket curry paste. When it became a fine paste she mixed in the freshly grated coconut and pounded to combine all of the ingredients. Then she stir-fried the mixture in a wok.

Coconut and turmeric—the colors and flavors of Southern Thailand

Stir-fried Fresh Grated Coconut Meat with Phuket Curry Paste

Phad Maprow Khub Kruang Gaeng Phuket

ผัดเนื้อมะพร้าวสดขูดกับเครื่องแกงภูเก็ต

Serves: 8 (as a side dish)

Yield: 2 cups

1/2 to 1 recipe Phuket Curry Paste (please click here for the recipe)
2 cups freshly grated coconut meat, or frozen (thaw before cooking)
1 tablespoon sugar, or to taste
Salt to taste
32 chapoo or wild pepper leaves

Combine curry paste and grated coconut by hand or with a mortar and pestle. Place in a wok (without cooking oil) over medium heat, and stir constantly to allow the coconut and curry mix to become one texture. Continue stirring until the moisture in the coconut dries up and the curry paste is well-incorporated, about 5 to 8 minutes. It should be flaky with a little bit of moisture left, neither too dry nor too oily. Serve at room temperature with wild pepper leaves on the side.

Enjoy this as a tidbit by placing about 1 tablespoon on a wild pepper leaf, then wrapping it up so you can eat it in a single bite. Or simply mix it with warm jasmine rice and enjoy it as an accompaniment to curry and vegetable dishes.

Pranee’s Note:

This recipe has not been tested yet in my kitchen, so pay attention to spicy, salty and sweet when trying this recipe.

Chapoo leaf or wild pepper leaf is also known as la lot leaf (please see Pranee’s Blog Entry on Chapoo leaf)

Pranee’s Video on Youtube: How to Open a Coconut Husk: Thai Style

More Recipes by Pranee on Phuket Curry Paste

© 2013  Pranee Khruasanit Halvorsen
I Love Thai cooking
Pranee teaches Thai Cooking classes in the Seattle area.
Her website is: I Love Thai cooking.com 
 
 
Related Articles

Read Full Post »

Playing with Food: Cassava

Cassava-Sweet Potato Pancake, a delicious Thai Dessert

I noticed recently that I have told my students to play with food in almost every class. I hope they have. After learning all the essential tips and techniques, the way to become a good cook is by experiencing the ingredients and having fun.

On the weekends, I clean up the fridge and cook creatively.  This weekend I had fresh cassava and sweet potato leftover from my class. While I was holding them in my hand, I heard an echo of Rösti. Rösti is a fried, grated potato dish made in Switzerland. I made a quick decision and at almost the same time my hand reached to turn on the oven to 450°F. I will heat up my well-seasoned 8-inch cast iron pan and make this quick & easy Thai dessert, Rösti style.

Cooking with cassavas is not hard at all. After grating the cassava, Thai simply add enough sugar to sweeten to taste, and some salt to bridge the flavor; a bit of coconut milk can also be added to heighten the flavor. Then the mixture is steamed and grilled until it is cooked and translucent. But something new today that I haven’t tried before is adding grated sweet potato. Why not? It was perfect. I used about 2 parts cassava to 1 part sweet potato. The glutinous property of cassava helps the sweet potato hold up nicely, and the sweet potato gives a nice orange color and sweet compliment to the dish.

Learn something new while playing with food and discover a new excitement and a sweet reward to the lesson. Cassava-Sweet Potato Pancake makes a perfect snack or dessert with light herbal tea.

Cassava - Sweet Potato Pancake

Cassava – Sweet Potato Pancake

Khanom Man Sumpalang Oop

มันสำปะหลังมันเทศแพนเค้ก

Servings: 6-8

2 cups grated cassava, fresh or frozen (if fresh , use a 10-inch-long cassava and remove the skin before grating)
1 cup grated sweet potato, about 1 small or medium
1/2 cup palm sugar or brown sugar
1/2 teaspoon salt
6 tablespoons coconut milk
2 tablespoon rice flour, optional
1 tablespoon cooking oil
 
Preheat the oven to 450 F.
 
Combine grated cassava, sweet potato, sugar, salt, coconut milk and rice flour in a large bowl; stir until well mixed.
 
Heat 8-inch cast iron pan on medium heat and cover the entire surface with cooking oil. Pour cassava-sweet potato pancake mixture into the pan and spread out evenly. Place uncovered in the center of the oven and bake for 20 minutes, until the bottom is crusty brown. Then turn the oven to broil and place the pan right underneath. The top of the pancake should be 6 inches below the heat source. Remove when the top is brown, about 3 to 5 minutes. Keep an eye on it! A nice crusty brown is the most delicious part of the cake. Let the pancake rest for 5 to 10 minutes before serving. Serve warm or cold.
Cassava (yuca) roots, the Taínos' main crop

Image via Wikipedia

Pranee’s Thai Kitchen note:

Cassava is a root from the Cassava or Tapioca Plant (Manihot esculenta Crantz). It is a bushy plant that grows to about 3 meters tall. It is an annual plant with underground food-storing root-tubers. The tuber is large and long with a dark brown skin and pink underneath to protect and keep the white flesh moist. In Thailand, cassava is usually boiled or roasted and serve with sugar. It also is made into various sweets combined with grated coconut and/or coconut milk and sugar. Raw cassava is poisonous, but when cooked it became a delicious dessert.  Pearl tapioca and tapioca starch and flour are all products of cassava roots.

© 2011 Pranee Khruasanit Halvorsen

I Love Thai cooking

Pranee teaches Thai Cooking classes in the Seattle area.

Her website is: I Love Thai cooking.com .


Read Full Post »

You say Pummelo, I say Pomelo, and Thais say ”Som Oh

One of my goals for the New Year is for my blog readers to learn light and easy Thai cooking and some new exotic ingredients. Thai cuisine has been famous for many centuries and I want people to have a more in-depth knowledge of it.

Pomelo, Thai Grapefruit - The Flower Market in Bangkok

One way that I hope I can deepen your culinary skills is simply by showing you some of the techniques that Thais use to handle their ingredients, methods learned from our families, our communities and our ancestors.  I hope the instructions in my video demonstration will help you to open your pomelo.

Pomelos tastes so great by themselves, you don’t need to cook them. I created this simple fun recipe on New Year’s Eve to provide a zing to welcome the year 2011.

Best wishes to you all.

I love pomelo. It is in season around New Year’s time, but you can enjoy it every week to give a zing to your life. There are so many way to create a wow moment with pomelo. My favorite recipe is from Phuket, Thailand, and is made with shrimp, tamarind sauce and caramelized shallots. It is a great dish for teaching my students about the layer of flavors and textures that can be found in a Thai salad.

Yum Som Oh, Pomelo Salad with Crab

For my blog visitors, I think learning to open a pomelo is challenge enough, so I am keeping this recipe simple (which is also how I cooked during this past week). This recipe is prepared like a crab or shrimp cocktail rather than the traditional pomelo salad from Thailand.

Pomelo Salad with Crab

Yum Som Oh Khup Phu

ยำส้มโอกับปู

Serves: 6

1 pomelo (prepared as shown in the video above), about 2 cups
1 shallot, peeled and sliced
1/4 cup chopped cilantro, plus 6 cilantro sprigs for garnish
1/2 cup cooked crab meat or cooked shrimp
1 tablespoon palm sugar or brown sugar
1 tablespoon tamarind concentrate
2 tablespoons lime juice, about 1 lime
1 tablespoon fish sauce, or more as needed
1/8 teaspoon chili powder

Place pomelo, shallot, cilantro and crab in a medium size salad bowl. Whisk sugar, tamarind concentrate, lime juice, fish sauce and chili powder until well-blended, then pour over pomelo. Fold all of the ingredients together gently with a salad spoon and serve in a nice glass. Serve at room temperature or chill. Garnish with cilantro sprigs.

Vegetarian option:

Omit crab and use a few pinches of sea salt instead of fish sauce.

© 2011  Pranee Khruasanit Halvorsen
I Love Thai cooking
Pranee teaches Thai Cooking classes in the Seattle area.
Her website is: I Love Thai cooking.com .
 
Related articles

Read Full Post »

Sticky Rice in a Bamboo Tube, Kao Lam

I have fond memories of sticky rice in a bamboo tube—it looks so cool! At every festival in my village when I was growing up, there was a man who made and sold this Kao Lam. We would eat some at the festival then bring home a few for family members who couldn’t go. It is a perfect take-home food, since it is already packaged in a bamboo tube.

Sticky Rice in a Bamboo Tube, Cambodia

The sticky rice is cooked in a segment of bamboo, the kind that has a thin wall so the heat can penetrate to cook the rice inside the tube. After it is filled with the sticky rice ingredients, the bamboo is plugged with a piece of coconut husk wrapped with banana leaf to keep in the steam for cooking the rice. Then the bamboo tubes are placed over charcoal. When it is done, the outer skin of bamboo is removed and a thin wall left behind to protect the rice inside. All Southeast Asian countries have some version of this, and they are all cooked in a similar way. The photo below is from Cambodia. In Thailand this dish is called Kao Lam; in Malaysia it’s Lemang.

Thai Sticky Rice in Bamboo Sticks in Cambodia

If you like sticky rice with mango, you will like Kao Lam, too. I love the fact that when you peel the bamboo away (see photo below), the powdery fiber in the bamboo tube leaves a sheen. The rice comes out shaped like a stick and looks like it was wrapped in edible paper. The vendor in my village usually made three varieties: white sticky rice, black sticky rice, and white sticky rice with black beans.

How to open the bamboo tube

In America you can find cooked sticky rice that comes straight from Thailand in the frozen food section in Asian markets. But I would rather you try my sticky rice recipe below. I wrap it up in parchment paper, roll it into a cylinder, and bake it. It is delicious, has a very nice texture, and is as satisfying as the original.

During the summer of 2010, I taught Grilled Sticky Rice with Black Bean and Banana Stuffing in a Banana Leaf (Kao Neow Mad) in my Thai Grill class. Organizing my photos from my recent trip to Cambodia led me to this project, a Kao Lam version baked in the oven. It is not easy to cook sticky rice in a bamboo tube—only a few experts from each Thai village know how. Last August I created this adaptation, wrapping and rolling the sticky rice in pieces of parchment paper and then baking them. The results were good. It was easy, and the flavor and texture were satisfying. Then I made a lot of them in small packages and even put some in the freezer. I microwave them or reheat them in the oven and eat them for a protein snack before teaching my classes. In Thailand, most farmers eat sticky rice before working in the rice field.

Baked Sticky Rice and Black Bean Wrapped in Banana Leaf

Kao Neow Yang

Serveings: 8

2 cups Thai sticky rice, soaked in water for 3 hours or overnight, then drained (see note)
¾ cup coconut milk
¼ cup water
2 tablespoons granulated sugar, optional
1 teaspoon salt
1 cup canned black beans, drained
8 (8×8) inch pieces of banana leaves or parchment paper

Preheat oven to 350°F.

Stir sticky rice, coconut milk, water, sugar and salt in a large pan over medium heat. Stir until all coconut milk is absorbed. Stir in black beans and fold gently to mix.

Put equal amounts of the sticky rice mixture onto 8 banana leaves. Form the rice into a cylinder about 6″ long and lay it in the center of the leaf so that you have about 1 inch left on either end. Fold the banana leaf in half around the rice, then roll it around the cylinder; fold in both ends and secure them with a toothpick, poking down and then up, or you can twist the ends and tie them. When you are done, each bundle will make a round tube about 6 inches long and 1 to 1 1/2 inches in diameter. Grill for 5 minutes on each side until the sticky rice is translucent and cooked, or bake in the oven for 10 minutes.

Pranee’s note:

In Thailand, recipes generally use one of two types of rice: jasmine rice or Thai sticky rice. The starch in rice is made up of two components, amylose and amylopectin. Jasmine rice has more amylose than amylopectin, giving it a puffy appearance, whereas Thai sticky rice has more amylopectin than amylose, creating its sticky texture. Both white and purple Thai sticky rice are long-grain rices with a firm grain and become sticky when cooked. They are tropical rices, and different from Japanese, Chinese or Mediterranean (Arborio and Valencia) rices, which have a medium or short grain and grow in temperate climates.

© 2010 Pranee Khruasanit Halvorsen
I Love Thai cooking
Pranee teaches Thai Cooking class in Seattle areas, her website is: I Love Thai cooking.com


Outer layer of bamboo tube is removed


Read Full Post »

Rice Soup for breakfast

My grandmother loved rice soup for breakfast. And I can recall a memory– I often joined her savoring this soul food before our day began. To this day when I visit Thailand, in my village, I still love having this rice soup but instead of our kitchen, I join local at the breakfast stall.

Rice Soup for Breakfast

I like rice soup in another occasion too, in the winter for lunch or dinner, as it is a real comfort food for every occasion and nothing is as good and satisfying as rice soup on a cold day and when one’s body needs gentle food. Just like American enjoys the chicken noodle soup.

Kao Tom, Thai Rice Soup for Breakfast

It is easy to make with either from scratch or use leftover rice. But when one has an extra time, I would recommend to make the rice soup from scratch, please follow the recipe below to make rice porridge. It has a nice softer texture. I never think rice soup as a pot luck dish, however my student once told me that she brought to her office potluck party and it was a hit.

Thai Rice Soup with Chicken & Egg

Kao Tom Gai Sai Kai

Serves: 1 about 2 cups

Cooking Time: 5 to 8 minutes

1 ½ tablespoons canola oil
1 tablespoon minced garlic, about from 3 cloves
¼ cup ground chicken or pork (from chicken thigh or breast)
½ teaspoon salt
2 teaspoons soy sauce
1 ½ cups chicken broth
1 cup steamed jasmine rice or rice porridge (see note)
1 egg
1 tablespoon thinly shredded fresh ginger
1 green onion, thinly sliced
1 tablespoon coarsely chopped cilantro
A dash white pepper powder

Heat canola oil in a medium size pot on medium-high heat and stir in garlic. Stir constantly and when garlic is yellow, remove a half portion of fried garlic for garnish. Stir in chicken and cook with remaining oil and garlic, then season with salt and soy sauce. Pour in chicken broth and jasmine rice and let it cook on medium-high heat for 3 to 5 minutes.

When it reaches the desire texture of soup or porridge like, it is cooked and almost ready to serve. On high heat, crack the egg open and drop in the center of rice soup. You may stir or poach the egg in the hot rice soup; it can take from 30 seconds or 1 minute depending on your preference to cook the egg.

Pour the hot rice soup in a bowl and top with fried garlic, ginger, green onion, cilantro and white pepper powder.

© Pranee Khruasanit Halvorsen

Rice Soup, Kao Tom ideally taste best when made from rice porridge specially prepare for rice soup. For this recipe you may use cold leftover rice or cooked warm rice but the texture will be different. Below is how to make rice porridge for a rice soup. The amount is enough to make 4 rice soups from the recipe above.

Kao Tom Buey

Plain Rice Porridge

Yield: 4 cups

Cooking Time: 20 minutes

1 cup jasmine rice

Bring jasmine rice and 2 cups water to a boil on high heat, and stir often while cooking for 5 minutes. Add 4 cups water and bring to a boil and let it cook on medium heat for 15 more minute. Then cook until it yields 4 cups.

Thai Rice


© 2010  Pranee Khruasanit Halvorsen
I Love Thai cooking
Pranee teaches Thai Cooking classes in the Seattle area.
Her website is: I Love Thai cooking.com .
 

Read Full Post »

« Newer Posts - Older Posts »