Feeds:
Posts
Comments

Monastery Banana Bread
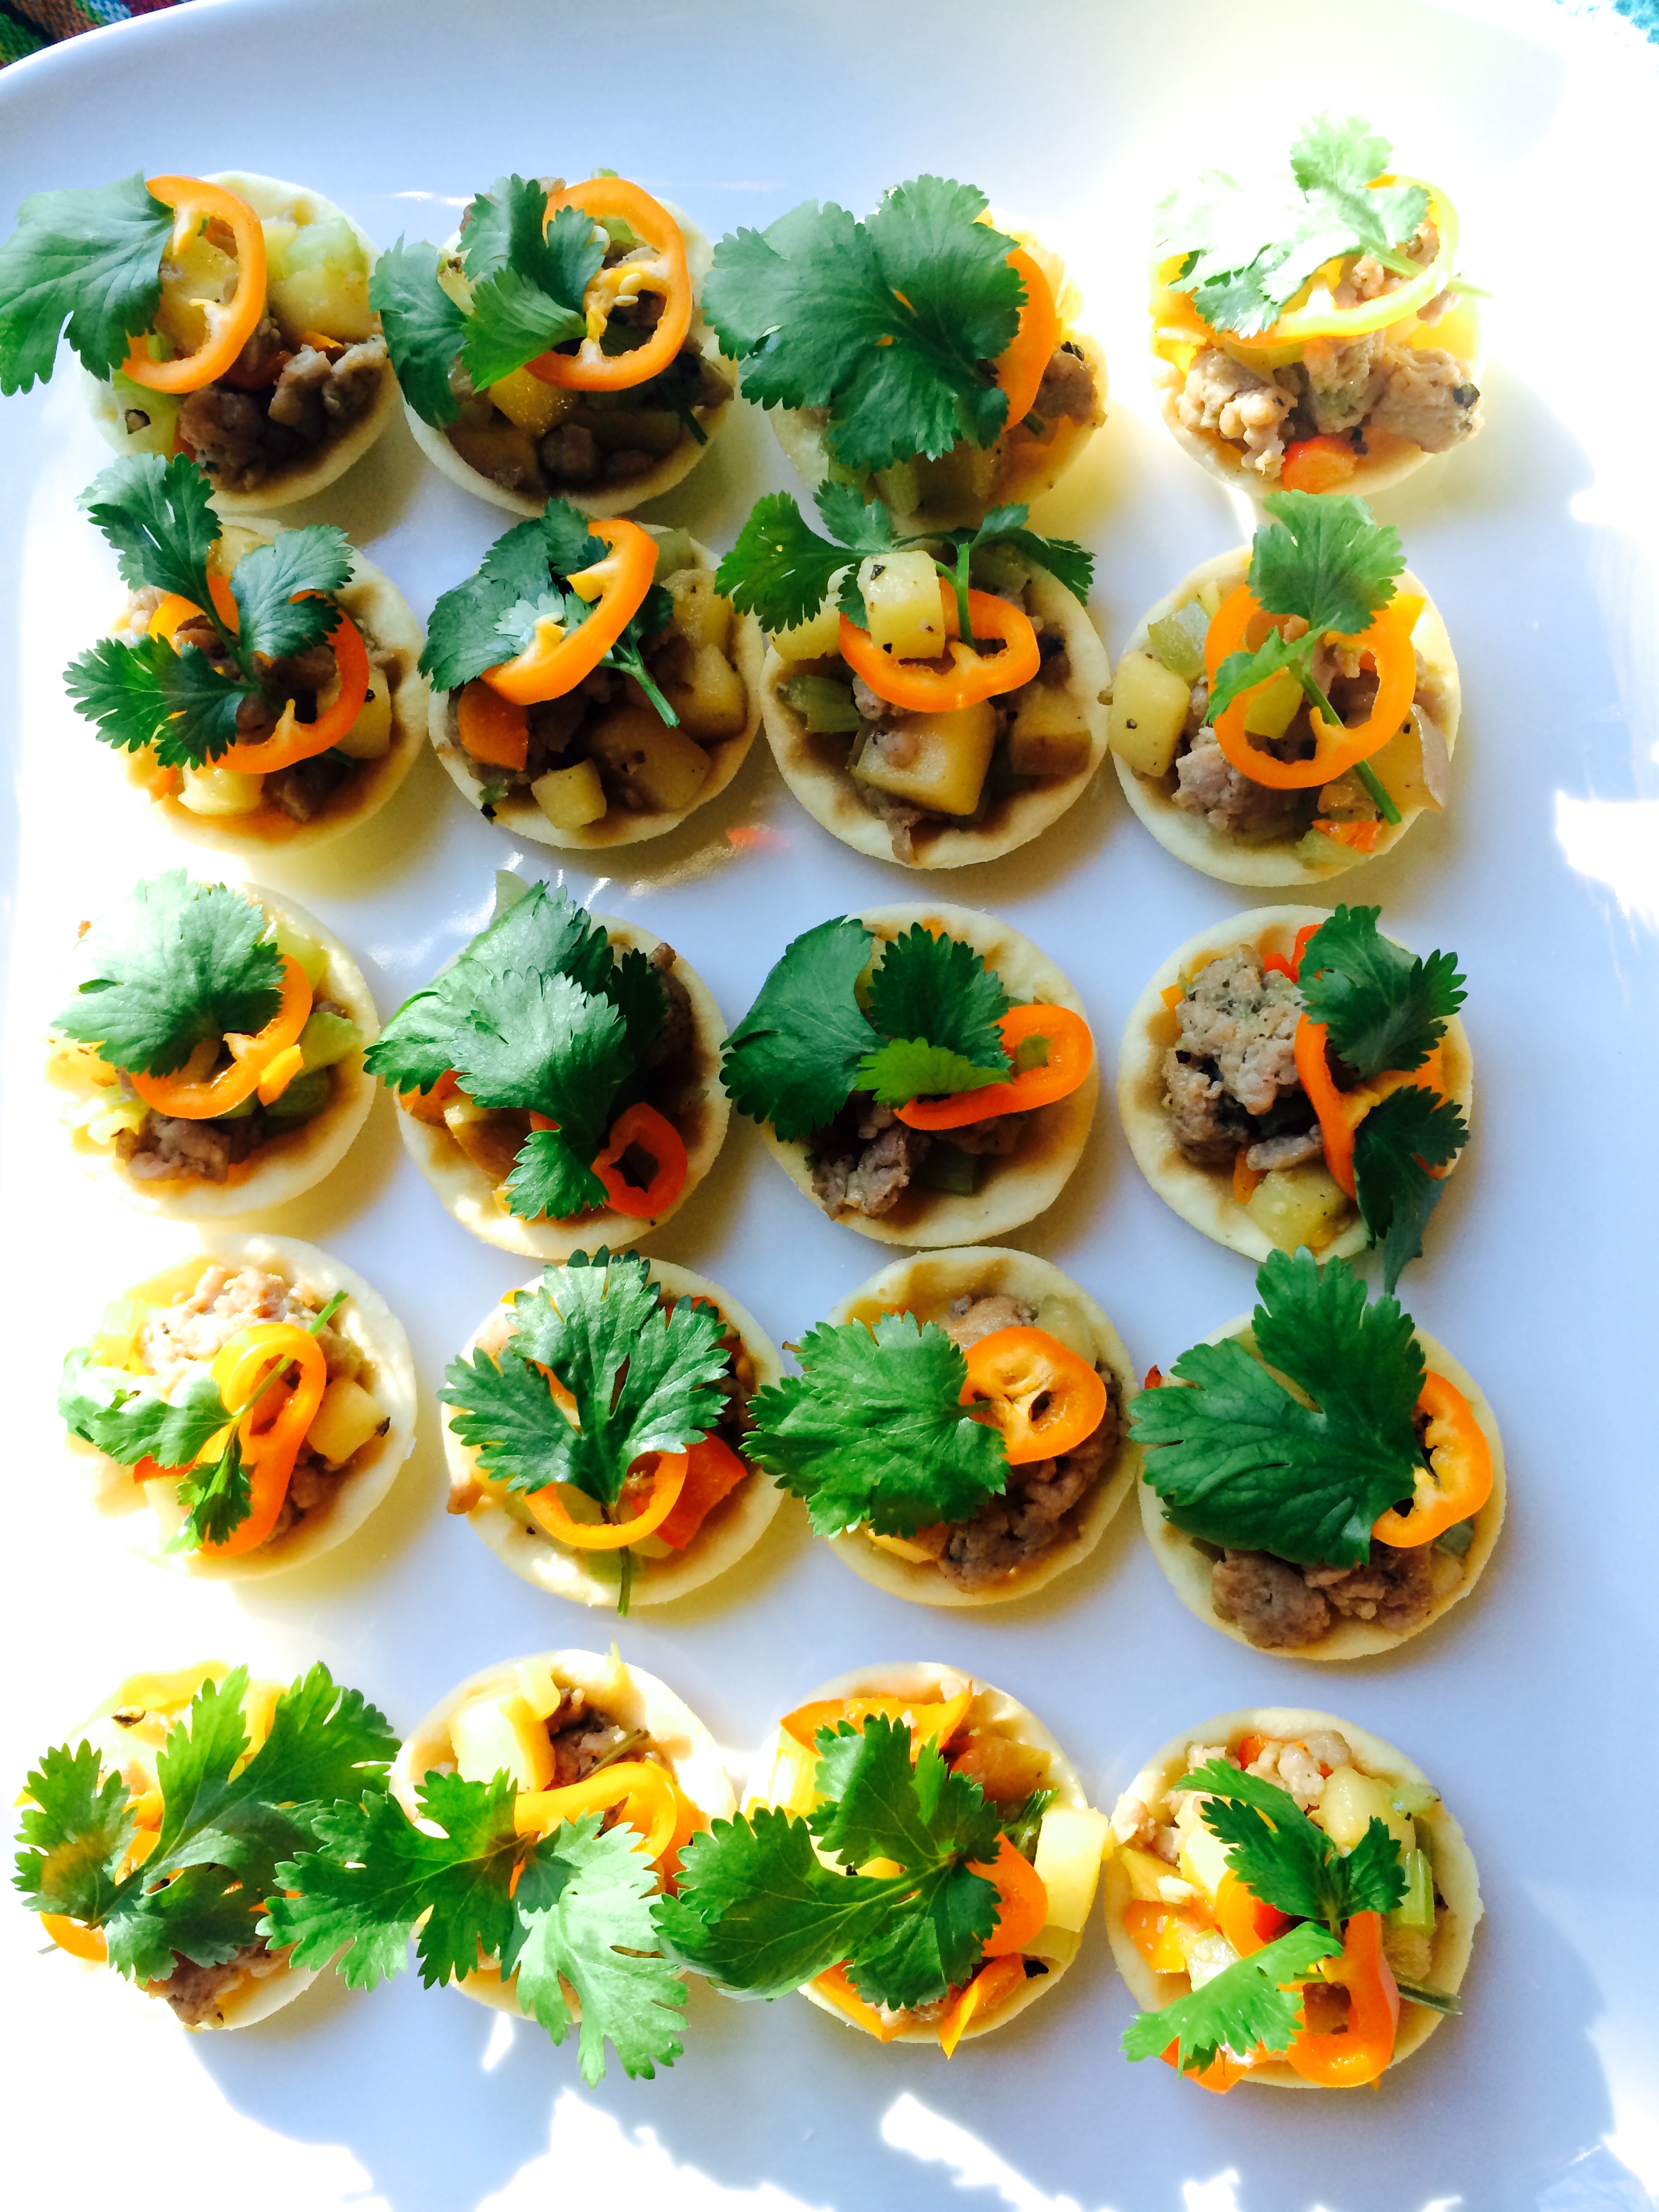
Assorted desserts

My son and I were at the Atammayatarama Buddhist Monastery early in the morning one day last week. We had volunteered to water over 20 newly planted trees surrounding the new meditation hall. Later in the morning I also offered food to three Thai monks. They were Southern Thai dishes such as stir-fried spicy stinky been with beef, Thai chili dip, Thai yellow curry rice and fried eggs. Since I am familiar with the kitchen, I also became a temporary helper there for the day. I helped visitors to properly place foods they had brought from home and to properly present them to the monks. At the end of the day, there were more than a dozen fully ripe bananas that had not been eaten. Waste not, I offered to take them home and return them to the Monastery as banana bread.

My banana cake recipe

This is my banana cake recipe from Thailand. I modified it into a quick and easy recipe for banana bread.

My banana bread recipe has long been on my list to share with you, but it never seemed to work out to do so until now. First, I found my 28-year-old recipe notebook which is always misplaced and hard to find. Second, I had the free time to make banana bread as well as a good reason for making it. The next day I made 4 loaves with one single recipe. It is a perfect recipe to bake once and share with friends and families as hostess gifts or for a community event.

Banana Bread-Cake – ขนมปังเค้กกล้วยหอม

This recipe makes an oil-based cake or quick bread that is baked in a loaf pan like a bread. Since vanilla and butter taste so good with bananas, I kept them in my recipe. I used olive oil because it is a healthy fat, but you can use any vegetable oil. There are no nuts in this recipe because I prefer it without. This recipe is light, somewhere between banana bread and banana cake. If I wanted to make a banana cake, I would keep the recipe the same but add one more cup of sugar, bake it in a cake pan, and then frost it with my dreamy coconut frosting recipe. But since I baked it in a loaf pan, let’s call it banana bread.

Banana Bread

Khanom Cake Kluey Horm

ขนมเค้กกล้วยหอม

This recipe makes four loaves of banana bread with a cake-like texture. It is unbelievably easy. Just stir the ingredients together and bake with fun. Enjoy it plain or with the frosting. If you wish to have it plain but sweeter, you can add one more cup of sugar or garnish it with frosting.

Yield: 4 loaves

7 cups cake flour
1 tablespoon baking soda
2 tablespoons baking powder
1 ½ teaspoons salt
2 sticks butter, melted
¾ cup olive oil
10 to 12 ripe banana, peeled, sliced and chopped
3 1/4 cups white sugar
8 eggs
2 tablespoons vanilla

Preheat the oven to 350 degrees F. Prepare loaf pans with oil and coat with flour, then set aside.

Sift flour, baking soda, baking powder and salt twice.

In a large bowl or 6-quart pot, stir butter, olive oil, banana and sugar together until blended. Then stir in eggs and vanilla until creamy. Add flour mixture 1/2 cup at the time, stirring after each addition until mixed. It will yield about 16 cups of batter. Divide equally into 4 loaf pans. Baking time is about 50 to 60 minutes. Bake without disturbing the cake for 45 minutes and then check the cake with a toothpick or wooden skewer; when it comes out clean, remove the pans from the oven. Let them rest on a wire rack for 15 minutes, then remove banana bread from the pans.

© 2012 Pranee Khruasanit Halvorsen
I Love Thai cooking
Pranee teaches Thai Cooking classes in the Seattle area.
Her website is: I Love Thai cooking.com  
 
Follow Me on Pinterest

Related articles

Romancing with Lavender

Can you smell that? This time it is something familiar to us all: lavender. It is not an indigenous Thai ingredient, but it is one that is easily adapted to Thai kitchens, just like any fragrant flower. So here is my contemporary Thai dessert, Coconut-Lavender Ice Cream. It was born last week from romancing with lavender in my kitchen. It has been three years since I met my friend Kathy Gehrt, cookbook author and the founder of the website Discover Lavender. She opened my world. Like most of us, I wondered how could one eat perfume flowers? The more I learn about how to cook with lavender, the wilder I get. It is an amazing discovery. For a change this post is not directly related to Thai cuisine, but a study of taste as a food lover. One should never stop exploring.

Culinary Lavender

Two years ago my friend purchased a few varieties of culinary lavender plants from the Lavender Wind Farm. This summer the plants took off. They have yielded many flowers, so last Tuesday Barbara and I got together and celebrated our first harvest day. We prepared lunch together and added a lavender accent to everything we had for lunch. We got creative. First I made an avocado and nectarine salad with lavender as a fragrant herb and garnish. Then we added a sweet bread spread with lavender butter, followed by baked salmon with lavender salt, and a lovage and lavender earl grey tea. After lunch we made lavender sugar, lavender infused honey and lavender salt. How lucky am I to have then also returned home with two large bunches of fresh lavender? Please feel free to check out my photos on I Love Thai Cooking flicker.

Coconut-Lavender Ice Cream with mixed melon

 Coconut-Lavender Ice Cream is ideal to serve in a summer month with a chilled mixture of water melon, honey dew melon and cantaloupe.

For a summery dessert in July there is nothing better than coconut ice cream with a scent of lavender. I have made a few versions and love to keep the coconut with a custard texture as the main flavor followed by a hint of lavender. It is a simple, easy recipe but the trick is to heat the cream mixture above 175 degrees, then after tempering it with the egg, bring it back to the stove top again but do not let it get higher than 160 degrees. When churning the ice cream, I recommend starting with a cold batter then do not churn it more than needed—about 25 minutes or until it starts to form a solid ice cream consistency. Finish the process in the freezer. Follow these tips to get a custard-style ice cream with a soft silky texture. I hope you have a chance to share this coconut-lavender ice cream with your families and friends this summer. Let’s create a romantic flavor and the fragrance of lavender in the air.

coconut cream, half and half and lavender

Heavy whipping cream, coconut milk and lavender.

Coconut-Lavender Ice cream

Coconut Lavender Ice Cream

ไอศครีมมะพร้าวลาเวนเดอร์

Anyone can make ice cream today. All you need is a simple machine and a good recipe to follow. For a lactose-free recipe, simply replace the heavy whipping cream with the same amount of coconut milk.

2 cups heavy whipping cream
2 cups coconut milk
3 tablespoons culinary lavender
8 egg yolks
1 ¼ cup lavender sugar (please click to see recipe)
 

First you will need to freeze your ice cream churning bowl at least 24 hours beforehand.

Prepare an ice water bath in a container that is larger than the pot.

Bring heavy whipping cream, coconut milk and lavender to a gentle boil and cook on medium-low with a gentle boil for 5 minutes or until it reaches 175 degrees.

Whisk yolks and lavender sugar in a large bowl until they are creamy, light and puffy like ribbon, about 10 to 12 minutes.

While slowly pouring the cream mixture into the yolks and lavender sugar mixture, stir constantly with the other hand to prevent the egg from curdling. Strain the mixture to remove the lavender as you pour it back into the same pot; whisk constantly while cooking on medium-low heat. The setting should keep the temperature below 160 degrees and the mixture should be steaming but never boiling. Observe the texture; watch for it to begin to thicken, changing from creamy and beginning to take on the appearance of a soft custard. When it is thick enough to coat the back of the spoon, remove the pot from the heat and place it in the prepared ice water bath.

Cool it in the ice bath and and then pour it into the prepared ice cream machine. Turn on the machine and continue according to the machine instructions, usually about 20 to 25 minutes. It should have a texture of soft ice cream. Put it in the freezer for 4 hours before serving.

Pranee’s Note

For further study on making ice cream, please check out the science related to making ice cream by Harold McGee.

Where can you find culinary Lavender in Seattle?

I found culinary lavender at Pacific Food Importers, Inc. By chance you can sometime fine them at some Seattle Farmers Markets. But best of all is if you have sunny spot in your garden, plant your own culinary lavender. Kathy Gehrt recommends the Royal Velvet variety. Next I recommend that you immerse yourself in a lavender world by visiting the Sequim Lavender Festival in Sequim, Washington.

Lavender at a Hmong farmer’s stand at the Columbia City Farmer Market

© 2012 Pranee Khruasanit Halvorsen
I Love Thai cooking
Pranee teaches Thai Cooking classes in the Seattle area.
Her website is: I Love Thai cooking.com  
 
Follow Me on Pinterest

Stink Bean: Top Ten Facebook Photo

Can you smell that? Stink bean, called sator in Thai – สะตอ – is also known as Parkia or Petai. It is a flat edible bean that is large, but dense in texture. Whether fresh or cooked, it has a taste and aroma similar to asparagus, but 3 to 5 times more powerful. You may never have heard of it or seen it before. Sator looks a like a large fava bean but is found on a large tree that only grows in southern Thailand, the neighboring countries south of Thailand, and near the equator. At home in Thailand, I have 55 Sator trees in various stages of development. It happens to be a native plant that survives on hilly mountains and thrives side by side with my durian tree. A perfect pair, stinky fruits and stink bean.

The scientific term for sator is Parkia speciosa. One cluster has from 3 to 15 pods and each pod can have 6 to 16 beans. Sator, like asparagus, has an amino acid that is responsible for the noticeable smell. Southerners, like my family and friends, are delighted when the short sator season finally arrives and they prepare and share sator dishes and photos. Below is a picture my niece posted on Facebook on May 30th; many of my friends and other chefs from Thailand did the same. Perhaps the famous smell of this rare edible bean is precious for those who value its deliciousness and take culinary pride in this special bean.

Phad Phed Sator Goong – ผัดเผ็ดสะตอกุ้ง

One of many food photos of a stink bean dish. This is one my niece posted on Facebook. The dish was prepared by my sister Rudee. It is a one dish meal of Stir-fried Spicy Stink Beans with Prawns served over steamed jasmine rice.

The middle of May is the beginning of sator season in southern Thailand. As the bean starts to make its appearance, sator fans get so excited. The most famous stink bean dish of all is Phad Phed Sator Goong – Stir-fried Sator with Prawns.

Sator and durian grow side by side in Phuket

Sator, สะตอ, grows wild in Phuket, a twisted cluster bean that grows on a tall tree, often side by side with durian.

What is Sator, Parkia or Petai?

It is an honor to once again present you with a local dish cooked by a local home cook, my friend Varunee who also teaches southern cooking on my culinary tour. Varunee will present you with Phad Phed Sator Phuket – Stir-fried Spicy Stink Bean with Prawns, Phuket Style. This is the way my mom and her mom and the local people in Phuket would cook it in their kitchens for family and friends. Please feel free to modify the recipe to suit your liking. There is no substitute for sator, however you can enjoy this recipe with any seafood or with other vegetables such as asparagus, fava beans or edamame for a similar texture.

Phad Phed Sator (Parkia) Goong – ผัดเผ็ดสะตอกุ้ง

Stir-fried Spicy Stink Beans with Prawns, Phuket Style

Phad Phed Sator Goong Phuket

ผัดเผ็ดสะตอกุ้งภูเก็ต

Serves: 4

3 tablespoons vegetable oil
3 cloves garlic, peeled and chopped
2 tablespoons Phuket red curry paste, or any brand from Thailand
1 teaspoon shrimp paste, optional (omit it if you use Mae Ploy Brand red curry paste)
8 prawns, shelled and deveined
1/4 cup water
1 tablespoon soy sauce
1 teaspoon palm sugar or brown sugar
1/2 cup Sator or Parkia beans, fresh or frozen
3 Kaffir lime leaves, center vein removed 

Heat a wok on high heat until it is hot, pour in vegetable oil and then stir in garlic, curry paste and shrimp paste. Stir well until fragrant, about 1 minute. Stir in prawns and stir for 30 seconds. Pour in water. Stir well until curry paste and oil are well-combined and prawns are cooked well in the sauce. Stir in soy sauce. Stir in palm sugar until well-combined.

Fold the Kaffir lime leaves lengthwise, remove the vein, then add the leaves to the wok. Stir in sator. Stir back and forth until the sator is partially cooked. Be careful not to overcook the prawns or the sator, which doesn’t need to be cooked very long. A shorter time is better for sator to keep its crunchy texture. Remove Kaffir leaves. Serve hot with steamed jasmine rice.

Please see instructions and photos below for cooking step by step.

Varunee shows you how to prepare her Phad Phet Sator Goong Phuket Style


My friend Varunee will show you how to prepare a famous Phuket dish Phad Phed Sator Goong, Stir-fried Spicy Stink Beans and Prawns, Phuket Style. Please enjoy her cooking.

Red curry paste and shrimp paste

In Phuket there are two kinds of red curry paste. One is for coconut-based curry and one is for stir-fries without coconut milk or with very little—just about 2 to 4 tablespoons coconut milk to make the sauce or to tone down the spicy level of the dish. Please do not be overly concerned with this level of complication, use Mae Ploy or Thai kitchen brands as you wish. For the best results, I recommend my Phuket Red Curry Paste Recipe.

Cooking oil and curry paste

Heat a wok on high heat until it is hot, pour in vegetable oil and then stir in garlic, curry paste and shrimp paste.

Phad Phed Sator (Parkia) Goong – ผัดเผ็ดสะตอกุ้ง

Stir in prawns and stir for 30 seconds.

Phad Phed Sator (Parkia) Goong – ผัดเผ็ดสะตอกุ้ง

Then pour in water and stir well until curry paste and oil are well-combined, making a good sauce, and the prawns are cooked well.

Phad Phed Sator (Parkia) Goong – ผัดเผ็ดสะตอกุ้ง

Stir in soy sauce.

Phad Phed Sator (Parkia) Goong – ผัดเผ็ดสะตอกุ้ง

Stir in palm sugar until well-combined.

Phad Phed Sator (Parkia) Goong – ผัดเผ็ดสะตอกุ้ง

Fold the Kaffir lime leaves, remove the veins, then add the leaves to the wok.

Stir in Sator – Stink bean

Stir in sator.

Phad Phed Sator Goong – ผัดเผ็ดสะตอกุ้ง

Stir back and forth until the prawns are cooked and sator is partially cooked. Be careful not to overcook the prawns or sator. A shorter time allows sator to keep its crunchy texture.

Credit: Khun Varunee

© 2012 Pranee Khruasanit Halvorsen
I Love Thai cooking
Pranee teaches Thai Cooking classes in the Seattle area.
Her website is: I Love Thai cooking.com 

Applied Thai Culinary Art

Gai Yang Amphawa – ไก่ย่างอัมพวา

Grilled Thai Chicken Gai Yang, shown here from my visit in 2011, is famous Thai street food.

On May 29th—just about two weeks ago—The New York Times published the article “Cuisines Mastered as Acquired Tastes.” It told the story of some cooks that have become stars of authentic cuisines from other than their native countries.

One person mentioned in the article is Superstar Thai chef, Andy Ricker, the James Beard Best Chef in the Pacific Northwest in 2011. The article was fascinating reading and brought to mind my last week’s post on Thai basic seasoning paste.  Andy Ricker uses Kratiem Prik Thai paste – a basic Thai seasoning – in his restaurant kitchens as intensively as a Thai would in his. I have been to Andy’s Pok Pok Restaurant in Portland, Oregon a few times. Several of the dishes on his current menu obviously use this basic Thai seasoning paste, including Kai Yaang: Charcoal, rotisserie-roasted natural game hen stuffed with lemongrass, garlic, pepper and cilantro), Moo Paa Kham Waan (Boar collar meat rubbed with garlic, coriander root and black pepper glazed with soy and sugar grilled over charcoal) and Kung Op Wun Sen (Wild caught gulf prawns baked in a clay pot over charcoal with pork belly, soy, ginger, cilantro root, black pepper, chinese celery and bean thread noodle.). Andy uses Kratiem Prik Thai as a marinade sauce in the first two dishes and as a seasoning in the third.

Goong Oob Woon Sen – กุ้งอบวุ้นเส้น

Goong Oob Woon Sen, a famous Thai hot pot dish served on a banana leaf. I enjoyed this dish served from a clay pot or on a banana leaf by street vendors in Amphawa. The grass noodles were soaked with the delightful flavors of soy, cilantro root, garlic and black pepper. A short gentle braising brings out all the great flavors.

It is great to see non-Thai become super stars in Thai cuisine because it is important to educate both Thai and non-Thai about our truly amazing cuisine. We would like non-Thai to appreciate and learn about authentic Thai cuisine in restaurants in America and elsewhere. And most importantly, we would like for Thai restaurant owners to work hard to preserve our culinary heritage through menus that don’t just offer dishes laden with sugar and coconut milk. If you are looking for a Thai cookbook, here are some authorities on Thai cuisine whose work I admire: David Thompson, a restauranteur and cookbook author; Nancie McDermott, cookbook author and historian; Robert Carmack and Robert Danhi, cookbook authors and tour leaders to Southeast Asia; and Naomi Duguid and Jeffrey Alford, cookbook authors, writers, travelers and photographers.

Fried Thai Garlic and Pepper Fish – Kratiem Prik Thai Pla – ปลากระเทียมพริกไทย

Fried Thai Garlic and Pepper Fish – Kratiem Prik Thai Pla

My friend Kratiem Prik Thai Pla at Kamala Beach village Pavilion Beach Restaurant with its signature garlic-black pepper sauce, topped with a lot of fried garlic.

Now that you have learned about Kratiem Prik Thai paste from this and the previous post, you can have fun learning to be a food detective, reading menus and finding the tastes of garlic, black pepper, and cilantro toots in Thai restaurants.

Cilantro roots alternative. In Seattle, when I see cilantro roots at a farmers market or at PCC Natural Markets, I buy a bunch so I can have a supply on hand in the fridge and the freezer. When  cilantro roots are not available, I use 2 teaspoons of finely chopped cilantro stems as a substitute for 1 cilantro root.

I hope you enjoy my photos from a famous restaurant in Bangkok, street food in Amphawa, and a beach restaurant in Phuket. The creators of these dishes may vary as to their preferences for white pepper or black pepper, soy sauce or fish sauce, palm sugar or white sugar, but they all use the secret ingredients of garlic, black pepper and cilantro root.

Please let me know if you have any suggestions for using Thai Basic Seasoning Paste Recipe.

Sun-dried Pork – Moo Daet Deow – หมูแดดเดียว

Amphawa, Thailand
Sun-dried pork on the street at Amphawa, ready to deep fry to order.
Some Thai cooks prefer to use fish sauce rather than soy sauce and white peppercorn powder rather than black pepper corns in making Kratiem Prik Thai Rak Puk Chee paste.

Kratiem Prik Thai Goong – กระเทียมพริกไทยกุ้ง

You will find the nationally famous garlic prawns in many forms and under many names in Thai restaurant menus. The traditional Thai version doesn’t mix in vegetables but has a few fresh sliced cucumbers on the side. This photo of garlic prawns was taken at Harmonique Restaurant, my favorite restaurant in Bangkok.

© 2012 Pranee Khruasanit Halvorsen
I Love Thai cooking
Pranee teaches Thai Cooking classes in the Seattle area.
Her website is: I Love Thai cooking.com  
 
Follow Me on Pinterest

Three Best Friends

สามสหาย – Saam Saahai

To consider oneself a Thai cook, one should understand the fundamentals of  Kratiem Prik Thai—garlic-black pepper-cilantro root seasoning paste. Like Nam Prik or chili dip, it is a truly Thai invention without any influences from neighboring countries. Like the classic pesto sauce that originated in Genoa in the Liguria region of northern Italy, Kratiem Prik Thai is a classic Thai culinary seasoning that has been around for as long as the existence of Siam.

Garlic, black pepper and cilantro roots

Pounding a mortar and pestle to make a Kratiem Prik Thai paste is a classic Thai culinary technique, and this paste is prepared practically everyday in every Thai kitchen where it serves as a seasoning for any meat or seafood. There is no need for more herbs than just this awesome three: garlic, black pepper and cilantro root. I like to call them the “three best friends” or, in Thai, สามสหาย – Saam Saahai. They often appear together in Thai recipes. Like The Three Musketeers, they are”All for one, one for all.”

Garlic – Black Pepper – Cilantro Root

Kratiem – Prik Thai- Rark Puk Chee

กระเทียม – พริกไทยดำ – รากผักชี

The Kratiem Prik Thai paste is simply made with just the three main ingredients of garlic, black pepper and cilantro. When balanced with salty and sweet from soy sauce and brown sugar, they deepen the flavor of grilled meat, appetizers, meat patties for soup, or marinades for meat before deep-frying. Then sweet chili sauce and Sriracha hot sauce may be served alongside the meat with a vegetable condiment. I hope you have a chance to learn how to make the Kratiem Prik Thai paste below and experiment with it in your cooking at home, from marinating your steak to adding it into a meat patty or simply sauteing it with seafood for a quick and easy main dish.

Garlic – Black Pepper – Cilantro Root Kratiem – Prik Thai – กระเทียม – พริกไทยดำ – รากผักชี

Place garlic, black pepper and cilantro roots in a mortar.

Garlic – Black Pepper – Cilantro Root, the three ingredients in  Kratiem – Prik Thai – กระเทียม – พริกไทยดำ – รากผักชี

With pestle, pound garlic, black pepper and cilantro root in a medium-size mortar

Garlic – black pepper – cilantro root Kratiem – Prik Thai – กระเทียม – พริกไทยดำ – รากผักชี

until it forms a fine paste, about 2 to 3 minutes.

Garlic, black pepper and cilantro roots with brown sugar and soy sauce: Kratiem – Prik Thai – กระเทียม – พริกไทยดำ – รากผักชี

Add brown sugar and soy sauce and stir in circular motion with pestle until it is well-blended and smooth.

Thai Basic Seasoning Paste

กระเทียม – พริกไทยดำ – รากผักชี

This recipe makes a large quantity. You can store it in the refrigerator and use it as needed, or freeze it in convenient quantities in an ice cube tray. Use 2 tablespoons of the finished paste per pound of meat or seafood as a marinade before grilling or frying. You can also use it as a basic seasoning paste in ground meats cooked for Thai appetizers. Please click on the photo for a link to a recipe for using the paste with seafood or shrimp.

 
Yield: 1/2 cup
 
1 tablespoon black pepper corns, or more
10 cloves garlic, peeled and minced
8 cilantro roots or 4 tablespoons chopped cilantro stems
6 tablespoons soy sauce
1 to 2 tablespoons brown sugar
 
Place garlic, black pepper and cilantro roots in a medium size mortar. With pestle, pound the ingredients until they form a fine paste, about 2 to 3 minutes. Add brown sugar and soy sauce and stir in circular motion with the pestle until it well-blended and smooth. Store in a mason jar in the refrigerator for a week, or freeze for up to 6 months. Please see suggestion above on how to incorporate this seasoning paste in your cooking.
 
Alternative preparation method: Place garlic, black pepper, cilantro roots, soy sauce and sugar in a blender and blend until it reaches the desired texture. I like the consistency shown above which still maintains a little texture.
 
Note: Please wait to see my next post when I will discuss in depth how to incorporate Kratiem Prik Thai Rark Puk Chee seasoning in your daily cooking.
 
© 2012 Pranee Khruasanit Halvorsen
I Love Thai cooking
Pranee teaches Thai Cooking classes in the Seattle area.
Her website is: I Love Thai cooking.com  
 
Follow Me on Pinterest

From a Thai Village to the Big City

I grew up in a world full of lemongrass and could tell you thousands of stories that evolve around this fragrant herb, from planting and cooking it, to all things related. But I will keep this short and sweet so that you can go straight to my recipes and prepare them.

Lemongrass Paste & Lemongrass Tartar Sauce

Here in Seattle, I always have many lemongrass stalks in my refrigerator—not in the backyard like in Thailand, but both methods work for the Thai cook who wants to be able to add lemongrass to a recipe at a moment’s notice. When I do a hands-on class I make sure students learn how to prepare lemongrass three ways (please watch the video). This lesson results in a lot of leftover lemongrass, which I cook, freeze, or make into a powder. A few days ago my friend was visiting me and our discussion of this and that led us to the kitchen. I wanted to make a pesto-like paste for her to add to her marinade sauce. I decided to stop short of making the lemongrass paste and we wandered off to another topic. The idea for us today is to use up the lemongrass in my fridge and turn it into a versatile form ready to be incorporated into many dishes such as a wet rub for a marinade or a lemongrass tartar sauce to go with fried rock fish for a family dinner.

I wish you fun cooking this summer with the lemongrass paste recipe from my kitchen. First you have to start your lesson at home by learning how to prepare lemongrass for Thai cooking.

Lemongrass Cutting 101 – slicing it right

Click picture to view video on slicing lemongrass by Pranee

Slicing lemongrass properly is an important part of Thai cooking. I hope you spend some time learning the right way to do this and get enough experience to develop a solid technique. Don’t try to save time by slicing lemongrass into bigger pieces because you are using a food processor. The grain of this fibrous plant runs lengthwise of the stalk, so slicing it thinly against the grain is essential. Besides, it provides aroma therapy and a mindful moment in the kitchen!


Lemongrass Paste, Lemongrass Tartar Sauce

Lemongrass Paste 

Lemongrass has a citrus aroma that can blend into any dish. I make a lemongrass paste using extra light olive oil that you can use well beyond Thai cuisine. Like lime and lemon, it blends itself into any cuisine. I spread it out on toast like pesto, or add it to rice, curries, marinades, or just about anything. All become so delightfully fresh. Also, to my amazement, the fragrance of lemongrass and olive oil are divine together.

yield: 1/2 cup

5 lemongrass stalks, trimmed and sliced (please watch Pranee’s Demonstration on YouTube)
1/4 cup extra light olive oil
1/2 to 1 teaspoon salt

Place lemongrass, olive oil and salt in the blender or mini food processor and blend. Use spatula to clean the side to make sure it well mixed. Repeat the process repeat the process several times until getting a smooth texture. Store in a jar, keep in the fridge for a week or up to three months in the freezer.

Lemongrass Tartar Sauce with Dill

Lemongrass Tartar Sauce with Dill

The idea of creating a lemongrass tartar sauce came to me randomly. My son loves fish with tartar sauce and I have made tartar sauce for him many times. Many western chefs, such as Christine Keff from the Flying Fish in Seattle, have created an awesome lemongrass aoli, so I thought why not a tartar sauce? I use serrano peppers and dill as they go really well with fish and keep the color palate to just green. I love the results and would use this sauce in many ways, not just for fried fish.
Yield: 1/2 cup
 
1/4 cup mayonnaise (I used Best Foods mayonnaise with olive oil)
2 tablespoons lemongrass paste, from recipe above
1/2 -1 whole serrano pepper, grated with a microplane
1 clove garlic, grated with a microplane
1 tablespoon small diced pickled cucumber
3 tablespoons lemon juice (I used calamansi juice)
1 tablespoon dill, chopped
 

In a one-cup bowl, stir together mayonnaise, lemongrass paste, serrano pepper, pickled cucumber and lemon juice until well-mixed. Stir in dill until it is well-combined. For the best results, prepare the night before or at least 30 minutes before serving.

© 2012 Pranee Khruasanit Halvorsen
I Love Thai cooking
Pranee teaches Thai Cooking classes in the Seattle area.
Her website is: I Love Thai cooking.com  
 
Follow Me on Pinterest
 
Related articles

Discontinued Mango Black Tea Smoothie

Late in the spring last year I went to my regular smoothie place. I stood in line and when it was my turn to order I found out that my favorite mango black tea smoothie was no longer on their menu. It had been discontinued! Disappointed, a few day later I made my own version in my kitchen, just like my mom would do. There is something about food cravings and fulfillment. For food lovers, satisfying a craving is taking care of our soul.

The mango smoothie I made last year was a good one. It was right at the peak of mango season and it tasted great. I call it a Lychee Black Tea Mango Smoothie. I was ready to share the recipe with you then, but the mango season was gone before I could capture a picture of my new drink. Since the recipe depends on just three ingredients—mango, lychee black tea and honey—you’ll want to pick the freshest, best quality mangoes for your smoothie. The other key to this recipe is balancing the deep flavor of the tea with the fruity and sweet flavors of the mango and honey.

I love lychee black tea. It is fun to drink this black tea with its alluring aroma and note of sweet floral lychee. However, this tea may be difficult to find if you do not have an Asian market nearby. There are a few online sources for lychee black tea. The alternative is to use any fruity black tea that you think would work well with mango and honey. Just give it a try!

Honey, lychee black tea, and mango

A fresh honey mango or a Manila mango is ideal for this drink, though any mango will work. Let it sit in a brown paper bag until it fully ripens. (I tested this recipe late last summer with a fully ripened peach and it was amazingly good as well.) Mangoes and peaches are available frozen all year round, so you can enjoy this lychee black tea mango smoothie as often as you wish. All you have to do now is find the perfect lychee tea to add to your tea collection.

Lychee black tea, mango, and honey smoothie

Lychee Black Tea Mango Smoothie

Nahm Lynjee Chadum Mamuang Pun

น้ำลิ้นจี่ชาดำมะม่วงปั่น

I love this smoothie recipe, which came to me effortlessly. I always have lychee tea at home and a supply of honey from my friend’s garden. When mangoes are plenty and I have one that is fully ripe, I simply place all of the ingredients in a blender, blend and pour into two glasses. Cheers to double antioxidants!

Serves: 2

Yield: 3 cups

2 to 3 tablespoons lychee black tea or 2 bags black tea
1 cup boiling water
Steep for 5 to 10 minutes
2 large mangoes, peeled and sliced, about 2 cups
1 tablespoon honey
2 pinches salt
1 cup crushed ice

Steep lychee black tea in 1 cup boiling water, letting it sit for at least 5 minutes, or steep for 8 to 10 minutes to make a deep colored tea. Set tea aside to cool while peeling and cutting the mangoes.

Place cooled tea, mango, honey, salt and crushed ice in the blender. Blend until smooth. Serve right away!

I Love Thai cooking
Pranee teaches Thai Cooking classes in the Seattle area.
Her website is: I Love Thai cooking.com  

Follow Me on Pinterest

Grilled Bok Choy for Minimalist Cooking

Bok Choy – ผักกาดใบ

I want to share with you my tips and techniques for making quick and easy grilled bok choy, something I did last weekend to celebrate the first warm sunny day when I spent a lot of time outdoors gardening. Cooking in the summer is about minimalism, and I like the idea of a few ingredients on the grill at one time.

Bok choy, also known as Chinese cabbage, is my favorite Asian vegetable. To me it is like vegetable-candy. I love its crunchy texture and light mustard flavor and the fact that I don’t need to be concerned about calories when I eat it. Even in large portions, I can just enjoy its delightful nutritional benefits. There are many ways to stir-fry bok choy with seasonings in a wok, but my favorite way to cook it is on the grill. This is in part because I don’t like to cut up a beautiful bok choy before I cook it; I would rather do that with a knife as I eat it. With baby bok choy, however, I can avoid cutting it all together and there are many other delicious Asian vegetables that I can cut up and stir-fry—such as choy sum, morning glory, and dozens of other greens. So when summer comes along, bok choy becomes a regular on my grill. It goes with any main dish.

This recipe is a great way to enjoy beautiful, low-fat, crispy, grilled bok choy. I typically cut regular bok choy in half lengthwise. This makes for easy grilling and a very appealing natural pattern. To quote Georgia O’Keeffe: “Colors and line and shape seem for me a more definite statement than words.” Sliced bok choy makes a beautiful pattern indeed. You can appreciate the look while grilling and eating them, and it only takes a little effort. You can dress the bok choy up to accompany any type of cuisine by adding a vinaigrette or sauce after grilling.

Grilled bok choy as a side dish

A perforated grill pan is ideal for grilling vegetables or seafood

Technique

First cut the bok choy in half lengthwise, then soak it under ice cold water for 15 minutes or longer for a crispy texture. Drain well, but do not spin. Drizzle a tablespoon or more of grape seed oil (or any vegetable oil) over the bok choy then sprinkle with 1/2 teaspoon sea salt; using tongs, mix well. (This technique is easier and uses less cooking oil than brushing it with oil.) The water bath, cooking oil and salt will keep the vegetable green, shiny and tasting good. Crushed fresh white or black pepper adds a great accent.

Grilled bok choy, grilled beef and steamed jasmine rice

This is a perfect dinner for a minimalist. Except for the rice cooked in a rice cooker, each dish is cooked with just three ingredients out on the grill. I rub fish sauce over my steak and pierce it with rosemary from my garden. The steaks are 1/2 inch thick, so both the steak and the bok choy cook in less than 15 minutes. The total time to prepare and to cook is about 30 minutes.  Minimalist cooking is a perfect approach for summer to come!

Grilled Bok Choy

ผักกาดใบย่าง

Pak Gard Bai Yang

Serves: 4

 
1 pound bok choy, cut in half lengthwise
1 tablespoons grape seed oil, canola oil or any vegetable oil
1/2 teaspoon fine sea salt
1/4 teaspoon freshly ground black or white pepper
1/4 cup Thai Chili-lime vinaigrette, optional

Pre-heat the grill to high heat. Place perforated grill pan on top of the grill.

Soak bok choy under cold water for at least 15 minutes, or longer for a crispy texture. Drain well but do not spin. Drizzle on a teaspoon or more of the oil and sprinkle 1/2 teaspoon sea salt over the top. Use tongs to mix well.

Place bok choy on perforated grill pan in a single layer and let it grill for 3 to 5 minutes on each side until it is translucent but still firm. Serve as is, or use tongs to mix well with Thai Chili-lime vinaigrette. Serve warm or cold as a side dish.

Pranee’s Note: Measure the first seven ingredients from the Thai Chili-Lime Vinaigrette recipe into an 8-ounce mason jar, close the lid tight and shake well. Pour over grilled bok choy.

I Love Thai cooking
Pranee teaches Thai Cooking classes in the Seattle area.
Her website is: I Love Thai cooking.com  

Follow Me on Pinterest

Home Sweet Home Cooking

I am happy to be home again. I have been away for two weeks, first to New York City to attend the International Association of Culinary Professionals 34th annual conference. The theme this year was The Fashion of Foods. After the conference, I took a train ride down to Washington DC. It was an incredible trip. I learned so much from the many workshops I attended related to foods, cocktails and writing, and had a chance to reconnect with many colleagues in the culinary world. And, most importantly, I had a chance to check out the local food scenes, including five Thai restaurants in the New York area. I plan to share my restaurant reviews and photos with you soon.

Beautiful spring is finally here

As much as I enjoyed eating out and tasting foods while on my trip, I am so ready for home cooking and something healthier. So I have set aside my fine dining experiences in favor of my down-to-earth, easy, and healthy, with a clean and refreshing flavor, steamed rice, fried organic egg, and stir-fried local vegetable. I am happy and content to just eat these for now.

My every week purchase – Swiss chard from the farmers market

I love fresh vegetables from the farmers market. I love to stir-fry them with garlic and fine sea salt.

Please see my Stir-fried Choy Sum Recipe

My first Saturday back home I visited the University District Farmers Market and stocked up with the freshest vegetables and salad greens. I routinely purchase at least three kinds of vegetables at the market. They are so fresh that they keep well in the fridge and often farmers will  give a discount for buying two bunches of vegetables that cost the same price.

I cook my eggs the way many Thai like their eggs cooked – a crispy egg white with the egg yolk just set, as in the photo below. We say it is like “Yang Matoom” – cooked just enough so that the yolk is “sticky” like the sap from the bael fruit tree. I hope you can enjoy this quick, easy and low-fat fried egg recipe! This is a typical fried egg that I have for lunch almost everyday. With a few drop of fish sauce from prik nam pla and warm steamed jasmine rice, I feel so at home now.

Fried egg Thai style

Thai Fried Egg

Kai Dao

ไข่ดาว

My Thai family never worries about the amount of oil used to prepare fried eggs – Kai Dao. We pour just enough oil into the pan to fry the egg, about 3 tablespoons. Some of the oil will be left in the pan after the egg is cooked. But for myself and my health conscious fans, a tradeoff for this recipe is to use a well-seasoned wok or cast iron pan to get a very crispy texture to the egg. I am happy to have just one side crispy instead of both.

This Kai Dao can be served with steamed jasmine rice, or any Thai fried rice dishes, with just a few drops of fish sauce or soy sauce on the egg, and served along with a stir-fried vegetable.

Serves 1

1 tablespoon canola oil
1 egg
 
Heat a well-seasoned wok or cast iron skillet on high heat. Pour in the oil and tilt the pan to cover the whole surface with oil. Then crack one egg and place it in the center. Fry on high heat until the bottom is crispy and golden brown to your liking, about 30 to 40 seconds. Then reduce the heat to medium and cover with a glass lid; cook until the egg white is cooked and the egg yolk is done to your liking, about 30 to 40 seconds. Remove and serve.
I Love Thai cooking
Pranee teaches Thai Cooking classes in the Seattle area.
Her website is: I Love Thai cooking.com 


Follow Me on Pinterest

The Old Day & The New Way

When I was in Thailand exactly a year ago, I created this recipe – Spicy Thai Coconut Chips. I wanted to create delicious snacks for upcoming cooking demo. At the same time I wanted the flavor to reflect my Southern Thai cuisine, specifically my grandmother cooking. After receiving a reminder to send in recipe from Seattle office, I went to my mom kitchen and cook with my family. This was a same day I wrote and recorded a mystery dish from Southern Thailand – Stir-fried Fresh Grated Coconut with Phuket  Curry Paste.

Stir-fried fresh grated coconut with Phuket red curry paste

It was a perfect day. I was lucky that my sister in-law – Tim was there. After she prepared the old forgotten dish of stir-fried fresh greated coconut with Phuket curry paste, I created new modern dish to reflect this flavor for the new generation. It is not often that I cooked for my family in Thailand. They were impressed seeing a recipe developer at work. I used my grandmother’s favorite spice, turmeric. I added more spice and other ingredients to create the balance of flavor of sweet, sour, salty and spicy. And my whole Thai family was excited with familiar texture and flavor from the coconut chip that was bake in my sister small oven.

Pranee’s Spicy Thai Coconut Chips

I hope you enjoy the step-by-sttep photos and recipes below taken and created in my mom’s kitchen in Phuket, Thailand. Have a great spicy Thai crunches!

Spicy Thai Coconut Chip

Maprow Krop Rod Ped 

มะพร้าวกรอบรสเผ็ดเปรี้ยวสไตล์ไทย

slice fresh coconut with peeler

First sliced fresh coconut with peeler, you may use dried coconut chips in a package. The cooking time may vary. Dried coconut chip is accessible and easy to prepare and it has longer shelve life.

fresh coconut chips

Place coconut chips in a baking sheet.

mix with spicy, salty, sour and sweet

Combine chili powder, turmeric, salt and lime juice in a large bowl or right on a baking sheet.

Spicy Thai Coconut Chips

The clue is crisp and dry and the coconut is almost brown.

1 to 2 teaspoons chili powder
2 teaspoons turmeric
1 teaspoon sea salt
2 tablespoons lime juice
3 cups dried large coconut chips or sliced fresh coconut chips

Preheat oven to 350º F. Line a baking sheet with parchment paper.

Combine chili powder, turmeric, salt and lime juice in a large bowl. Mix in coconut chips and combine well.

Spread coconut flakes in a thin layer on the baking sheet. Place in the center of the oven rack and stir every 4 minutes for 8 to 12 minutes, or until crisp and toasted.

I Love Thai cooking
Pranee teaches Thai Cooking classes in the Seattle area.
Her website is: I Love Thai cooking.com 

Recipe by Pranee Halvorsen, PCC Cooks instructor.  Demonstrated on the PCC Cooks stage at Vegfest 2011. You also can see this recipe from PCC Natural Markets website.

Without a Rice Cooker

You can cook rice for 30 people, anytime, without a rice cooker! Since last November, my son and I have been preparing one meal a month for 60 homeless youth at Seattle’s [James W. Ray] Orion Center. The organization helps homeless youth get off the street and provides them with meals, education and shelter. The meal-calendar is posted and updated to allow members of the public to sign up to prepare a meal for these hungry youth. It has been a rewarding experience to take part in helping to build community. Thank you to a friend who also signed up to help prepare a meal with me. Together—without a rice cooker—we cooked lavender-turmeric scented jasmine rice for 30–6o hungry young people.

Rice can be cooked in a rice cooker, on the stove top, or in the oven. My recipe below is for rice cooked in the oven. I wanted to share the recipe so you would know that you do not need to buy a rice cooker in order to cook large quantities of rice. Instead you can purchase a large hotel pan and cook up to 30 servings of rice in about an hour.

Before putting rice and water in the hotel pan, it is best if all ingredients are hot before they are sealed up and placed in a preheated oven. (Here’s a link for an explanation as to how this method works: “Once water is heated past the 212°F mark, it stops being water and turns into steam. Steaming has an advantage over methods such as boiling or even simmering …..”. Moist Heat Cooking Method by About.com.)

About the recipe

Culinary Lavender

Today, the recipe I want to share with you is Kao Oop Kamin and Dok Lavender, lavender-turmeric scented jasmine rice. It works well served with Thai main dishes such as Thai curry dishes. I came up with the concept of adding lavender to turmeric scented jasmine rice about two years ago after I visited the Lavender Wind Farm on Whidbey Island and purchased a bag full of culinary lavender. After that visit I began adding lavender to everything. My friend, Kathy Gehrt, a local expert on cooking with lavender, says ” you can infuse anything with lavender” just be careful not to over use the lavender. You can learn more about cooking with lavender from Kathy’s book as well as her blog “Discovering Lavender.

One day I simply played with turmeric powder and lavender in a rice cooker. I found it had an alluring and somehow surprising fragrance. After making this dish I forgot about this new flavor and scent combination until sometime later when I heated up the leftovers and experienced the same unexpected delight. The next time I cooked this recipe was at the first dinner I prepared at the Orion Center. My friend was puzzled by the rice’s flavor and fragrance—”What is it in this steamed rice?

Thai jasmine rice, culinary lavender and turmeric

The sweet perfume of lavender complements the pungent turmeric, which is also known as Indian saffron. This amazing blend gives off an alluring aroma and gives the rice a subtle flavor that allows you to serve it with any cuisine. You can find culinary lavender in jars or in the bulk herbs section in a natural food store.

Playing with lavender and turmeric in a rice cooker

Lavender-Turmeric Scented Jasmine Rice

Kao Op Khamin Dok Lavender

ข้าวอบขมิ้นลาเวนเดอร์

Lavender-Turmeric Scented Jasmine Rice

Yield: 30 cups cooked rice

When I cook this at a large event, I measure up the jasmine rice, turmeric, lavender and salt beforehand and store them in a large ziplock bag. Each bag will provide a main course or side dish for 30 servings. You can bake enough in your oven to serve 30 people. In a commercial kitchen, where the ovens are larger, you could double the recipe and bake each in a separate hotel pan—one on the top shelf and another one on the bottom shelf. For smaller portions at home, set the oven temperature at 350°F and bake for 30 minutes, then let rest for 10 minutes. The rice to water ratio is 1 to 1 ½.

1/4 cup canola oil
10 cups jasmine rice
1 tablespoon turmeric powder
3 tablespoons culinary lavender 
2 teaspoons salt
16 cups boiling water
2 sheets 2 ½-foot-long aluminum foil 

Preheat oven to 425°F. Place large pan on high heat on the top of your stove and add canola oil. When the oil is hot, add rice, turmeric, lavender and salt and stir for 1 minute. Pour the rice mixture into a hotel pan and then pour in boiling water. Stir well and cover tightly with foil. Put pan in the preheated oven and let it cook undisturbed (no peeking) for at least 40 minutes. Remove the pan from the oven and let it sit for 10 to 20 minutes before removing the foil. Stir and serve.

Summer 2010 at Lavender Wind Farm, Whidbey Island

 
I Love Thai cooking
Pranee teaches Thai Cooking classes in the Seattle area.
Her website is: I Love Thai cooking.com 
 
 Related articles

Do Nothing Day

Honey-lime Tea

Honey-Lime Tea, Cough Remedy

I got bit by a winter bug and have been resting for the past two days. What do I eat on such a do nothing day?  I prepared Honey-Lime Tea to sooth my coughing and sore throat. For dinner I prepared myself a rice porridge. While the rice porridge was on the burner, I whisked up an omelet from an old family recipe – a classic Thai omelet with pickled sweet radish – Kai Jeow Chaipor Wan. I took some pictures to share with you so you could enjoy eating this omelet along with rice porridge – Kao Tom from a recent post. This good gentle food doesn’t take long to cook, another reason why it is good for a day when you are not feeling well.

The four ingredients are eggs, shallot, Thai chilies and pickled radish. The pickled sweet radish is the same one that Thais use in phad thai, so it is easy to find. You may use dried daikon radish from PCC Natural Markets, but add a squeeze of lime juice and a teaspoon of fish sauce or soy to the recipe. You may also try it with Kimchi and pickled mustard greens; since both are pickled, you do not need to add fish sauce or soy sauce.

I hope you enjoy this simple recipe with four ingredients and three cooking steps. Twenty minutes after starting, I had both rice porridge and omelet on the dining table. I enjoyed this warm, down-to-earth comfort food and once again felt like I was at home with my mom and family in Phuket.

Pickled Sweet Radish Omelet

Kai Jeow Chaipor Wan 

ไข่เจียวไชโป้วหวาน

Serves: 2

1 small shallot, peeled and sliced
2 eggs
2 fresh Thai chilies or serrano chilies, sliced
1/4 cup pickled sweet radish
3 tablespoons canola oil

Place shallot, eggs, chilies and pickled sweet radish in a medium size bowl, then beat with fork to mix, about 1 minute.

Heat 6-inch cast iron pan or frying pan on medium-high heat. Pour in canola oil and tilt to coat the bottom of the pan. Pour omelet batter in the hot pan, stir quickly 5 times and then let it spread out to cover the bottom of the pan. Turn the burner to medium heat, cover with a lid and let it cook until the bottom of the omelet is dry. Flip the omelet and cook for 30 seconds more. Serve with rice porridge or steamed jasmine rice.

Sliced shallot, eggs, sliced chilies and pickled sweet radish

First you place shallots, eggs, chilies and pickled sweet radish in a medium size bowl.

Stir with fork until it well-mixed

Then beat it with a fork to mix, about 1 minute.

Phuket Pickled Sweet Radish Omelet

I Love Thai cooking
Pranee teaches Thai Cooking classes in the Seattle area.
Her website is: I Love Thai cooking.com 
 

Not Just for Fine Dining, Golden Trout

Last Saturday I went to the Pike Place Market to get the fresh fish of the day for my family dinner. Golden trout caught my eye. When I visited the market last summer, only City Fish carried it. This time around it seemed that every fish stall had a pile of golden trout, so I thought this would be a perfect time to share my recipe with you for Steamed Golden Trout in Lime-Chili-Garlic-Dill Sauce. The pictures were taken a while ago, but the recipe is timeless. It is based on Phuket Pla Nueng Manao—steamed fish in lime juice—but the way I prepared it reflects my new home in the Pacific Northwest.

Golden trout is a sub-species of rainbow trout, both of which are related to salmon. The pale pink color of the flesh and its texture are a really amazing mixture of both trout and salmon. There are many ways to prepare golden trout, but today my favorite is to steam them. I love cooking fish whole, so using the oven is a quick way to go.

The golden trout I bought was from a farm in Idaho. Golden trout’s natural habitat is the “clear, cold headwaters of creeks and lakes at elevations above 6,890 feet,” but most golden trout come from fish farms. This is because you may fish for them for your personal consumption but not to sell them commercially. Most golden trout in the markets are from the Idaho Trout Company. From my research I learned that fly fishing for rainbow trout and golden trout is a very popular activity.

Fresh Rainbow Trout from Pike Place Market

When it comes to steaming fish, I am my grandma’s grandaughter. I ate many meals of steamed fish with my grandmother, like Clay Pot Lemongrass-Steamed Fish (Pla Nueng Morh Din). I hope you will have a chance to cook a few of her recipes. Several of them are featured in the Asian Grandmothers Cookbook by Pat Tanumihardja. At home here in Seattle, I have adapted my grandmother’s recipe into an easy and fun way to prepare fish for my friends and family. My recipe below reflects my quick and easy method for doing this at home. I will let you decide which way you prefer.

Garlic, Lime, Dill and Purple Chili

PLA NUENG MANAO

ปลานึ่งมะนาว

Steamed Golden Trout with Lime-Chili-Garlic-Dill Sauce

Servings: 4

Preparation Time: 15 minutes

Cooking Time: 15 minutes

If you love fish, this recipe works for all occasions! It is light, fresh and delightful — yet easy to prepare. While steaming the fish, prepare the sauce. When the fish is cooked, just pour the sauce over it and serve with hot, fragrant jasmine rice.

1 whole golden trout, or any fileted fish (cooking time may vary)
4 lemongrass stalks, trimmed and smashed
large sheet of parchment paper and foil
10 cloves garlic, peeled
5 Thai red chilis, purple chilis, jalapeno or Serrano peppers
1 cilantro root
1 teaspoon salt
2 tablespoons sugar
2 tablespoons fish sauce
3 tablespoons lime juice
1/4 cup chopped dill or cilantro
4 lime slices for garnish

Using a mortar and pestle, pound garlic, peppers, cilantro root and salt until smooth. With pestle, blend in sugar, fish sauce and lime juice until sugar dissolves. Stir in dill. Set aside.

Preheat oven to 375°F.  Place 1/4 cup water in a 9” x 13” baking pan, then spread the lemongrass out. Place the trout on the bed of lemongrass and sprinkle salt on top of the fish. Cover the dish with parchment paper and then the foil, wrapping it around the edges to form a seal. Bake until the fish is cooked, about 10 to 15 minutes. (The good thing about steaming is you never overcook the fish). To check if the fish is done, insert a knife into the thickest part of the fish and lift the flesh away from the backbone. If it is easy to separate the flesh from the backbone, then it is done. If not, steam a little bit longer.

Place trout on a serving dish along with all of the steaming water. Pour the lime sauce over the top, then garnish with sliced limes and serve with jasmine rice.


Cook’s Note:

~Thai chilies are recommended for this recipe because they have a lingering flavor; you may remove seeds if needed. To control the spiciness of your finished dish, use 2 chilies for mild, 3 or 4 for medium, and 5 or 6 for a full spicy flavor.

~Always add the fish sauce before the lime juice to keep the sauce vibrant and fresh tasting.

~Best of all is to prepare the sauce while the fish is cooking. If you have a steamer, you can steam the fish in a serving size bowl and pour the sauce on top just before serving.

~The sauce can be used as a dipping sauce for any seafood, including mussels, clams and crab meat.

I Love Thai cooking
Pranee teaches Thai Cooking classes in the Seattle area.
Her website is: I Love Thai cooking.com 

The Hungry Planet

I attended the Hungry Planet: What the World Eats grand opening at the Burke Museum. I was totally awestruck by the large photographic exhibit and printed information from Peter Menzel and Faith D’Aluisio who show us how the rest of the world eats and feeds their families with one week of purchased food supplies. “A picture said a thousand words” and I hope that you will have a chance to view the exhibition which will be at the museum through June 10.

On Saturdays, PCC Cooks also participates in the exhibition by providing a cooking demonstration of one of eight different cuisines from around the world. I had the honor of representing PCC Cooks one Saturday by preparing Kao Tom Gai, Rice Soup with Chicken. I demonstrated how to prepare this Thai dish and provided samples. When I was growing up in Thailand this particular dish meant so much to me and the rest of the country. It was a time when families had to nourish their families with simple, healthy foods.

I was lucky to grow up in the land of plenty in Phuket, Thailand. My village has a mountain on one side and a rice field on the other. The Srisunthorn Road was on the edge of the mountain and our home was just off this main road. We spent our weekends gathering foods from the forest such as bamboo shoots, mushrooms and other edible plants. Our family also owned a plantation which provided an abundance of fruits such as rambotant, durian, jackfruit and coconut.  At the end of each month, or after each sale of a crop from the plantation, my grandmother made sure to purchase a month’s supply of rice and to stock up on all stable dry ingredients. Mobile markets would came every morning with meats, seafood and fresh vegetables and herbs. The open air market was full of venders of all sorts and once a week villagers could fill up their kitchen cabinets with food. In our family, when my grandmother was the treasurer of the household, she decided what was on the table on a daily basis, through times of abundance and scarcity.

Phuket Open Air Market

My grandma shared many bedtime stories with us about the lives of others or her experiences during economic down times. She taught us that every grain of rice should be eaten. Phuket is rich in tin,  rubber and other natural resources, but when it came to rice production, we depended on supplies from the central part of Thailand–a supply that was affected by the economy, politics, and climate. When the price of rice increased, our regular steamed rice would change to rice porridge to make our supply last as long as possible.

One cup of rice grains yields about 3 cups of steamed rice or 4 cups of thick rice porridge which can be thinned down to make 6 cups of rice soup. Instead of making 3 servings, 1 cup of rice can be stretched to provide 6 servings.

The Hungry Planet exhibit is eye opening. It shows how the rest of the world eats, what is available to them, what they can afford, what they choose, and the limitations. I love the picture from Mali, Africa, which shows the ritual of a family sharing a rice porridge that is cooked with sour milk.

For me, rice porridge is a soul food, comfort food and a health food. It has a healing and nourishing element and it is suitable for everyone and every occasion.

Now that you have heard my stories, what is yours?

Rice Porridge Three Ways

I know three ways to enjoy rice porridge. The first one is as a rice soup base which can then be made into Kao Tom Gai

Kao Tom ~ ข้าวต้ม

(Click photo above for Pranee’s Kao Tom Gai recipe)

A second way to enjoy rice porridge is to make a rice soup buffet for a big crowd or special event.  To do this, take a rice porridge and add a little bit of ground meat. Cook it without adding flavoring, but serve it with condiments as shown in the photo below. The condiments typically consist of ginger, white pepper powder, sugar, soy sauce, chili powder, fried garlic, vinegar with jalapeno peppers and green onions.

Thai rice soup condiments

A third way to eat rice porridge is to serve it the same way as steamed jasmine rice but ideally with Chinese-Thai style main dishes such as stir-fried vegetables with salted soy bean or oyster sauce, salted egg, salted peanut, pickled mustard green, or braised pork in five spices.

Either for stretching a dollar or caring for yourself and your family, rice porridge is my comfort food for every occasion.

Kao Tom (Rice Porridge)

ข้าวต้ม

PREP TIME: 20 minutes

Yield: 4 cups

1 cup jasmine rice
6 cups water

Bring jasmine rice and 2 cups of the water to a boil on high heat. Stir often while cooking for 5 minutes.

Add the remaining 4 cups of water and bring to a boil. Let cook on medium heat for 15 minutes more, until it yields 4 cups.

I Love Thai cooking
Pranee teaches Thai Cooking classes in the Seattle area.
Her website is: I Love Thai cooking.com 

Eat the Jungle

Papaya, Carica papaya Linn., is a native to South American and Mexico. From there it spread throughout tropical countries like the Hawaiian islands, Sri Lanka, India and Southeast Asia. In Thailand, we regard papaya as a herbaceous plant. The fruit shape is elongated and has a pointy tip. The green fruit is used in savory dishes such as green papaya salad, Gaeng Som (sour curry), Gaeng Kati (red curry), Gaeng Ohm (pork stew), or it is pickled or candied, stir-fried with egg, or used as a vegetable condiment. In our garden, when we want to have a ripe papaya we allow the green papaya to mature on the tree until a good portion of yellow and orange appears on part of its green skin. Then we pick the papayas and keep them covered with a rice sack until they fully ripen. Because the papain protein enzyme helps the digestive system, green papaya salad is an ideal side dish to accompany the grilled meat dishes common to Thai and Vietnamese cuisines—think of green papaya salad instead of coleslaw.

It is best to buy papaya with a great hint of yellow or orange color. When soft to the touch, peeled and seeded, ripe papaya is great eating fresh or in a smoothie.

Papaya is a great source for Vitamin A, C, folate and potassium. For an in-depth nutrient analysis please visit whfoods.com.

Thais eat fresh ripe papaya with a squeeze of lime and some sea salt. The seeds have a peppery flavor, but I haven’t come across Thais cooking with the seeds. We discard them, but Hawaiian cuisineuses the seeds in salad dressing.

Green Papaya

Papayas at the young and green stage are ideal for Thai, Laotian and Vietnamese cuisines. A few examples include the Thai green papaya salad Som tam which also know as Papaya Pok Pok–a fun name that comes from the sound that is made during preparation when the ingredients are pounded with a mortar and pestle. The Vietnamese movie The Scent of Green Papayaoffers an insight into the relationship of green papaya to Vietnamese cuisine and people. I personally have many stories to share about papayas.

Yield: ½ cup

1 shallot, halved and peeled 
6 garlic cloves, peeled
¼ cup minced lemongrass, about 1 stalk
1 teaspoon salt
1 teaspoon dry turmeric
½ to 1 tablespoon chili pepper flakes, or 10 to 15 dry Thai red chilies
1 teaspoon shrimp paste or 1 tablespoon miso paste or anchovy paste
1 tablespoon black peppercorns
¼ cup cooking oil

Place everything except the oil in the food processor. While the processor is running, pour in cooking oil as needed. Blend until smooth.

Phuket Jungle Curry with Green Papaya


Phuket Jungle Curry with Green Papaya

Gaeng Pa Malakaw Moo

แกงป่ามะละกอกับหมู

The exotic blend of peppery non-coconut curry with wild vegetables creates the flavor profile inspiration for this dish. I am glad most Thai restaurants carry it on their menus. You may be wary of any spicy Thai curry without coconut milk, but you will be amazed how each vegetable in this curry has it own sweetness when it’s cooked. Individual flavors from each vegetable stand out better than in a coconut curry dish.

Ingredients for Phuket Jungle Curry

Serves 4 to 6           Preparation time: 20 minutes           Cooking time: 10 minutes

3 tablespoons red curry paste or fresh Jungle Curry paste from recipe above
2 tablespoons canola oil
½ cup water
1 cup diced green papaya, peeled and seeded, about ¼ of a whole small green papaya
1 cup wedged Thai eggplants, about 5 whole Thai eggplants
1 cup yardlong beans or green beans, cut into 1 inch-lengths
1/4 cup sliced pork tenderloin, optional for vegetarian
¼ cup Thai basil or any basil, or 3 nasturtium flowers (optional)
4 Kaffir lime leaves, optional if not available
1 tablespoon palm sugar or brown sugar
2 dashes fish sauce, or more to taste

Blend red curry paste and canola oil in a saucepan and cook over medium heat until fragrant, about 3 minutes. Add water and green papaya chunks, stir, then cover with a lid and let it cook for 3 minutes or until green papaya starts to look half-cooked. Add eggplant, yardlong beans and pork and stir, cover and cook for 3 more minutes until eggplant is soft but not mushy.

Stir in basil, Kaffir lime leaves, and sugar and cook for 30 seconds more; add fish sauce to taste. Remove from heat and serve with Jasmine rice.


This slideshow requires JavaScript.

© 2010  Pranee Khruasanit Halvorsen  
 I Love Thai cooking 
 
Pranee teaches Thai Cooking class in Seattle areas, her website is: I Love Thai cooking.com

Thai Kitchen Apprentice

Thai Kaffir Lime – Luk Makrut

Makrut and Bai Makrut (citrus hystrix)

When I was growing up, we used many citrus fruits in our family kitchen: lime, key lime, kaffir lime and calamansi, to name just a few. We use citrus juice in Thai cooking and when it comes to juice we depend largely on lime juice; most other citrus juices are for fun and creative cooking while they are in season. Kaffir lime is an exception. It was never important for its juice but rather for its precious rind.

Kaffir Limes – the rind is an ingredient for curry paste

Kaffir Lime (citrus hystrix), Makrut in Thai, is a bumpy citrus fruit that has a great deal of aromatic essential oil in the rind. In Thailand and Laos, we use the rind in curry paste. My grandmother would cut a kaffir lime in half and rub the lime on her head to massage her scalp and condition her hair.

Kaffir Lime Leaf ~ Bai Makrut is known as kroy saoch in Cambodia. These shiny, dark green, double-lobed leaves are used extensively in Thai, Lao and Cambodian cuisines as well as in the neighboring countries of India, Burma, Malaysian and Indonesia. For Thais, whole kaffir lime leaves have endless possibilities. They are an important ingredient in soups such as Tom Yum and Tom Kha, and are also always in curries. Whole kaffir lime leaves are used like bay leaves. The essential oil in the fresh leaves imparts flavor quickly and easily in boiling liquid, but the leaves themselves are not for eating. We never use dry kaffir lime leaves in Thailand. Letting them dry allows the delicate essential oil to disappear and nothing is left in the dry leaves. Ideally you want to freeze the fresh leaves right away while their moisture helps trap all of the essence.

When I was growing up, each home had one or more large kaffir lime trees in the back yard. The fresh leaves is the price that the trees pay for their alluring fragrance with citrus and floral notes. Besides using whole kaffir lime leaves in Thai soups and curries, another way to use the leaves is as a very fine chiffonade.

Kaffir Lime Leaves

The tender fresh leaves are ideal for cutting into fine chiffonade then adding to fish cakes or salads. There is no substitute nor any other ingredients that can truly imitate the alluring fragrance and flavor of kaffir limes. To avoid frustration, I keep a pound of frozen kaffir limes in my freezer for emergencies and for convenience, but I use fresh ones any time they are available at the store. I seldom chiffonade frozen kaffir lime leaves.

Thai Hua Mok batter wrapped in banana leaves ready for steaming

Thai Kitchen Apprentice

My mom is famous for Hua Mok – steamed fish cake in banana leaves. I was so proud of how people in the village raved about her Hua Mok that I found an opportunity to make her my business partner. I asked her to make Hua Mok and I would sell them right after school, around 4 to 5pm. That way people in the villages could purchase them for a snack or as a main dish for their family. She agreed and I became an apprentice cook at her side. The valuable lesson I learned was to shred the kaffir lime leaves into the finest slivers. A fine chiffonade of kaffir lime leaves is a high point of Thai cuisine, so it is important to be patient and to practice cutting the leaves; there is no compromise. The fine chiffonade of kaffir lime leaves is incorporated into many recipes: Tod Mun (fried fish cake), Hua Mok (steamed fish cake in banana leaves), Kao Yum (rice salad), Pla (spicy Thai herbal salad with meat, poultry or seafood), Phanang curry and Chu Chi curry. These are traditional Thai dishes that are always served with generous amounts of fine chiffonade of kaffir lime leaves on top.

I took the three pictures below when I visited Koh Kred, an island village of ethnic Mon people outside of Bangkok. For me, Koh Kred is a culinary treasure island. It is famous for traditional fried fish cake or steamed fish cake. Both recipes use extreme amounts of fine slivered kaffir lime leaves. In Koh Kred I visited Pha (Thai for Auntie) Mu and savored her steamed fish cake in banana leaves. She also kindly let me take her picture as she spent her time chiffonading kaffir lime leaves while selling her Hua Mok.

Kaffir lime leaves are stacked before being made into a finely shredded chiffonade

To chiffonade, layer three to four kaffir lime leaves and fold, then, holding them tightly, use a sharp knife to thinly slice them (see picture below). I tell my students that I often cut the air seven times to control my knife then I may succeed with three perfect fine slivers. There are two errors you are likely to make while cutting: one is cutting the air instead of the leaves, the other is cutting too big a slice. Cutting the air indicates that you are close to perfection. When the leaves are too old and tough, I would prefer not to chiffonade them at all – eating one will feel like you’ve eaten a fish bone. Only the tender fresh kaffir lime leaves are good for this.

I have posted many photos to give you a good sense of how Thai cuisine depends on the flavor of the kaffir limes and kaffir lime leaves. Today kaffir lime leaves are easy to find in America and around the world. I hope I have inspired you to incorporate this alluring citrusy sense and flavor in your cooking. You can use kaffir lime in practically everything!

Pha Moo is making a chiffonade of Kaffir lime leaves

Pha Moo spends many hours chiffonading her kaffir lime leaves as there is no shortcut for this step. Often, when I make a fine chiffonade in a classroom, students who are across the room will pause as they notice the alluring fragrance. The food’s citrusy taste is easily noticeable and appreciated.

Pha Moo’s famous steamed fish cake

Pha Moo’s steamed fish cakes are so scrumptious. Her regular customers come from the neighborhood and from Bangkok.

Tod Mun Pla and Tod Mun Khai Nok Katha – Fish Cake and Quail Eggs

Koh Kred Tod Mun Pla is packed full of herbs. Besides kaffir lime, Noh Kala, a local rhizome is added to the fish paste.

Pho Noodle Soup with Chicken, with fine fresh shredded chili and kaffir Lime

A famous Pho Noodle stall in Hanoi provides a fine chiffonade of kaffir lime leaves and Thai chili for customers to add to the Pho Ga, Chicken Noodle Soup.

Shredded kaffir lime leaves is one of the ingredients in Amok curry paste

Please click photo for Kroeung Khmer curry paste recipe

In Siem Reap, Cambodia at Le Tigre De Papier cooking class, a member of my tour learned how to add kaffir lime leaves to Khmer curry paste.

Pla Gai, Thai herbal salad in lime juice with fine slivers of kaffir lime leaves

In Phuket, the BoatHouse Cooking School teaches students to make a fine chiffonade of kaffir lime leaves for Pla Salad.

Phuket Spicy Devil Soup – Tom Prade Gai at Palai Seafood Restaurant

Coconut and Turmeric Curry of Blue Swimmer Crab with Southern Lime

Coconut and turmeric curry of blue swimmer crab with southern lime at Nahm Restaurant in Bangkok by David Thompson

Southern Thai Rice Salad with Mixed Herbs

Please click photo to see Pranee’s Southern Thai Rice Salad Recipe

Pranee’s Salmon Fish Cake – Tod Mun Pla Salmon

Please click photo for Pranee’s Salmon Fish Cake Recipe

Kaffir lime leaves are available fresh or frozen in Asian markets, at the PCC Natural Markets, and from online stores. For fun facts and recipes, please also check kaffirlimeleaves.com

I Love Thai cooking
Pranee teaches Thai Cooking classes in the Seattle area.
Her website is: I Love Thai cooking.com 

Dreamy Coconut Frosting

I have been home from Maui for over a week now and I still dream of the luscious tropical deserts from my recent trip. I am totally inspired and determined to create an easy version of a coconut dessert that will reflect my trip. For a dinner party last Sunday I baked a coconut cake the day before by following a layer cake recipe from a box of cake flour and using coconut milk in place of milk and substituting coconut flavoring for vanilla. (You can do the same or try the links to the many wonderful coconut cake recipes that I have added at the bottom of this page.)

Last Sunday was perfect. I brought the coconut cake to a Thai friend’s dinner party to complement their Thai dinner. I was glad they liked the cake. They loved the light texture of the frosting and the generous amount of sweetened shredded coconut. I hope you will enjoy this recipe and add a dream-like tropical dessert to your Thai dinner at home.

A Creation of Tropical Flavors

Primroses greeted me in January; I used them to decorate the cake.

Coconut Cake with Coconut Frosting was the answer to my longing to create a dish to duplicate the flavors of a tropical land in a western kitchen. I personally have never tasted coconut cake in Thailand but came to love the cake in America and most recently on my visit to Maui. I can’t live without coconut and was excited about adding coconut cake to my repertoire.

The body of the cake that I envisioned can be any white, spongy cake that gets its coconut flavor from coconut milk and natural coconut flavoring. Its frosting should be light and fluffy with pure coconut flavor and a mouthful of shredded coconut.

Butter, Coconut Cream and Powder Sugar = Coconut Frosting

First step: Cream butter, then add powdered sugar and coconut cream.

Step 2: Coconut Frosting

Step 2: Stir in coconut flavor, jasmine flavoring essence and sweetened shredded coconut.

Step 3: More Coconut on Coconut Frosting

Step 3: Spread frosting between the layers and on the top and sides of the cake; add sweetened shredded coconut on the top and along the sides.

Dreamy Coconut Frosting

Pranee’s Coconut Cake with Coconut Frosting

When it comes to making coconut frosting for coconut cake, I keep it simple, low fat and fast.  The whole process should be easy and carefree. The frosting needs to be creamy, but thick enough to stick to the surface of the cake and to allow the shredded coconut to stick to it. We need either cream cheese or butter to begin with, then I use coconut cream to lighten it up and add powdered sugar until the mixture gets to the desired texture. For coconut, you can use dry coconut chips/flakes, freshly grated coconut or simply sweetened, shredded coconut. I baked the cake the day before and made the frosting the next day—it doesn’t take long to whip up and spread—then the cake is ready to serve. The secret to making this frosting dreamy is to have a real coconut flavor heightened with either vanilla, rose, lavender or jasmine.

Yield: 2 cups

1 stick unsalted butter, at room temperature
2 cups powdered sugar
1/3 cup coconut cream (the thick top layer from a can or carton of Thai coconut milk)
1 pinch of salt
1 teaspoon coconut flavoring (I like Frontier Natural Flavors)
1 teaspoon flavoring essence Jasmine (Mali)
2½ cups sweetened shredded coconut, divided
 
With an electric mixer, beat butter on medium speed until creamy. With a spatula, fold in sugar and coconut cream; beat until creamy, about 3 minutes. Fold in coconut flavoring, jasmine flavoring essence and 1½ cups sweetened shredded coconut. You may use ½ cup of the finished mixture as a filling and the rest, about 1½ cups, as frosting.

Spread the frosting to cover all of the cake surface, then cover the frosting with the rest of the sweetened shredded coconut.

I Love Thai cooking
Pranee teaches Thai Cooking classes in the Seattle area.
Her website is: I Love Thai cooking.com 
 

Maui, Upcountry Culinary Getaway

First of all, Happy New Year – Sawasdee Pee Mai – สวัสดีปีใหม่.

Maui, Upcountry

I have just returned from a family vacation to Maui. While I was there I had the chance to take two days off to totally explore Maui as a culinary getaway. For foodies and culinary enthusiasts, the upcountry is a must. No Maui vacation is complete without a full immersion into this land, people, food and culture.

View from Highway 37 between Grandma’s Coffee House and the Maui Winery

First Day – Grandma’s Coffee House, Tedeschi Vineyards, Ali’i Kula and the Hili’imaile General Store

On Friday December 23rd, I left Ka’anapali around 8:30am and drove along Highway 37 to the upcountry area. Upcountry is the high land area near the base of the Haleakala Crater and the Haleakala National Park. (Please see related links below for more information.)

I arrived at 9:30am at Grandma’s Coffee House – a must-visit place for coffee lovers, either on your way to the Maui Winery or afterwards if you are following the area’s bike route. Grandma’s serves breakfast and lunch.

Grandma’s Coffee House

Grandma’s Maui Coffee, Highway 37, Keokea.

grandmascoffee.com

I enjoyed a Grandma’s Americano and a Grandma’s Pineapple and Banana Cream Cake at an outside table. The cake was perfect—not too sweet, but with all the Hawai’i goodies: macadamia nuts, pineapple and bananas. The frosting was light with a swirl of caramel. My palate tasted the heaven.

Maui Winery

Tedeschi Vineyards at the Ulupalakua Ranch

Highway 37, Keokea. mauiwine.com

Around 10am I got back in the car and, continuing on Highway 37, headed to Ulupalakua. I arrived at the Maui Winery 20 minutes later, just in time for the first tour at 10:30am. The free half-hour tour provided extensive information about the winery and its wine, as well as the history, culture, and native land that connect to the spirit of the place. The old large tree and hilly landscape made for a very tranquil atmosphere.

Ulupalakua Ranch Store and Grill

Ulupalakua Ranch Store and Grill, Highway 37

 ulupalakuaranch.com

Then I walked to Ulupalakua General Store and had my picture taken between the sculptures of two Hawaiian cowboys. I could have ordered an elk burger, salad or sandwich for lunch, but the Ali’i Kula lavender Farm was my next destination and I planned to have a late lunch after that at the Hili’imaile General Store.

Ali’i Kula Lavender Farm

Ali’i Kula Lavender Farm, 1100 Waipoli Road, Kula.

 aklmaui.com

Twenty minutes later, I arrived at Ali’i Kula Lavender Farm. Admission to the farm was free, but I decided to take the 30-minutes tour at 1pm for $12. This gave me plenty of time to enjoy the gift shop, eat a lavender scone and sip some lavender black tea on the patio. I enjoyed the retreat-like setting in the beautiful garden with its cool air and great view and felt at peace.

Thank you to Kathy Gehrt, my friend and author of the cookbook Discover Cooking with Lavender, who recommended this place to me. If you wish to learn more about cooking with culinary lavender please visit Kathy’s blog: Discover Lavender.

Right after the tour ended, I excused myself and headed out to The Hili’imaile General Store. I arrived at 2 pm, just 30 minutes before the kitchen was to close.

The Hili’imaile General Store Restaurant

The staff was very friendly and I took their recommendations for what to order. I was glad I did. To share my memorable meal with you, I have found Chef Beverly Gannon’s recipes online and placed the links to them right under the pictures of these dishes. The Sashimi Napolean and the six times award-winning Pineapple Upside-Down Cake are not to be missed. The recipes are also in her second cookbook, Family-Style Meals at the Hali’imaile General Store which is published by Ten Speed Press.

Sashimi Napoleon

Sashimi Napoleon Recipe by Chef Beverly Gannon

Pineapple Upside-Down Cake

Pineapple Upside-down Cake Recipe by Chef Beverly Gannon

Recipes and information on her second cookbook

with Chef Beverly Gannon

The Hali’imaile General Store

900 Hali’imaile Road, Makawao, HI 96768
Phone: 808.572.2666 | Fax: 808.572.7128

Second Day – Kula Lodge, O’o Farm and Makawao

On Monday, December 26th, the second day of my upcountry culinary getaway, I started my day with breakfast at Kula Lodge, then drove to the O’o Farm which is only 10 minutes away. I arrived at the farm just 10 minutes before a farm tour was to begin.

O’o farm, harvesting Salad Mix for Our Lunch

O’o Farm, 651 Waipoli Road, Kula. Tours and lunches

 oofarm.com

Farm Fresh Lunch Prepared by Chef Caroline Schaub

Chef Caroline Schaub prepared some amazing and inspired farm-fresh dishes.

O’o farm, lunch area

The farm tour and lunch package costs $50; booking in advance is recommended. The tour, which included about 26 people from all across the United States, was guided by the farm manager. It started at 10:30am and we picked our own salad mix at the end. We all enjoyed the tour and were inspired by our farm-to-table experience.

Lunch at O’o Farm Tour

After leaving the farm I spent a pleasant hour in Makawao, a delightful small town for visiting art galleries, eateries and shops. Then I made a leisurely drive back to Ka’anapali and met up with my family in the late afternoon.

Pranee Khruasanit Halvorsen

Related articles

Enjoy the Seasons

Lake Washington, Seattle

When I drove along Lake Washington toward Seward Park to my friend’s house the other day, the beauty of the drive blew me away. It was one of those rare random days of beautiful Seattle weather that exist just to tease you. I decided to stop and capture the pictures in front of me and ended up arriving fifteen minutes late at my friend’s. I asked her for forgiveness, showing her a dozen photos on my camera. She gave me a pardon. I hope you will enjoy the holiday seasons despite how busy your life is. Like the Thai say, “Sanuk.” It means to have fun.

Many Bowls of Soup

I am lucky that many friends have pampered me with many  hearty soups this winter. While savoring these soups, I came up with a plan to create delicious soups to share with you. By playing around with foods during the month of December, I rediscovered some connections among the different Asian cuisines. I enjoyed the process of how this soup came about. I hope you enjoy the story and the process of making Curried Sweet Potato with Curry Leaf Soup. I hope you will be courageous and look for curry leaves in an Asian market then have a successful adventure making this soup. Happy Holidays to you all!

Curry Leaves 

Curry Leaf – Murraya Koenigii -from my freezer

Curry leaf is used in Malaysian, Southern and West Coast Indian and Sri Lankan cuisine. It tastes and smells like curry powder, though more delicate and aromatic. It is available fresh at many Asian markets in the Seattle area. Thai cuisine doesn’t usually incorporate curry leaves; Kaffir lime leaves are usually more dominant. In fact, it was only a few months ago that I actually saw curry leaves being used in cooking. The first time was when I was a guest at a Malaysian cooking lesson given by my girlfriend’s mother in-law. She demonstrated her family’s secret recipe for Malaysian Chicken Curry with Curry Leaf. Then in November I took an Indian cooking class from Raghavan Iyear, an IACP associate and the author of 660 Curries. During the class, Iyear said “Use curry leaf  in anything just like bay leaf, but do use a fresh one, otherwise don’t use it at all. There is nothing left in a dry curry leaf.” He then demonstrated using generous amounts of fresh curry leaves in the recipe Basmati Rice with Yogurt and Mustard Seeds from his cookbook.

Raghavan Iyer’s Basmati Rice with Yogurt and Mustard Seeds – plenty of curry leaves

After those two experiences I was crazy about the flavor of the aromatic curry leaf (Murraya Koenigii). Since then I have had a package of curry leaves in my freezer waiting for its moment. Freezing is another way to preserve the delicate essential oil in the leaf.

Sweet Potato

The other night, when I cooked yellow chicken curry for my family, instead of using a regular potato, I used a sweet potato. At home I often improvise, and this time I was glad I did. It turned out to be a delicious yellow chicken curry. When I was looking for frozen Kaffir lime leaves, I thought of the curry leaves. Though the Thai don’t use curry leaves,  Yellow Curry (or Gaeng Kari in Thai) is in fact a Thai version of Indian curry. Malaysian Chicken Curry also shows the strong influence of Indian Curry. Then I saw the whole connection: Malaysian Chicken Curry itself is similar to Thai yellow curry. Just before serving yellow curry to my family, I imitated my friend’s mother in-law and placed 6 curry leaves in my left palm. Then then with my right, I roughed them back and forth before dropping the leaves into a boiling curry that was about 5 minutes from being ready to serve. (The other way that Iyear incorporated the curry in the cooking class was by adding the leaves to hot oil along with other dry whole spices to intensify the flavor, then allowing the simmering process to extract the delicate perfume and flavor.)

Curried Sweet Potato Soup with Curry Leaf

Curried Sweet Potato Soup with Curry Leaf

Curried Sweet Potato Soup with Curry Leaf Recipe

ซุปแกงมันฝรั่งหวาน

When you have curry paste, curry powder and curry leaves as staple ingredients in your kitchen, this dish is so easy to prepare. A small amount of oil to fry the curry paste, curry powder and curry leaves helps the natural essential oil and the flavors to bloom. Pay attention and put patience to this step – allow the fragrance to develop and the oil to separate. Then the rest is easy. There is no need to use a large amount of coconut milk, use just enough to give a nice flavor to the curry. If the soup is a little too spicy, increase the coconut milk or next time you can reduce the amount of red curry paste. I use just a little coconut milk in this recipe, cutting back further on coconut milk may effect the flavor and the balance of this curry. I consider this a hearty winter soup with big flavor.

Serves: 6 (yields about 5 cups)

1 tablespoon canola oil
1/2 cup coconut milk, divided
2 to 3 teaspoons red curry paste 
1 tablespoon Madras curry powder
12 curry leaves, divided
1 large onion, peeled and diced
1 large sweet potato, peeled and diced
1 (32-ounce) box Pacific Natural Food Free Range Chicken Broth
1/4 teaspoon fish sauce

In a large pot, heat canola oil, 1/4 cup coconut milk, red curry paste, Madras curry powder and 6 curry leaves on medium-high heat; stir until fragrant, about 1 minute. Stir in diced onions until they become translucent, about 3 minutes. Add sweet potato and chicken broth; bring to a boil, then reduce the heat to medium, and with the lid on, let it cook until the onion and sweet potato are softened, about 30 to 40 minutes. Stir in fish sauce and 1/4 cup coconut milk, stir for 30 seconds, then remove from the burner. Use an immersion blender or a tabletop blender to puree the soup. Serve in a soup bowl and garnish with curry leaves.

I Love Thai cooking
Pranee teaches Thai Cooking classes in the Seattle area.
Her website is: I Love Thai cooking.com 

Holiday Sweet with a Tropical Accent

Coconut Tea Cakes

Finally, this is the year that I have set aside the whole month of December to indulge myself with food and friends. I am a well-pampered cook.

This past week, my Italian culinary group, who traveled together to Italy in 2004, got together for a fun cookie exchange. I returned home with assorted cookies and sweet delights. My son, who appreciated them all, loved the Russian Tea Cakes, also called Butter Balls or Mexican Wedding Cakes. My friend bakes them every year from Betty Crocker’s Recipe.

I love the flavor and the texture of the Russian Tea Cakes and imagined that they would be good made with Bob’s Red Mill coconut flakes and almond meal/flour, both of which I have had in my freezer for a long time. So I started by following the recipe but played with the proportions of coconut flakes, almond meal and flour. I kept the amounts of butter and powder sugar from the Russian Tea Cakes recipe as a backbone structure and kept the preparation and cooking methods the same as well.

Several friends who love coconut loved the coconut tea cakes instantly. My son, however, still prefers the traditional Russian Tea Cakes!

Coconut Tea Cakes

Bake until slightly yellow-brown on the top and the bottom.

Coconut Tea Cakes

If you prefer, you can add coconut flakes to the powdered sugar to dust the baked cookies; it won’t stick, but it makes a great garnish just before serving.

Credit: Russian Tea Cake by Betty Crocker’s Recipe

Coconut Tea Cakes

I love coconut and incorporate it into recipes any time I can. While baking Russian Tea Cakes for my son, I played around with my concept of Coconut Tea Cakes and it worked on the first try. Coconut flakes are edible in all forms, toasted or not. Personally I love dried coconut flakes just the way they are. This recipe should also work with sweetened shredded coconut but the outcome will be different than my version which highlights the dry coconut against the buttery texture of the other ingredients. Anytime that the dough fails to form a ball, add a little more melted butter to hold it together.

Yield: 3 dozen
 
2 cups flour
¼ cup Bob’s Red Mill Almond Meal/Flour
¼ teaspoon salt (omit if salted butter is used)
1 cup Bob’s Red Mill Unsweetened Medium Shredded Coconut
1 cup butter, softened
½ cup powdered sugar, plus ¼ cup for dusting 
1 teaspoon either coconut extract or almond extract
 

Preheat oven to 375°F. Prepare a wire rack for cooling the cookies.

Combine flour, almond meal/four, salt and medium shredded coconut and set aside.

In a large bowl, beat butter, ½ cup powder sugar and coconut or almond extract on medium speed until creamy. Using a spatula, fold in flour mixture slowly until it is well-combined and you have a  large ball of dough. Divide the dough into four balls. Roll each ball into a cylinder and cut into 9 equal pieces. Roll each piece into a perfect round ball and place onto a baking sheet. You should have about 3 dozen.

Place in the oven and bake for 12 to 15 minutes until a tiny hint of yellow-brown appears on the top and the bottom. Remove cookies to the wire rack.

Place ¼ cup powdered sugar in a small bowl, then drop in slightly cooled cookies one at a time, dusting them with powdered sugar before placing them back on the wire rack. Before packaging, storing or serving, dust the cookies once again with powdered sugar.

Photos: © 2011 Pranee Khruasanit Halvorsen

Pranee teaches Thai Cooking classes in the Seattle area.
Her website is: I Love Thai cooking.com